Matter: Weather Station
The Matter weather station application demonstrates the usage of the Matter application layer to build a weather station device using the Nordic Thingy:53 or nRF54L15 TAG. Such a device lets you remotely gather different kinds of data using the device sensors, such as temperature, air pressure, and relative humidity.
This device works as a Matter accessory device, meaning it can be paired and controlled remotely over a Matter network built on top of a low-power 802.11ax (Wi-Fi® 6) or 802.15.4 (Thread) protocol.
In case of Thread, this device works as a Thread Sleepy End Device.
In case of Wi-Fi, this device works in the Legacy Power Save mode. This means that the device sleeps most of the time and wakes up on each Delivery Traffic Indication Message (DTIM) interval to poll for pending messages.
You can use this sample as a reference for creating your own application. See the Adding clusters to Matter application page for an overview of the process you need to follow.
Note
The Matter weather station application from the v2.1.1 nRF Connect SDK release participated in Matter Specification Validation Event (SVE) and successfully passed all required test cases to be considered as a device compliant with Matter 1.0. You can use the nRF Connect SDK v2.1.1 release to see the application configuration and the files that were originally used in Matter 1.0 certification.
Application overview
The application uses a single button for controlling the device state. The weather station device is periodically performing temperature, air pressure, and relative humidity measurements. The measurement results are stored in the device memory and can be read using the Matter controller. The controller communicates with the weather station device over the Matter protocol and exchanges data using the Matter Data Model. The data model describes data measurements within the proper clusters that correspond to the measurement type.
Testing with the Matter Quick Start app
The weather station sample is available in the Matter Quick Start app desktop application. Use this app to enable fast and easy evaluation of the sample without compiling it or setting the development environment thanks to the pre-compiled hex files. After flashing, follow the step-by-step instructions to commission the sample to the Matter network and interact with commercial ecosystems.
Download the Matter Quick Start app from the nRF Connect for Desktop application.
Requirements
The application supports the following development kits:
Hardware platforms |
PCA |
Board name |
Board target |
|---|---|---|---|
PCA20053 |
|
||
PCA10156 |
|
If you want to commission the weather station device and control it remotely through a Thread or Wi-Fi network, you need to set-up the Thread Border Router (Matter over Thread only) and control it with the CHIP Tool, or use a commercial ecosystem controller. When this happens, you will also be able to control it through a Matter controller device configured on PC or smartphone. This requires additional hardware depending on the setup you choose.
Note
Matter requires the GN tool. If you are updating from the nRF Connect SDK version earlier than v1.5.0, see the Manual installation gn.
IPv6 network support
The following development kits for this sample offer IPv6 network support for Matter:
Matter over Thread is supported for the
thingy53/nrf5340/cpuappandnrf54l15tag/nrf54l15/cpuappboard targets.Matter over Wi-Fi is supported for the
thingy53/nrf5340/cpuappboard target with thenrf7002ebexpansion board attached.
Programming requirements
To commission the weather station device and control it remotely through a Thread or Wi-Fi network, you also need a Matter controller device configured on PC or smartphone. This requires additional hardware depending on your setup. The recommended way of getting measurement values is using the mobile Matter controller application that comes with a graphical interface, performs measurements automatically and visualizes the data.
To program a Thingy:53 device where the preprogrammed MCUboot bootloader has been erased, you need the external J-Link programmer. If you have an nRF5340 DK that has an onboard J-Link programmer, you can also use it for this purpose.
If the Thingy:53 is programmed with a compatible sample or application, you can also update the firmware using MCUboot’s serial recovery or DFU over Bluetooth Low Energy (LE).
Note
If you build Matter weather station firmware with factory data support it will not be compatible with other Thingy:53 samples and applications. Then, the only way to program the new firmware image is to use the J-Link programmer.
See Thingy:53 application guide for details.
To program nRF54L15 TAG, you need the external J-Link programmer. If you have an nRF54L15 DK that has an onboard J-Link programmer, you can also use it for this purpose.
If your tag is already programmed with one of the Matter samples, you can use DFU over Bluetooth LE or Matter OTA Software Update.
See Developing with nRF54L Series for details.
User interface
- LED (LD1 on Thingy:53, LED1 on nRF54L15 TAG):
Shows the overall state of the device and its connectivity. The following states are possible:
Short flash on (green color, 50 ms on/950 ms off) - The device is in the unprovisioned (unpaired) state and is not advertising over Bluetooth LE.
Short flash on (blue color, 50 ms on/950 ms off) - The device is in the unprovisioned (unpaired) state, but is advertising over Bluetooth LE.
Rapid even flashing (blue color, 100 ms on/100 ms off) - The device is in the unprovisioned state and a commissioning application is connected through Bluetooth LE.
Short flash on (purple color, 50 ms on/950 ms off) - The device is fully provisioned and has Thread enabled or has Wi-Fi connection established.
Rapid even flashing after commissioning (blue color, 100 ms on/100 ms off) - The device lost connection to Wi-Fi network (only in Wi-Fi mode).
Note
The boards allow to control RGB components of its single LED independently. This means that the listed color components can overlap, creating additional color effects.
- Button (SW3 on Thingy:53, BTN1 on nRF54L15 TAG):
Used during the commissioning procedure. Depending on how long you press the button:
If pressed for 6 seconds, it initiates the factory reset of the device. Releasing the button within the 6-second window cancels the factory reset procedure.
If pressed for less than 3 seconds, it starts the NFC tag emulation, enables Bluetooth LE advertising for the predefined period of time (15 minutes by default), and makes the device discoverable over Bluetooth LE.
- USB port:
Used for getting logs from the device or communicating with it through the command-line interface. It is enabled only for the debug configuration of an application.
- NFC port with antenna attached:
Optionally used for obtaining the onboarding information from the Matter accessory device to start the commissioning the device procedure while using a commercial ecosystem. See the Testing with commercial ecosystem section.
Note
USB and NFC are not available on nRF54L15 TAG. To receive logs from the device, connect to it through RTT.
Configuration
This section describes the configuration options for the sample.
See Configuring and building in the nRF Connect SDK documentation for information about how to permanently or temporarily change the configuration.
The sample uses a prj.conf configuration file located in the sample root directory for the default configuration.
It also provides additional files for different custom configurations.
When you build the sample, you can select one of these configurations using the FILE_SUFFIX variable.
See the Application file suffixes and Providing CMake options pages for more information.
Note
If you are working with multiple devices, set a unique discriminator for each one, or commission them one at a time. See Matter device identification for more information.
The sample supports the following build configurations:
Configuration |
File name |
FILE_SUFFIX |
Supported board |
Description |
|---|---|---|---|---|
Debug (default) |
|
No suffix |
All from Requirements |
Debug version of the application. Enables additional features for verifying the application behavior, such as logs. |
Release |
|
|
All from Requirements |
Release version of the application. Enables only the necessary application functionalities to optimize its performance. |
Note
Currently, only the release configuration is supported when Building for the nRF7002 Wi-Fi expansion board.
Advanced configuration options
This section describes advanced configuration options that you can apply in this sample.
Use the click to show toggle to expand the content.
Device firmware upgrade support
The sample supports device firmware upgrade (DFU) over-the-air (OTA) using the following protocols:
Matter OTA update protocol that uses the Matter operational network for querying and downloading a new firmware image.
Simple Management Protocol (SMP) over Bluetooth® LE. In this case, the DFU can be done either using a smartphone application or a PC command-line tool. This protocol is not part of the Matter specification.
For detailed information about how to perform an update over Matter or Bluetooth LE, see the Matter software update guide. In both cases, the MCUboot secure bootloader is used to apply the new firmware image.
The DFU over Matter is enabled by default.
Additionally, you can enable the DFU over SMP by using the -DCONFIG_CHIP_DFU_OVER_BT_SMP=y build flag.
See Providing CMake options for instructions on how to add these options to your build.
The following platforms require external flash memory to perform the DFU:
nRF52840 DK
nRF5340 DK
nRF54L10 DK
You can run DFU without external flash memory on the nRF54L15 and nRF54LM20 DKs using the MCUboot image compression feature.
To see if the sample supports this feature, check whether the internal build configuration is available in the build configuration table.
When building with nRF Connect for VS Code extension, add your desired dfu_build_flag to Extra CMake arguments.
For example add -DCONFIG_CHIP_DFU_OVER_BT_SMP=y to enable DFU over BT SMP.
When building on the command line, run the following command with board_target replaced with the board target name of the hardware platform you are using (see Requirements), and dfu_build_flag replaced with the desired DFU build flag:
west build -b board_target -- dfu_build_flag
For example:
west build -b nrf54l15dk/nrf54l15/cpuapp -- -DCONFIG_CHIP_DFU_OVER_BT_SMP=y
NFC-based commissioning
You can commission a Matter accessory over NFC using the Matter NFC Transport Layer (NTL). The device emulates a Type 4 Tag and exposes both the Matter application and a standard NDEF Tag Application with the onboarding payload.
NFC tags can support either powered mode, in which the device is fully powered on by its own power supply during NFC operation, or unpowered mode, where the tag operates exclusively using energy harvested from the NFC polling device (such as a phone).
The NFC-based commissioning feature in Nordic Matter SDK supports only powered mode.
The Nordic SoC must be on and running (not only powered by NFC field) for NFC-based commissioning to work.
Ensure that your application’s power arrangements match this requirement, as many NFC use cases commonly advertise unpowered operation, but this implementation does not.
This feature requires a board with the on-chip NFCT peripheral and an NFC antenna connected. It is supported on Nordic DK targets that provide NFCT, such as the nRF52840 DK, nRF5340 DK, nRF54L15 DK, and nRF54LM20 DK.
Note
You cannot use NFC-based commissioning if the CONFIG_CHIP_NFC_ONBOARDING_PAYLOAD Kconfig option is enabled.
This Kconfig option may be enabled in Matter samples by default.
To enable NFC-based commissioning, set the CONFIG_CHIP_NFC_ONBOARDING_PAYLOAD kconfig option to n and the CONFIG_CHIP_NFC_BASED_COMMISSIONING Kconfig option to y
You can also use the related CONFIG_CHIP_NFC_BASED_COMMISSIONING_APDU_DEBUG that enables additional debug logging of ISO-DEP APDU traffic.
Commissioning flow:
As soon as the Matter server finishes initializing, the NFC tag serves an NDEF onboarding payload that advertises the NFC rendezvous flag. Tap the tag with a commissioner that supports Matter NTL to start commissioning; no button press is required. The setup code is also printed to the UART log with the NFC rendezvous flag.
Once commissioning completes successfully, NFC tag emulation is automatically stopped.
Note
While NFC-based commissioning is active, commissioning over Bluetooth LE might take longer than usual. The device first attempts to use NFC and only falls back to Bluetooth LE afterwards, which delays the Bluetooth LE pairing. A log message is printed when Bluetooth LE commissioning is attempted while NFC commissioning is still active.
Build a sample with NFC-based commissioning support as follows:
Add -DCONFIG_CHIP_NFC_BASED_COMMISSIONING=y, and -DCONFIG_CHIP_NFC_ONBOARDING_PAYLOAD=n to Extra CMake arguments in your build configuration.
west build -p -b <board_target> -- -DCONFIG_CHIP_NFC_ONBOARDING_PAYLOAD=n -DCONFIG_CHIP_NFC_BASED_COMMISSIONING=y
Replace <board_target> with a supported board target, for example nrf52840dk/nrf52840.
Building and running
This section describes how to build the sample and commission it to the Matter network.
This sample can be found under applications/matter_weather_station in the Matter add-on folder structure.
To build the sample, follow the instructions in Building an application for your preferred building environment. See also Programming an application for programming steps and Testing and optimization for general information about testing and debugging in the nRF Connect SDK.
Note
When building Repository application applications in the Matter add-on which is an SDK repository, building with sysbuild is enabled by default.
If you work with out-of-tree Freestanding application applications, you need to manually pass the --sysbuild parameter to every build command or configure west to always use it.
When building this sample with Sysbuild in the configuration system for an SoC that has a network core, the IPC radio application is automatically applied to the build.
The IPC radio is one of the Companion components in the nRF Connect SDK and allows to use the radio peripheral from another core in a multicore device.
If needed, you can modify the IPC radio configuration in the prj.conf source file in the sample’s sysbuild/ipc_radio directory.
Before starting the commissioning procedure, make sure that the device is discoverable over Bluetooth LE. The device becomes discoverable automatically upon the device startup, but only for a predefined period of time (one hour by default). If the Bluetooth LE advertising times out, enable it again.
Advanced building options
Building with factory data support
To build the application in nRF Connect for VS Code extension with factory data support, add -DEXTRA_CONF_FILE=overlay-factory_data.conf -DFILE_SUFFIX=factory_data to Extra CMake arguments in your build configuration.
Use board target thingy53/nrf5340/cpuapp or nrf54l15tag/nrf54l15/cpuapp.
To build the application with factory data support, run the following command:
west build -b <board_target> -- -DEXTRA_CONF_FILE=overlay-factory_data.conf -DFILE_SUFFIX=factory_data
Where <board_target> is thingy53/nrf5340/cpuapp or nrf54l15tag/nrf54l15/cpuapp.
Note
Matter factory data support requires a dedicated partition layout.
This means that if you build the application using the overlay-factory_data configuration overlay, it will not be compatible with other Thingy:53 compatible applications.
To generate a new factory data set when building for the given board target:
Add -DEXTRA_CONF_FILE=overlay-factory_data.conf -DSB_CONFIG_MATTER_ADD_ON_FACTORY_DATA_GENERATE=y -DFILE_SUFFIX=factory_data to Extra CMake arguments in your build configuration.
Run the following command:
west build -b <board_target> -- -DEXTRA_CONF_FILE=overlay-factory_data.conf -DSB_CONFIG_MATTER_ADD_ON_FACTORY_DATA_GENERATE=y -DFILE_SUFFIX=factory_data
Where <board_target> is thingy53/nrf5340/cpuapp or nrf54l15tag/nrf54l15/cpuapp.
This command builds the application with default certificates.
After building for the board target, the generated factory_data.hex file will be merged with the application target HEX file, so you can flash the device using the regular programming command (see Programming an application).
If you want to use Vendor ID, Product ID or other data that is not reserved for tests, you need custom test certificates. To build with custom certificates, you need to install the CHIP Certificate Tool.
To learn more about factory data, read the Factory provisioning in Matter user guide.
Building for the nRF7002 Wi-Fi expansion board
To build this application to work with the nRF7002 Wi-Fi expansion board:
Connect the nRF7002 EB to the P9 connector on Thingy:53.
Build the application:
To build the application in the nRF Connect for VS Code extension IDE for Thingy:53 with the nRF7002 EB attached, add
-Dweather_station_SHIELD=nrf7002eb -DFILE_SUFFIX=release -DSB_CONFIG_WIFI_NRF70=yto Extra CMake arguments in your build configuration.To build the sample from the command line for Thingy:53 with the nRF7002 EB attached, use the following command within the sample directory:
west build -b thingy53/nrf5340/cpuapp -- -Dweather_station_SHIELD=nrf7002eb -DFILE_SUFFIX=release -DSB_CONFIG_WIFI_NRF70=y
Testing
This section shows how to test the sample. You can test it using your PC and the CHIP Tool for Linux or macOS or commercial ecosystem that supports Matter.
Testing with CHIP Tool
Complete the following steps to test the weather station device using CHIP Tool:
Turn on the device
The application starts in an unprovisioned state. Advertising over Bluetooth LE and DFU start automatically and LED starts blinking blue (short flash on).
If the device does not start advertising over Bluetooth LE and it is not blinking blue, press the Button for 6 seconds to initiate the factory reset of the device.
Commission to Matter network
To commission the device to the Matter network complete the following steps:
Obtain a Thread active dataset from OTBR:
Connect to the Raspberry Pi through USB or SSH.
Run the following commands:
sudo ot-ctl
> dataset active -x
Run the following command:
sudo docker exec -it otbr sh -c "ot-ctl dataset active -x"The output should look like:
080000000000000000000300001735060004001fffe00208deadbeefcafe12340708fd123456789abc00000510112233445566778899aabbccddeeff00030a54657374576f726b3031010211220410aabbccddeeff00112233445566778899aa0c0402a0f7f8
Done
Run the following command and fill the <thread dataset> argument obtain in the previous step:
chip-tool pairing ble-thread 1 hex:<thread dataset> 20202021 3840
Collect the following parameters of your Wi-Fi access point:
<ssid> - SSID of your Wi-Fi network.
<password> - A password to your Wi-Fi network associated with the SSID.
Run the following command and fill the <ssid> and <password> arguments:
chip-tool pairing ble-wifi 1 <ssid> <password> 20202021 3840
Once the commissioning is complete and the device has full Thread or Wi-Fi connectivity, LED starts blinking purple (short flash on).
Read temperature
Run the following command:
chip-tool temperaturemeasurement read measured-value 1 1
Example of the temperature measurement value log:
[1675846190.922905][72877:72879] CHIP:TOO: Endpoint: 1 Cluster: 0x0000_0402 Attribute 0x0000_0000 DataVersion: 1236968801
[1675846190.922946][72877:72879] CHIP:TOO:   MeasuredValue: 2348
This means that the current temperature value is equal to 23.48°C.
Read relative humidity
Run the following command:
chip-tool relativehumiditymeasurement read measured-value 1 2
Example of the relative humidity measurement value log:
[1675849697.750923][164859:164861] CHIP:TOO: Endpoint: 2 Cluster: 0x0000_0405 Attribute 0x0000_0000 DataVersion: 385127250
[1675849697.750953][164859:164861] CHIP:TOO:   measured value: 2526
This means that the current relative humidity value is equal to 25.26%.
Read air pressure
Run the following command:
chip-tool pressuremeasurement read measured-value 1 3
[1675849714.536985][164896:164898] CHIP:TOO: Endpoint: 3 Cluster: 0x0000_0403 Attribute 0x0000_0000 DataVersion: 3096547
[1675849714.537008][164896:164898] CHIP:TOO:   MeasuredValue: 1015
This means that the current air pressure value is equal to 1015 hPa.
Testing with Matter Commissioner over NFC
Note
Currently, no commercially available smartphone application supports Matter commissioner functionality using NFC transport. To test NFC-based commissioning, you need a Matter commissioner that implements the Matter NFC Transport Layer (NTL). You can develop your own commissioner application based on the Matter 1.6 specification (Matter Core Specification).
To commission the sample over NFC using a Nordic Semiconductor DK, complete the following steps:
Build the sample with the NFC commissioning support.
See NFC-based commissioning for the required Kconfig options and supported DK targets.
Ensure that a Thread dataset or Wi-Fi credentials are configured.
Program the DK with the proper firmware and connect a terminal emulator to monitor the UART log.
When the Matter server finishes initializing, the device automatically starts NFC tag emulation and serves an NDEF onboarding payload with the NFC rendezvous flag. No button press is required to start NFC commissioning.
On a smartphone with a Matter commissioner application that supports Matter NTL, tap the NFC antenna area on the DK to start the commissioning session.
Keep the smartphone within NFC range for the duration of the commissioning exchange.
The required hold time depends on the network variant:
Hold the tap for at least 9 seconds.
Hold the tap for at least 20 seconds.
Keep the smartphone in the NFC field until the commissioner application indicates that commissioning has completed successfully.
Once device is commissioned the Second LED stops blinking and the light is solid and the NFC tag emulation on the DK stops automatically.
Note
If the commissioner loses connection with the device during the process, wait until the failsafe mechanism is triggered before attempting commissioning again. You will see the following UART log messages:
I: 5419 [DL]NFC field lost: the NFC Reader/Writer moved away
I: 5424 [DL]NFC tag emulation paused until fail-safe completes
The failsafe timeout depends on the commissioner configuration.
Press the reset button to clean-up the device faster and make it reachable over NFC again.
Use the commissioner application to control the device and verify that the expected clusters and attributes are accessible.
Testing with commercial ecosystem
You can also test the sample with the commercial ecosystems and the mobile apps. To test the sample, see the ecosystem manual page.
When you start the commissioning procedure, the ecosystem controller must get the onboarding information from the Matter accessory device. The onboarding information representation depends on your commissioner setup.
For this application, the data payload, which includes the device discriminator and setup PIN code, is encoded and shared using an NFC tag. When using the debug configuration, you can also get this type of information from the logs.
Use one of the following onboarding information formats to provide the commissioner with the data required:
For the debug and release configurations:
Weather station application onboarding information for the debug or release configurations QR Code
QR Code Payload
Manual pairing code
Scan the following QR code with the app for your ecosystem:
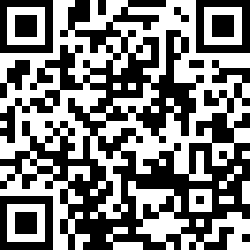
MT:M1TJ342C00KA0648G00
34970112332
Additionally, if the factory data build configuration overlay is selected:
Weather station application onboarding information for the factory data build configuration overlay QR Code
QR Code Payload
Manual pairing code
Scan the following QR code with the app for your ecosystem:
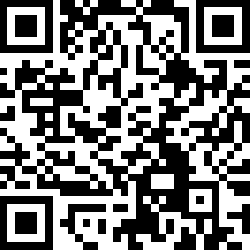
MT:KAYA36PF1509673GE10
14575339844
This data payload also includes test Device Attestation, with test Certification Declaration, Product ID, and Vendor ID. These are used for Device Attestation within commissioning, and you can generate your own test Certification Declaration when you Testing Device Attestation during development.
Dependencies
This sample uses the Matter library that includes the nRF Connect SDK platform integration layer:
In addition, the sample uses the following nRF Connect SDK components:
The sample depends on the following Zephyr libraries: