Gesture recognition
This application demonstrates a gesture-based remote control device using Nordic Edge AI Lab solution.
Application overview
The gesture recognition application demonstrates how to use an nRF Edge AI model to recognize hand gestures from motion sensor data and expose them as standard HID inputs over Bluetooth® Low Energy. There are two variants of the application that differ in where the model is executed:
The Neuton variant, which uses a CPU-based model, also called the Neuton model.
The Axon variant, which uses an NPU-based model, also called the Axon model.
When connected to a PC, the device appears as a Bluetooth LE HID device, allowing recognized gestures to control media playback or presentation slides. Based on accelerometer and gyroscope data, the nRF Edge AI model recognizes eight gesture classes:
Swipe right
Swipe left
Double shake
Double tap
Rotation clockwise
Rotation counter-clockwise
No gestures (IDLE)
Unknown gesture
The neural network model is trained using the Nordic Edge AI Lab. The whole process how to capture data and train the model is described in the Nordic Edge AI Lab documentation. Alternatively, you can collect training data using the Data forwarder sample together with the Data Forwarder Host tool. You can also see Gesture recognition use-case demo video.
Requirements
The application supports the following development kits:
Hardware platforms |
PCA |
Board name |
Board target |
Shields |
|---|---|---|---|---|
PCA20053 |
|
|||
PCA10184 |
|
|
||
PCA20072 |
|
Development kits
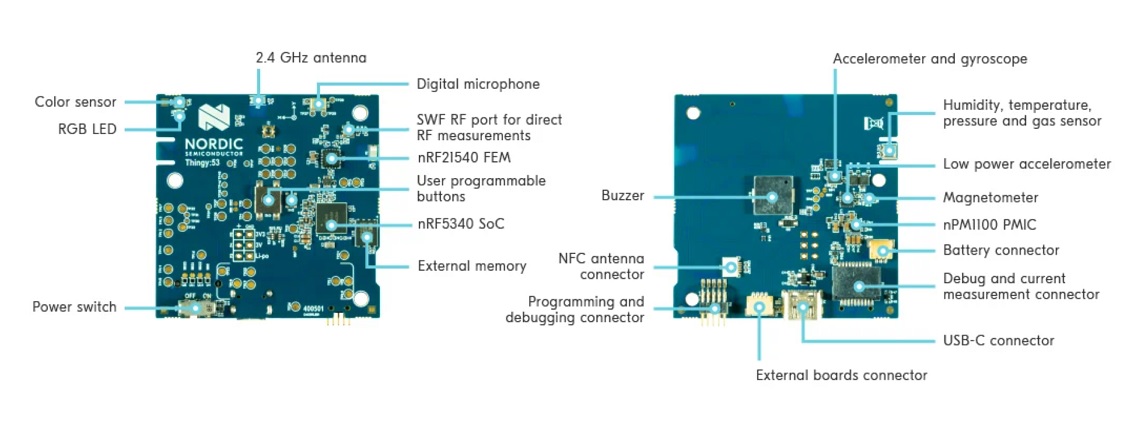
The Nordic Thingy:53 is an easy-to-use IoT prototyping platform. It allows to create prototypes and proofs-of-concept without building custom hardware. The Thingy:53 is built around the nRF5340 SoC, a dual-core wireless SoC. The processing power and memory size of its dual Arm Cortex-M33 processors enable it to run embedded machine learning (ML) models directly on the device.
The Thingy:53 also includes multiple integrated sensors, such as environmental sensors, color and light sensors, accelerometers, and a magnetometer. It is powered by a rechargeable lithium-polymer (Li-Po) battery that can be charged through USB-C. There is also an external 4-pin JST connector compatible with the Stemma, Qwiic, and Grove standards for hardware accessories.
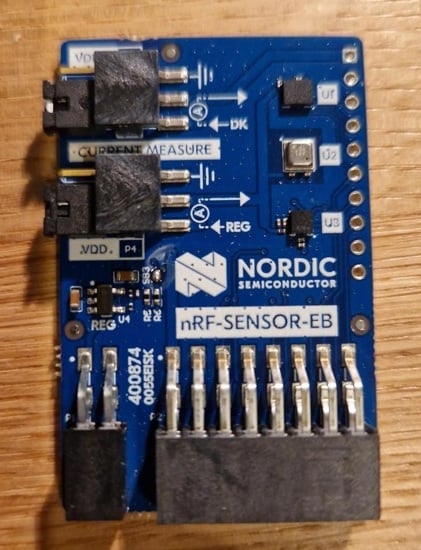
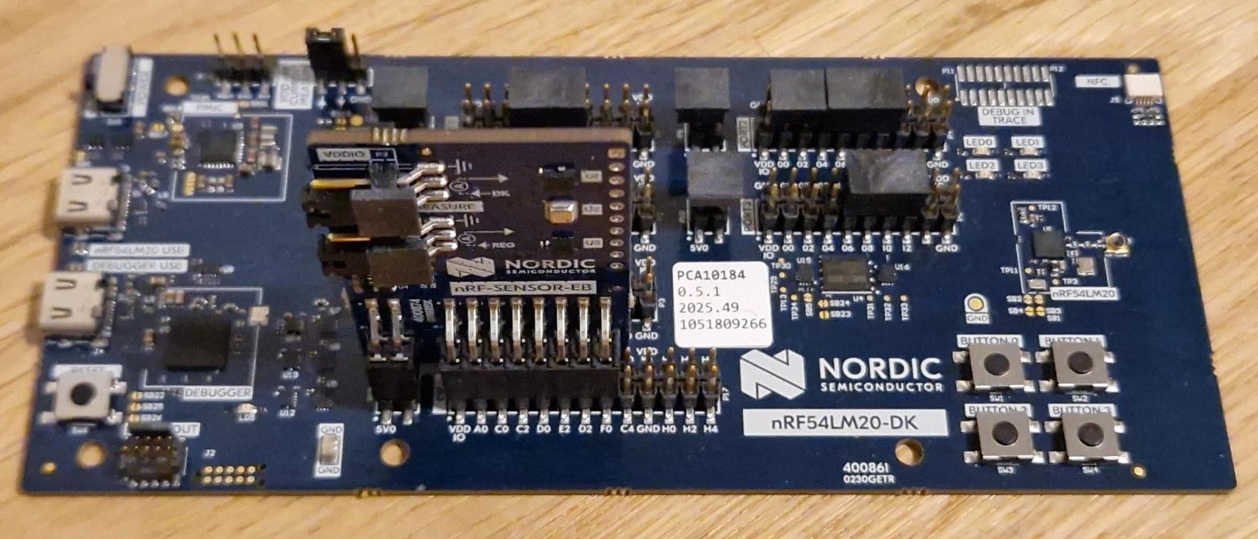
The nRF54LM20 DK development kit has two variants with different SoCs: nRF54LM20A and nRF54LM20B. Both variants require a sensor evaluation board:
|
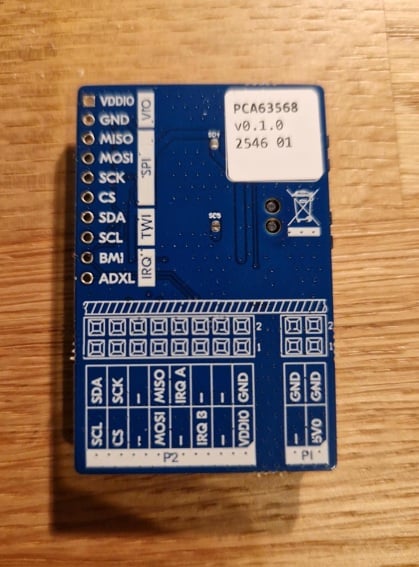
|
The Sensor Evaluation Board is connected to the DK through the EXP port on the nRF54LM20 DK board:
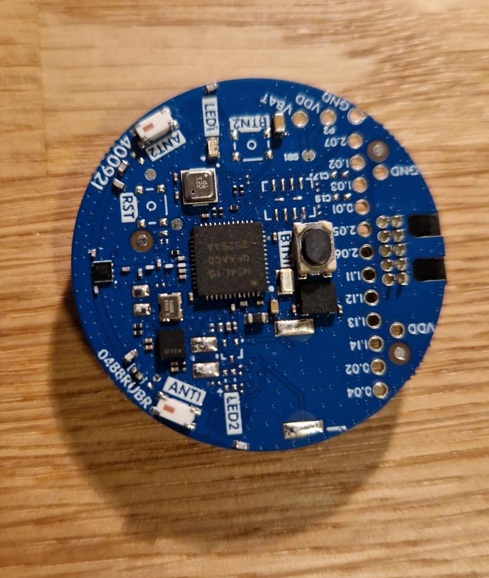
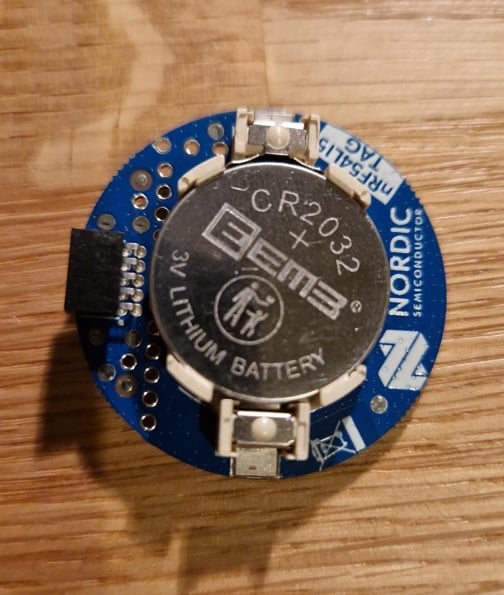
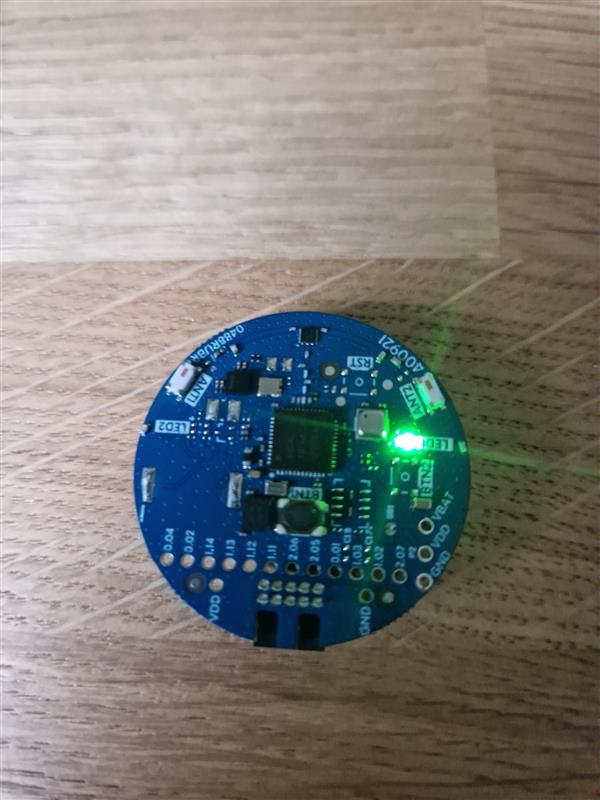
The nRF54L15TAG is a development board for the nRF54L15 SoC. It is a small, low-cost development board that is perfect for prototyping and testing.
|
|
Sensor BMI270
The Bosch BMI270 is a 3-axis accelerometer and 3-axis gyroscope IMU sensor. All development kits use the sensor to collect data for gesture recognition.
Setting up software environment
For full instructions on preparing your development environment, see Quick start guide.
User interface
This section describes the user interface available on development kits in this application.
Buttons and LEDs
The project has two keyboard control modes: Presentation Control and Music Control. Depending on the control mode, recognized gestures are mapped to different keyboard keys. Switch between control modes by pressing the user button.
When Bluetooth LE HID pairing with MITM protection is enabled, the application also supports explicit passkey confirmation and rejection using the user button with short and long presses.
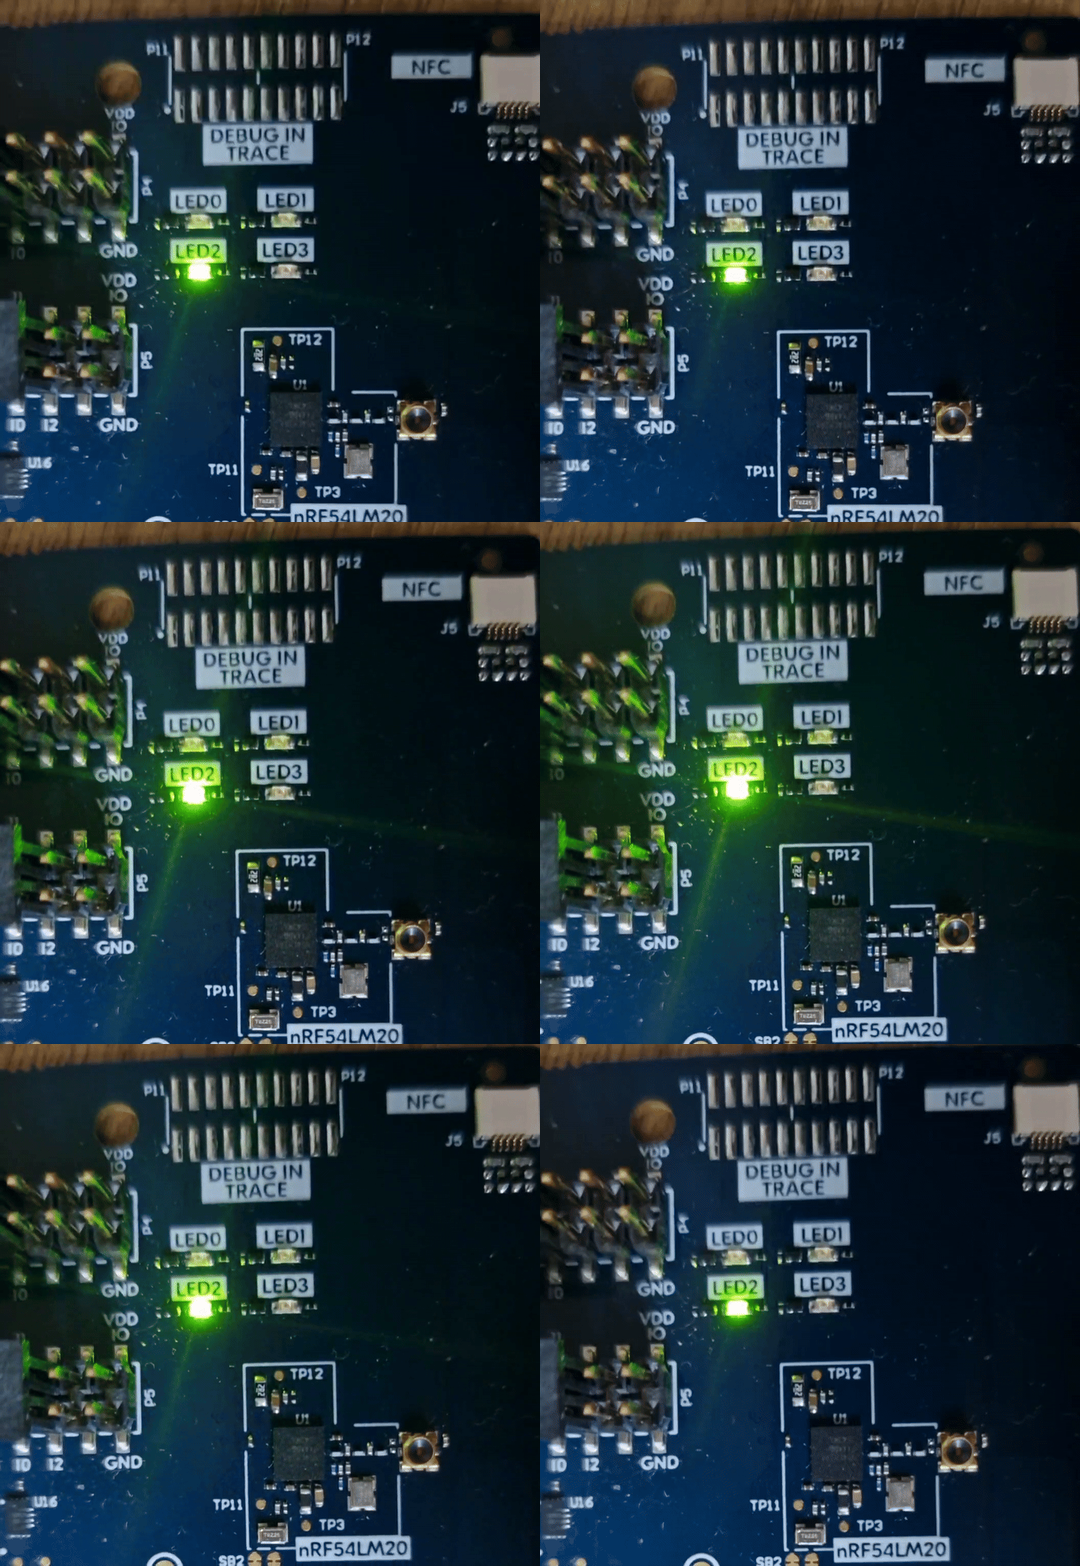
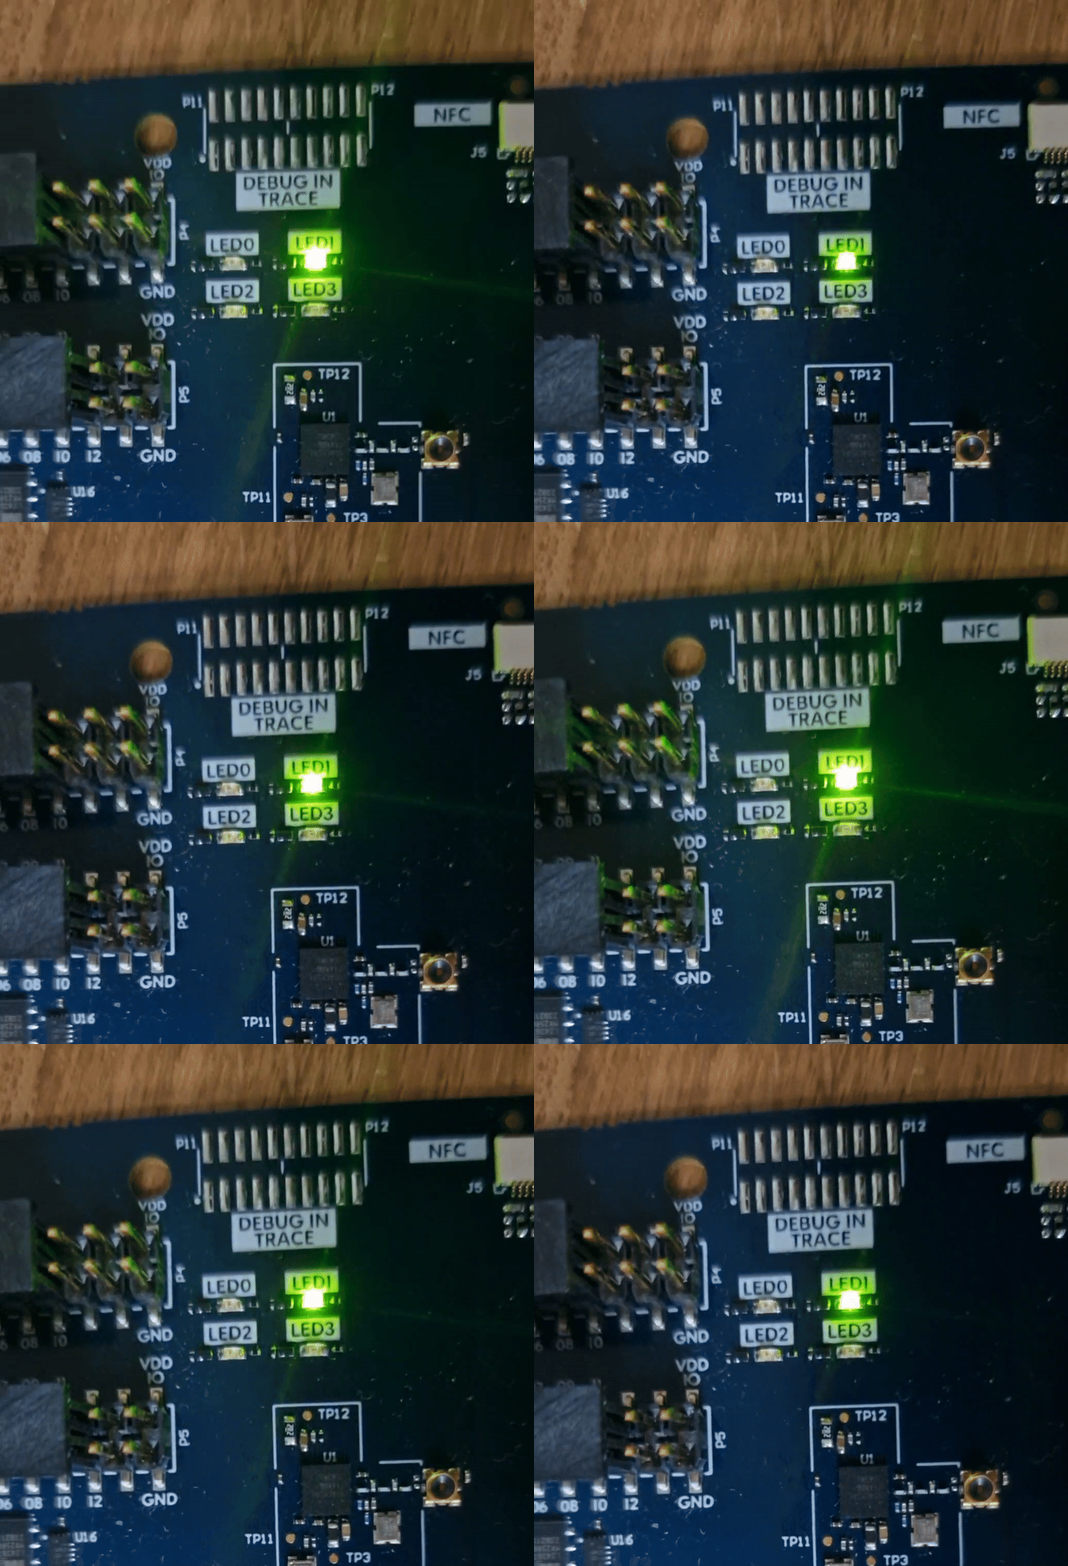
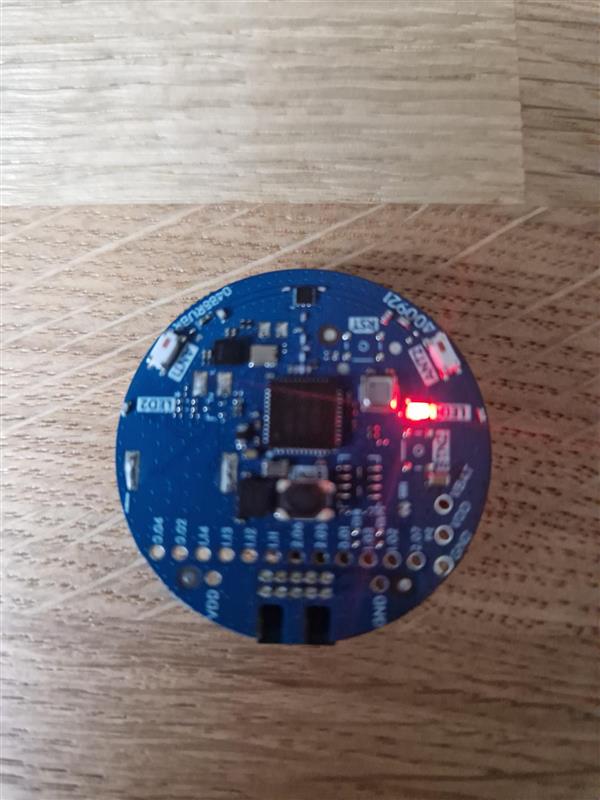
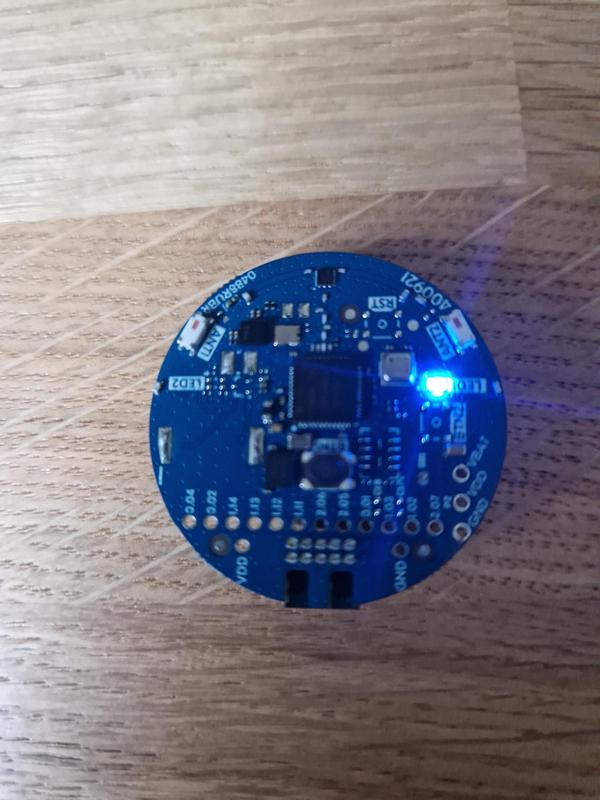
The following table explains the LED indications for control modes and Bluetooth connection states on each device, and shows which button switches between control modes:
Device |
Mode switch |
No Bluetooth connection |
Presentation Control mode |
Music Control mode |
|---|---|---|---|---|
Thingy:53 |
Press the button on top of the device to switch between Presentation Control and Music Control modes. |
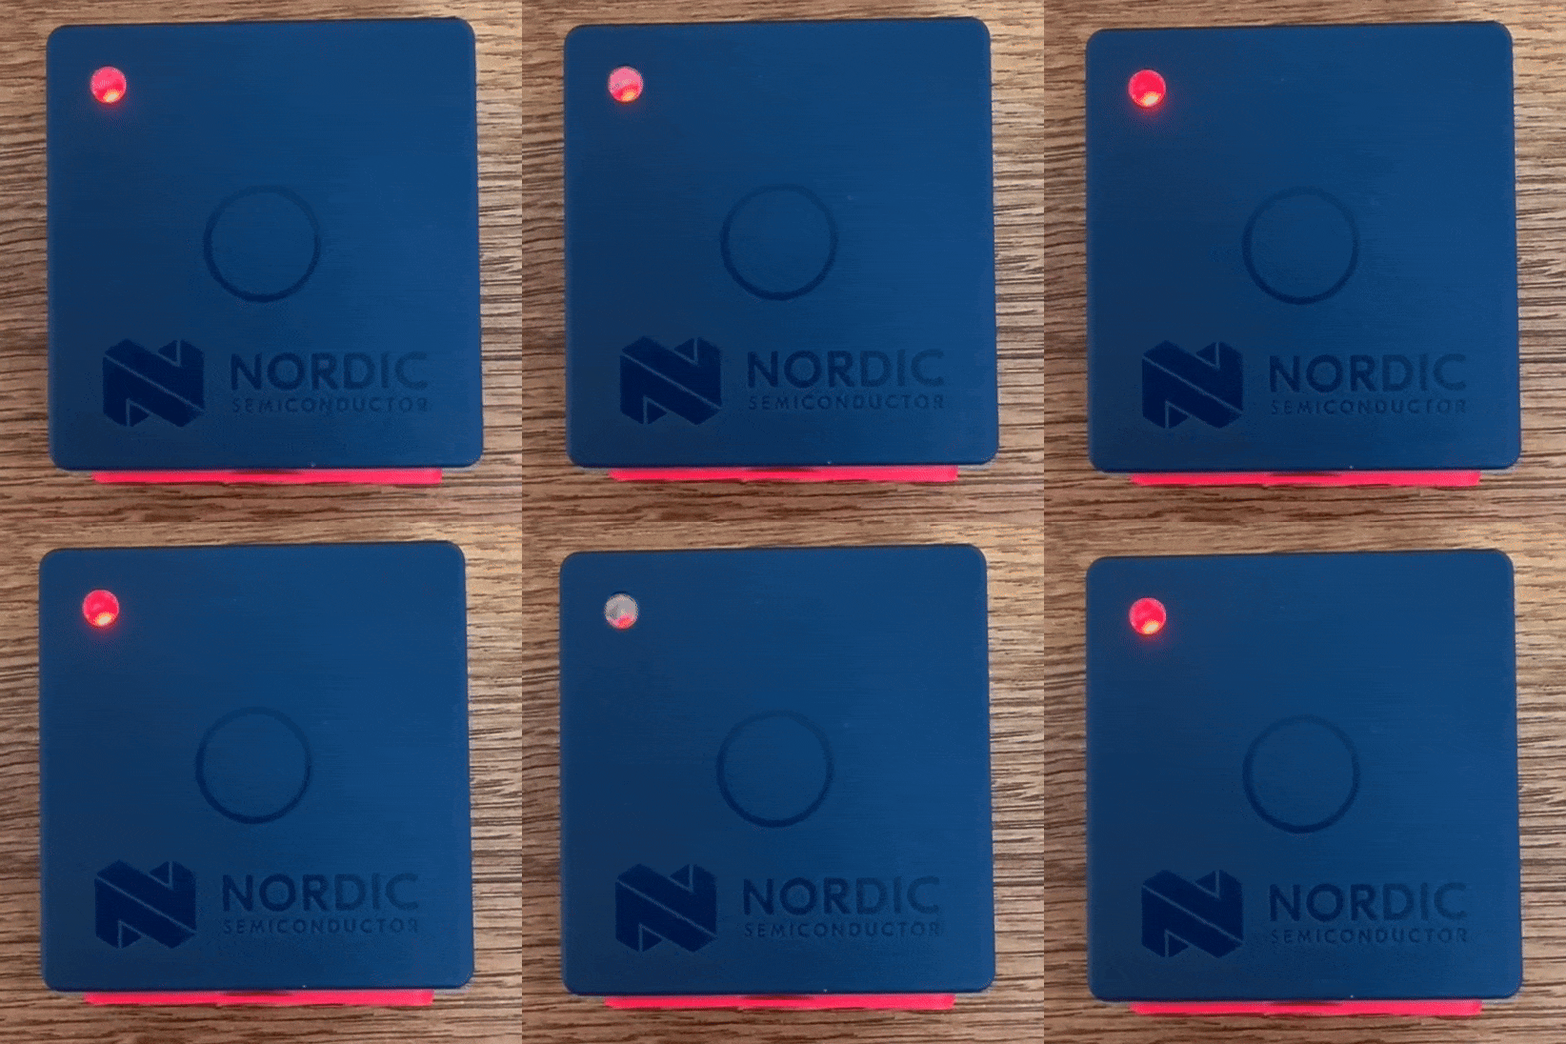
|
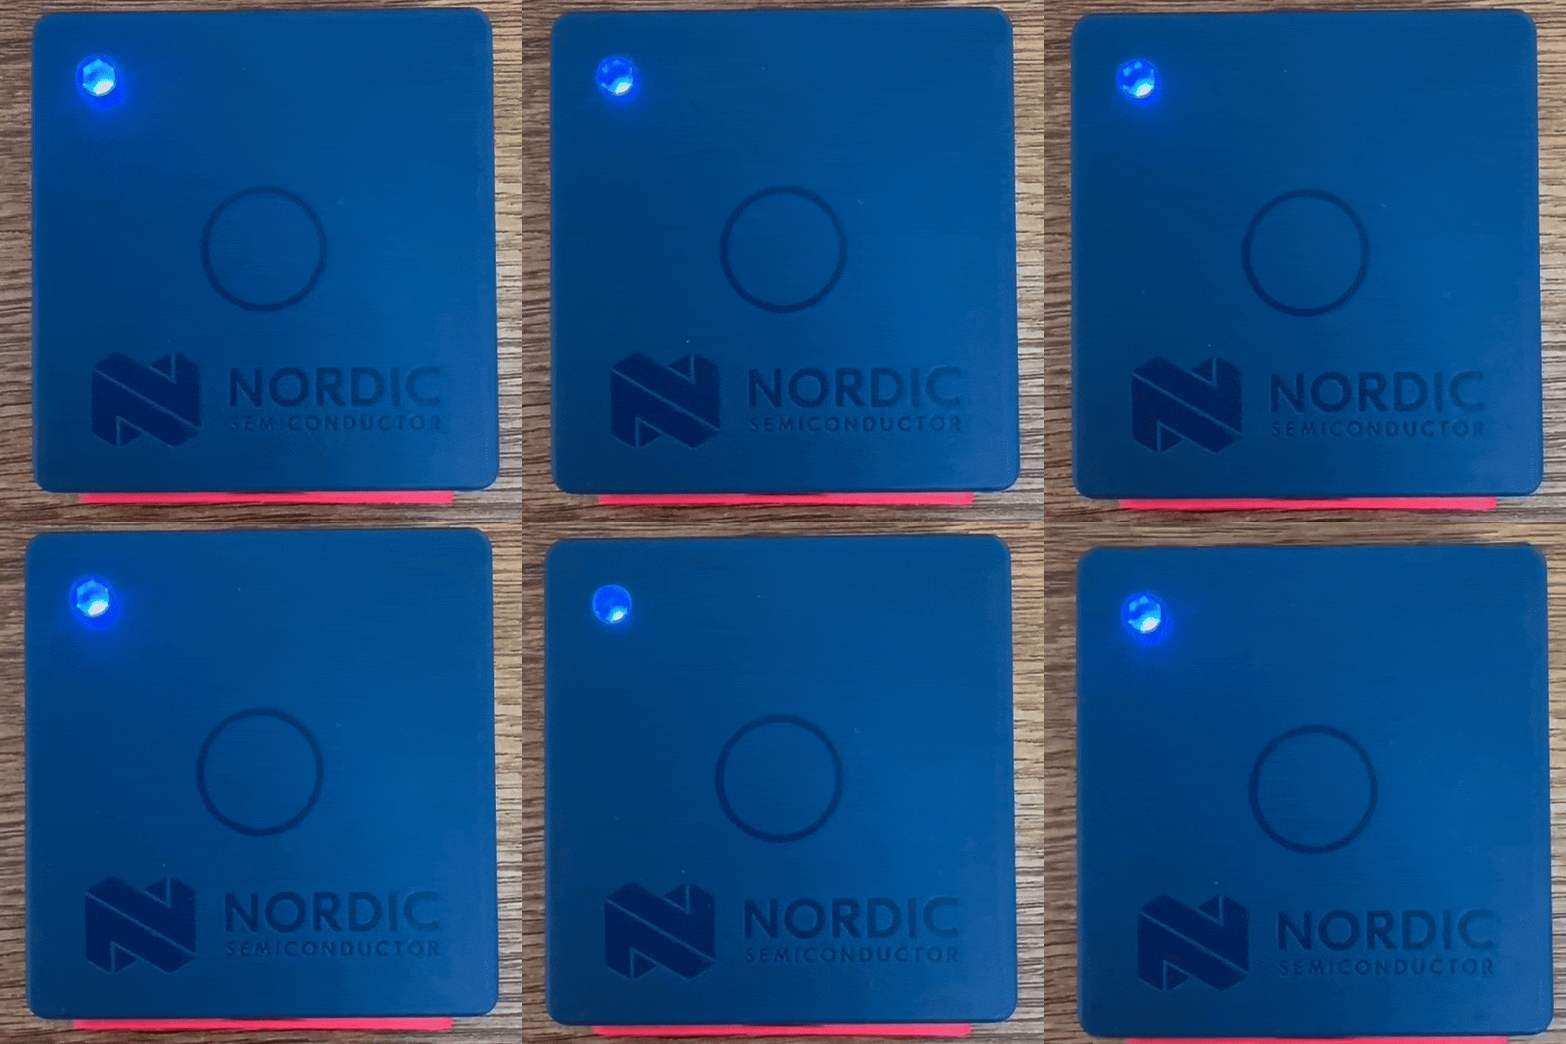
|
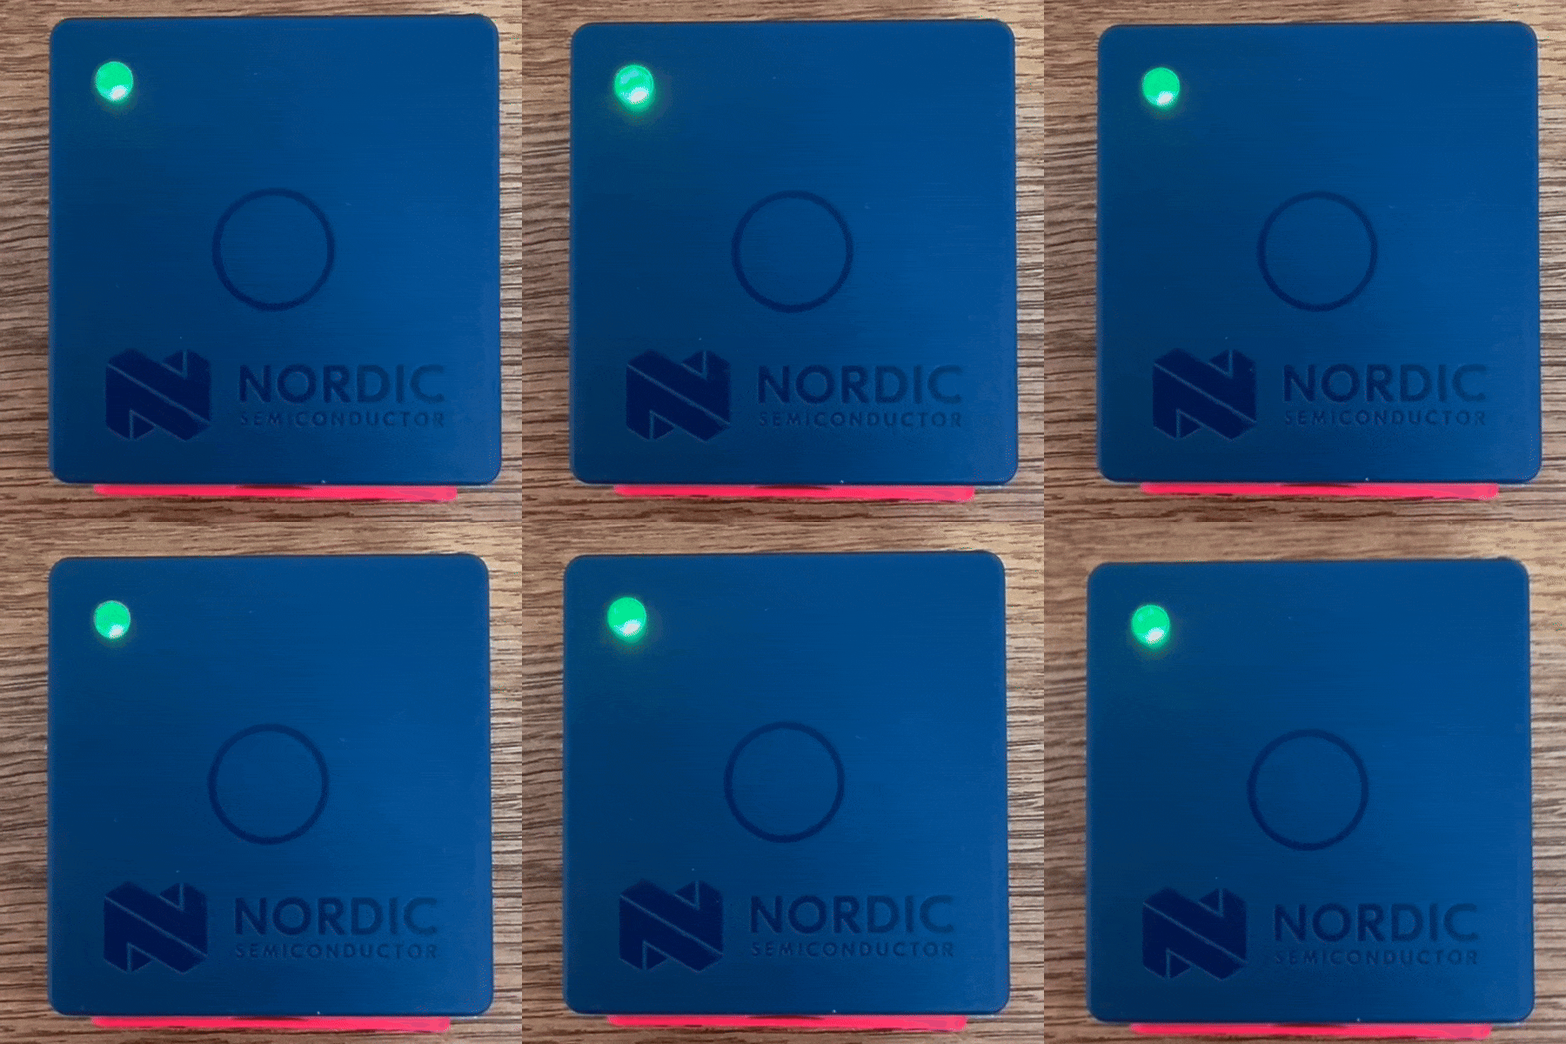
|
nRF54LM20 DK |
Press the BUTTON 0 to switch between Presentation Control and Music Control modes. |
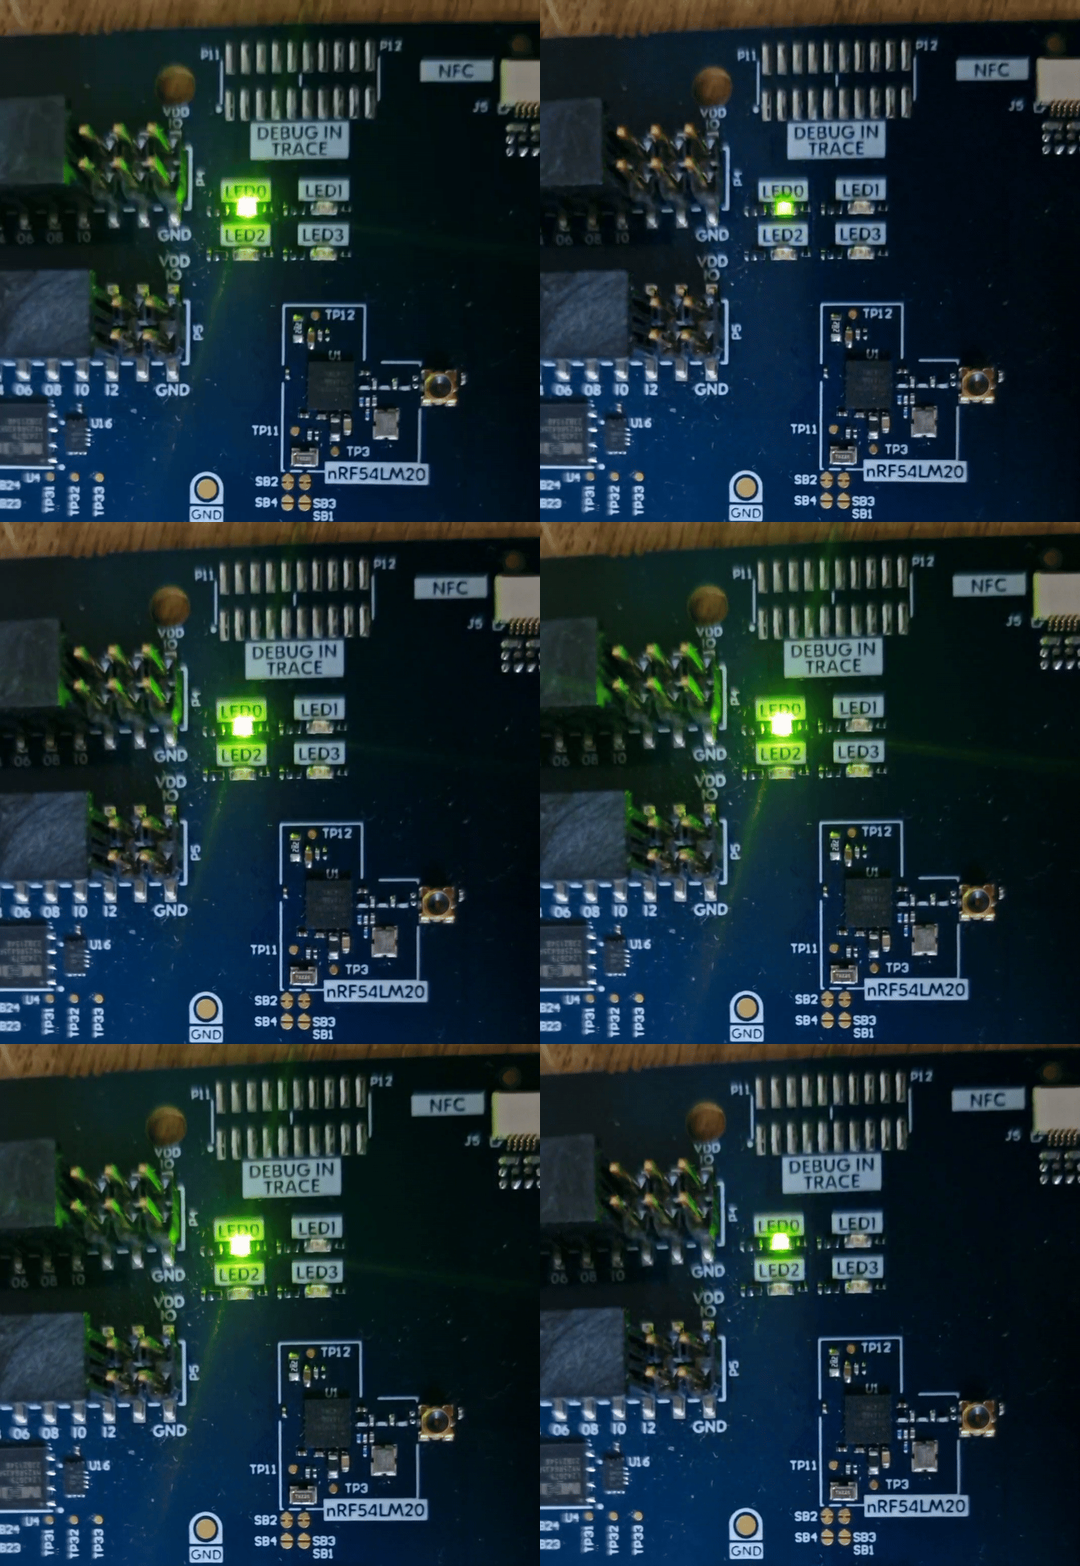
|
|
|
nRF54L15 TAG |
Press the BTN1 to switch between Presentation Control and Music Control modes. |
|
|
|
Bluetooth LE HID passkey confirmation
In Bluetooth HID mode, when CONFIG_BLE_MITM_AUTH=y and passkey confirmation is requested, the serial log prints the passkey and the available button actions.
The single user button changes its behavior temporarily while pairing confirmation is pending:
Short press (< 500 ms): Reject pairing
Long press (> 2000 ms): Confirm pairing
The mode-switch button behavior is restored after pairing is completed or rejected.
Configuration
See Configuring and building for information about how to permanently or temporarily change the configuration.
Choosing the model backend
The application supports two execution backends:
Neuton models - Highly optimized models that run on the CPU.
Axon NPU - Models that run on the Axon NPU (AI accelerator core).
The Neuton model is used by default on all boards that do not have the Axon NPU.
You can use the Axon model by enabling the CONFIG_NRF_EDGEAI_GESTURE_RECOGNITION_MODEL_AXON Kconfig option.
Choosing Bluetooth LE HID pairing security
In Bluetooth HID mode, the pairing behavior is controlled by the CONFIG_BLE_MITM_AUTH Kconfig option:
CONFIG_BLE_MITM_AUTH=yenables MITM-protected pairing.The application requests Bluetooth LE Security Level 4, and pairing uses passkey confirmation on the user button.
CONFIG_BLE_MITM_AUTH=ndisables MITM protection.The application requests Bluetooth LE Security Level 2, and pairing uses unauthenticated encrypted pairing without passkey confirmation.
This option is relevant only when the CONFIG_BLE_MODE_HID option is enabled.
By default, it is enabled in prj.conf and disabled in prj_release.conf.
Build types
Each board directory contains per-board configuration files for different build types. See Custom build types and Providing CMake options for more information. The application supports the following build types:
Build type |
File name |
Description |
|---|---|---|
Debug (default) |
|
Debug version of the application with logging and assertions enabled. BLE HID MITM protection ( |
Release |
|
Release version of the application with logging disabled, compiler optimizations, and reduced LED activity for lower power consumption. BLE HID MITM protection ( |
Release without Bluetooth LE |
|
Release version of the application without Bluetooth LE, but with serial logging enabled for diagnostics. |
Choosing Bluetooth LE mode
The application supports four mutually exclusive Bluetooth LE modes.
Select one in the prj.conf file or through menuconfig (Application Options → Bluetooth LE mode):
Bluetooth HID mode - Used when the
CONFIG_BLE_MODE_HIDKconfig option is enabled. The device is a Bluetooth keyboard that sends keystrokes based on recognized gestures. It is not available in data collection mode, which is the default mode when theCONFIG_DATA_COLLECTION_MODEKconfig option is disabled.No Bluetooth LE mode - Used when the
CONFIG_BLE_MODE_NONEKconfig option is enabled. In this mode, Bluetooth is disabled. Inference results and data collection use serial connection only.Bluetooth LE NUS mode - Used when the
CONFIG_BLE_MODE_NUSKconfig option is enabled. In this mode, the device forwards raw IMU samples over the Nordic UART Service. This mode is available only in data collection mode, which is the default when theCONFIG_DATA_COLLECTION_MODEKconfig option is enabled. For more information, see Building firmware for data collection.Bluetooth LE GATT mode - Used when the
CONFIG_BLE_MODE_GATT_CUSTOMKconfig option is enabled. In this mode, the device exposes a custom GATT service called “neuton_gatt” that sends inference results in the format<class_label>,<probability>. This mode is not available in data collection mode.
Building firmware for data collection
It is possible to create a build that outputs raw data from the accelerometer and gyro sensors on the serial port. No inference is performed in this mode. This allows to capture data for training new models and to test and implement new use cases.
Note
As an alternative to the built-in data collection mode, use the Data forwarder sample with the Data Forwarder Host tool to stream sensor data to your host for Nordic Edge AI Lab workflows. The data forwarder sample is a dedicated firmware for collecting training data. It supports additional sensors and exports data in a format compatible with Edge AI Lab data collection.
The output consists of 16-bit integers separated by a comma, in the following order:
<acc_x>,<acc_y>,<acc_z>,<gyro_x>,<gyro_y>,<gyro_z>
Column headers are not included. The output rate is the configured sampling frequency (default 100 Hz).
You can find raw datasets used for model training on the training dataset page.
To build this version, enable the following option in the
prj.conffile:CONFIG_DATA_COLLECTION_MODE=y CONFIG_BLE_MODE_NONE=y
If you want to forward the same data over Bluetooth LE using Nordic UART Service (NUS), additionally switch from No BLE mode to NUS mode:
CONFIG_DATA_COLLECTION_MODE=y
CONFIG_BLE_MODE_NUS=y
In this mode, you must have an additional development kit running the Central UART sample to receive the NUS data.
Note
When using Bluetooth LE NUS mode, some samples may be lost due to RF noise or increased distance between the device and the central. To help track lost samples, the application prepends a sequential ID to each sample transmitted over NUS. Use the
scripts/check_nus_data.pyscript to check for dropped samples and strip the ID from the received data.
Building and running
This application can be found under applications/gesture_recognition in the Edge AI Add-on folder structure.
To build the application, follow the instructions in Building an application for your preferred building environment. See also Programming an application for programming steps and Testing and optimization for general information about testing and debugging in the nRF Connect SDK.
Testing
After programming the application to your development kit, complete the following steps to test it:
Connect the kit to the computer using a USB cable. The kit is assigned a serial port. Serial ports are referred to as COM ports on Windows, /dev/ttyACM devices on Linux, and /dev/tty devices on macOS. To list Nordic Semiconductor devices connected to your computer together with their serial ports, open a terminal and run the
nrfutil device listcommand. Alternatively, check your operating system’s device manager or its equivalent.Connect to the kit with a terminal emulator (for example, the Serial Terminal app). See Testing and optimization for the required settings and steps. Connect to the serial device printing console output.
When performing gestures with the device, the serial port terminal displays messages similar to the following:
Predicted class: DOUBLE SHAKE, with probability 96 %
BLE HID key sent successfully
Predicted class: SWIPE RIGHT, with probability 99 %
BLE HID key sent successfully
Predicted class: SWIPE LEFT, with probability 99 %
BLE HID key sent successfully
Predicted class: ROTATION RIGHT, with probability 93 %
BLE HID key sent successfully
Once the device is running, Bluetooth LE advertising starts as a HID device and waits for a connection request from the PC. Devices can be connected in the same way as a regular Bluetooth keyboard.
Pair the Bluetooth device with your PC.
Once connected successfully, the serial port terminal returns log messages similar to the following:
Connected 9C:B6:D0:C0:CE:FC (public)
Security changed: 9C:B6:D0:C0:CE:FC (public) level 4
With
CONFIG_BLE_MITM_AUTH=y, the connection is raised to Security Level 4 and the terminal prints the passkey and available button actions:Passkey for 9C:B6:D0:C0:CE:FC (public): 123456 ===== Button Functionality (Pairing Confirmation Mode) ===== Short press (< 500 ms): Reject pairing Long press (> 2000 ms): Confirm pairing ==============================================
Use a long press (> 2000 ms) on the user button to confirm the passkey, or a short press (< 500 ms) to reject it.
With
CONFIG_BLE_MITM_AUTH=n, pairing does not require passkey confirmation and the terminal log shows Security Level 2 instead:Connected 9C:B6:D0:C0:CE:FC (public) Security changed: 9C:B6:D0:C0:CE:FC (public) level 2
After Bluetooth connection, the device changes LED indication from red to green, or red to blue depending on the keyboard control mode. You can now use the device to control media playback or presentation slides by making gestures.
Gestures overview
This section describes the gesture‑to‑action mapping for Presentation Control and Music Control modes.
Gesture |
Presentation control - blue LED |
Music control - green LED |
|---|---|---|
Double shake |
F5 |
Media play/pause |
Double tap |
Escape |
Media mute |
Swipe right |
Arrow right |
Media next |
Swipe left |
Arrow left |
Media previous |
Rotation clockwise |
Not used |
Media volume up |
Rotation counter-clockwise |
Not used |
Media volume down |
Making gestures
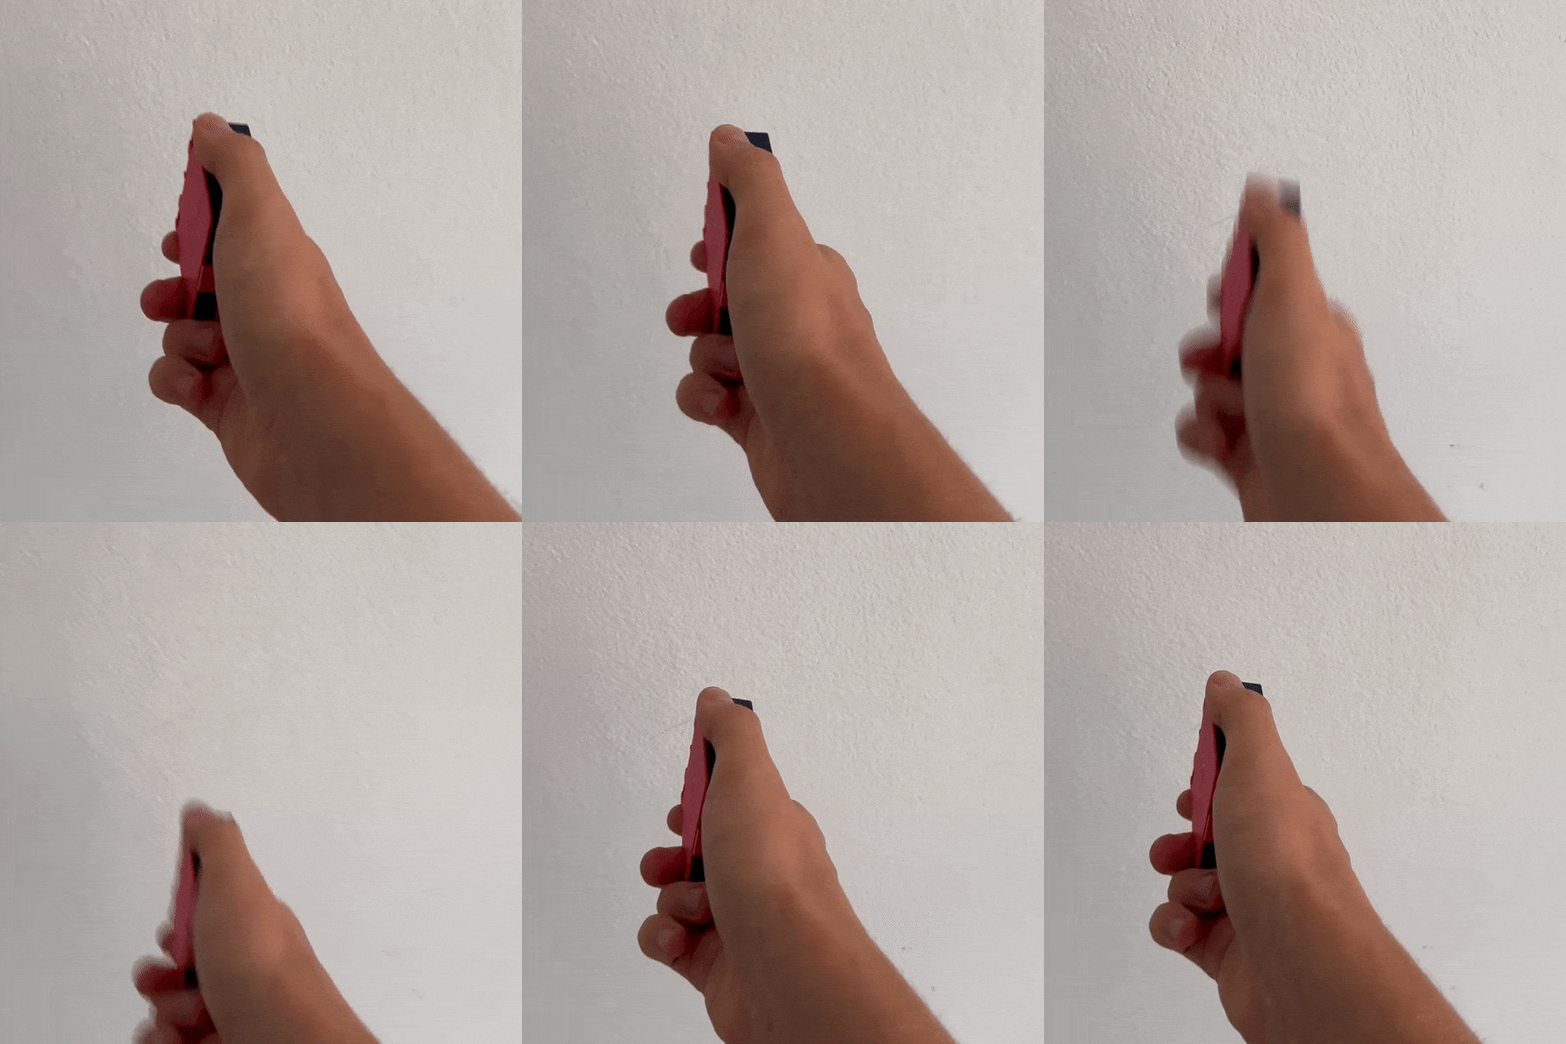
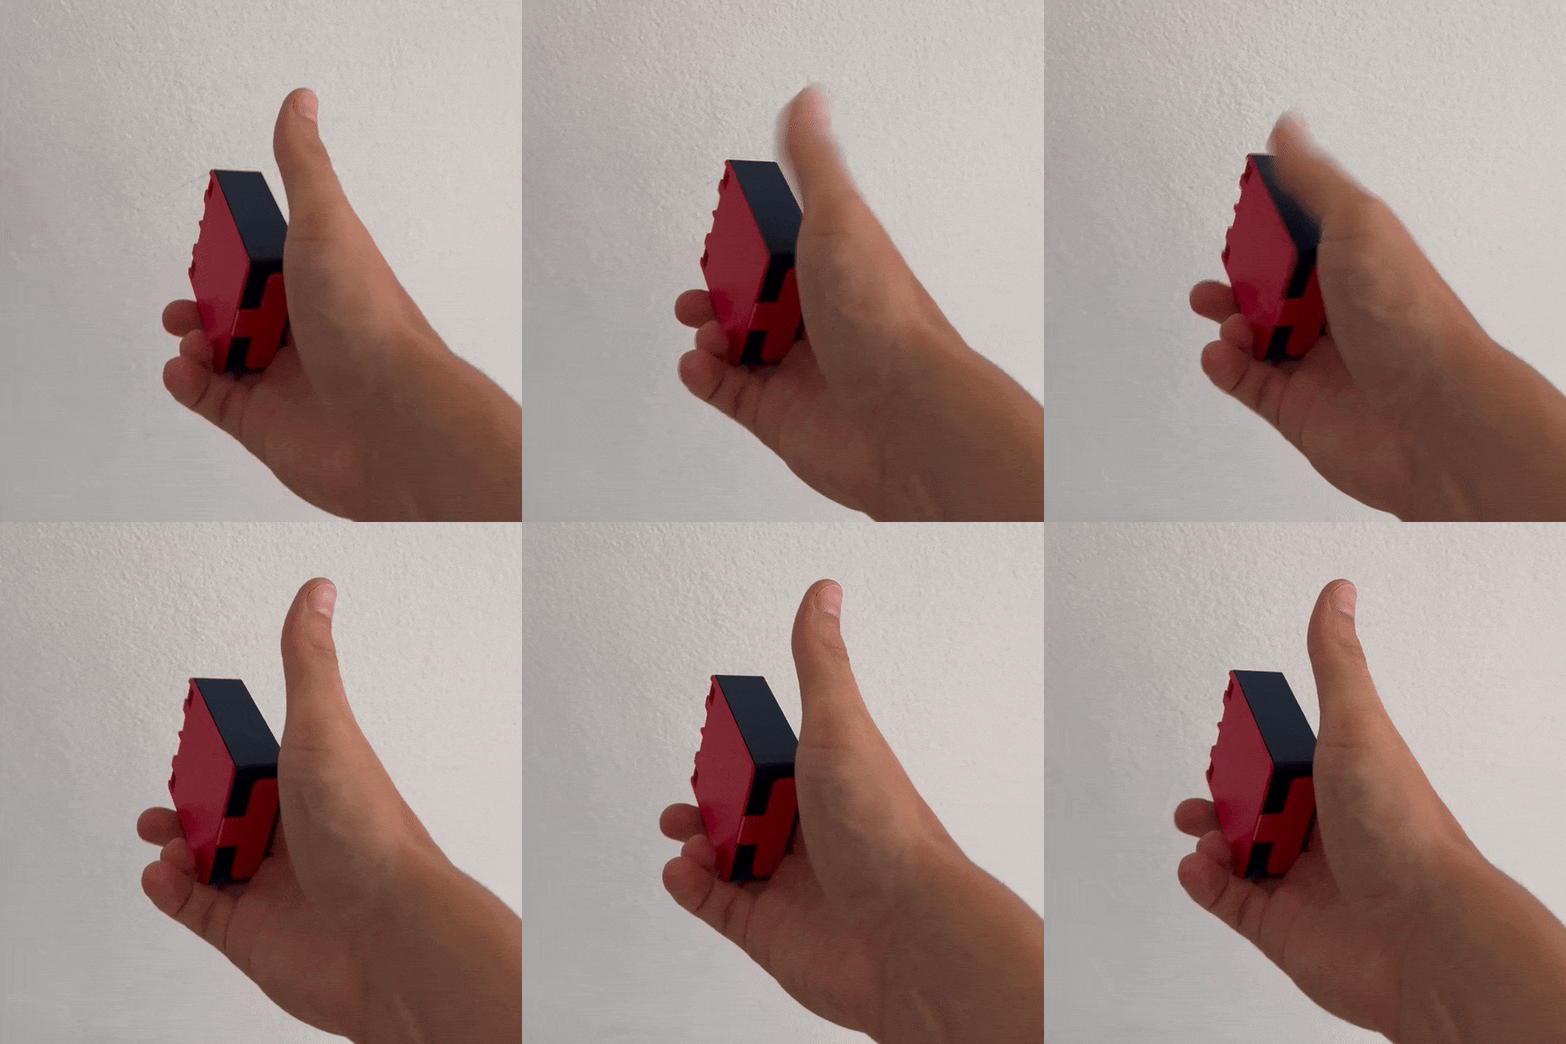
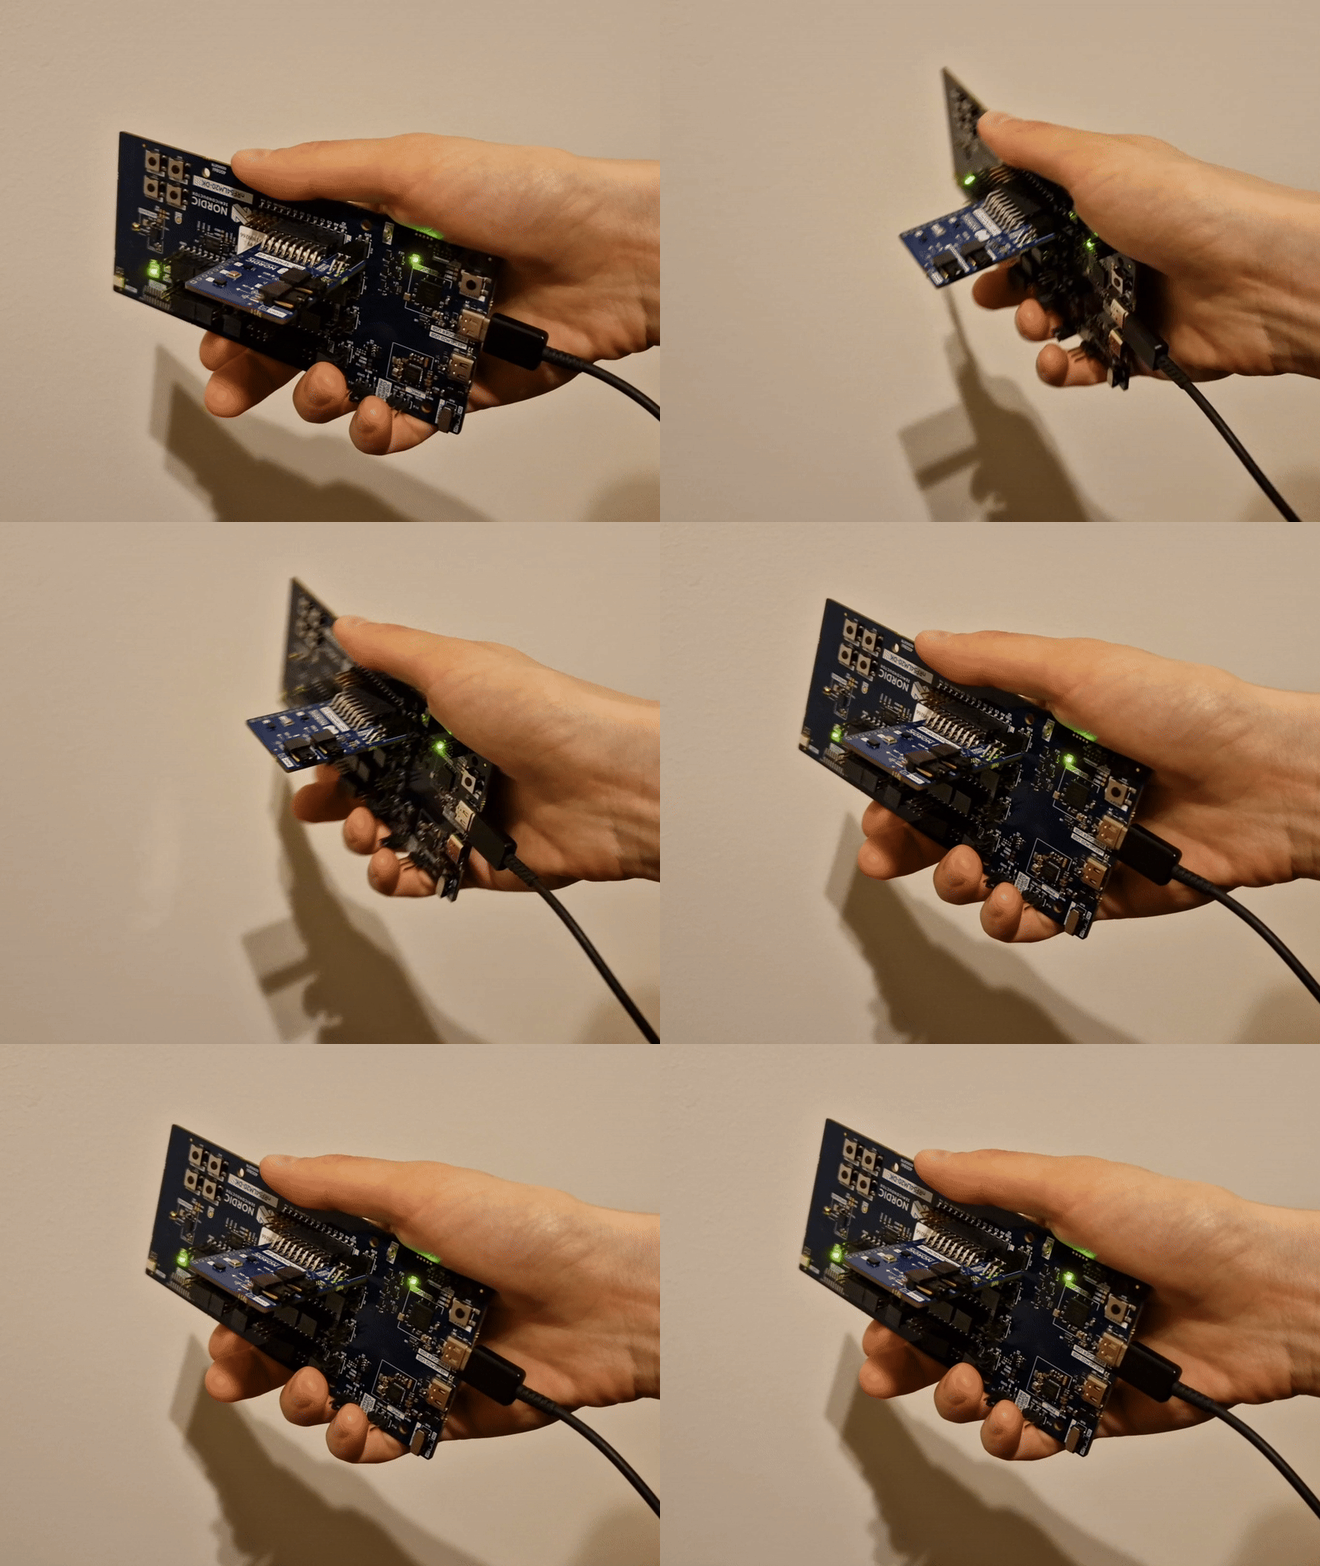
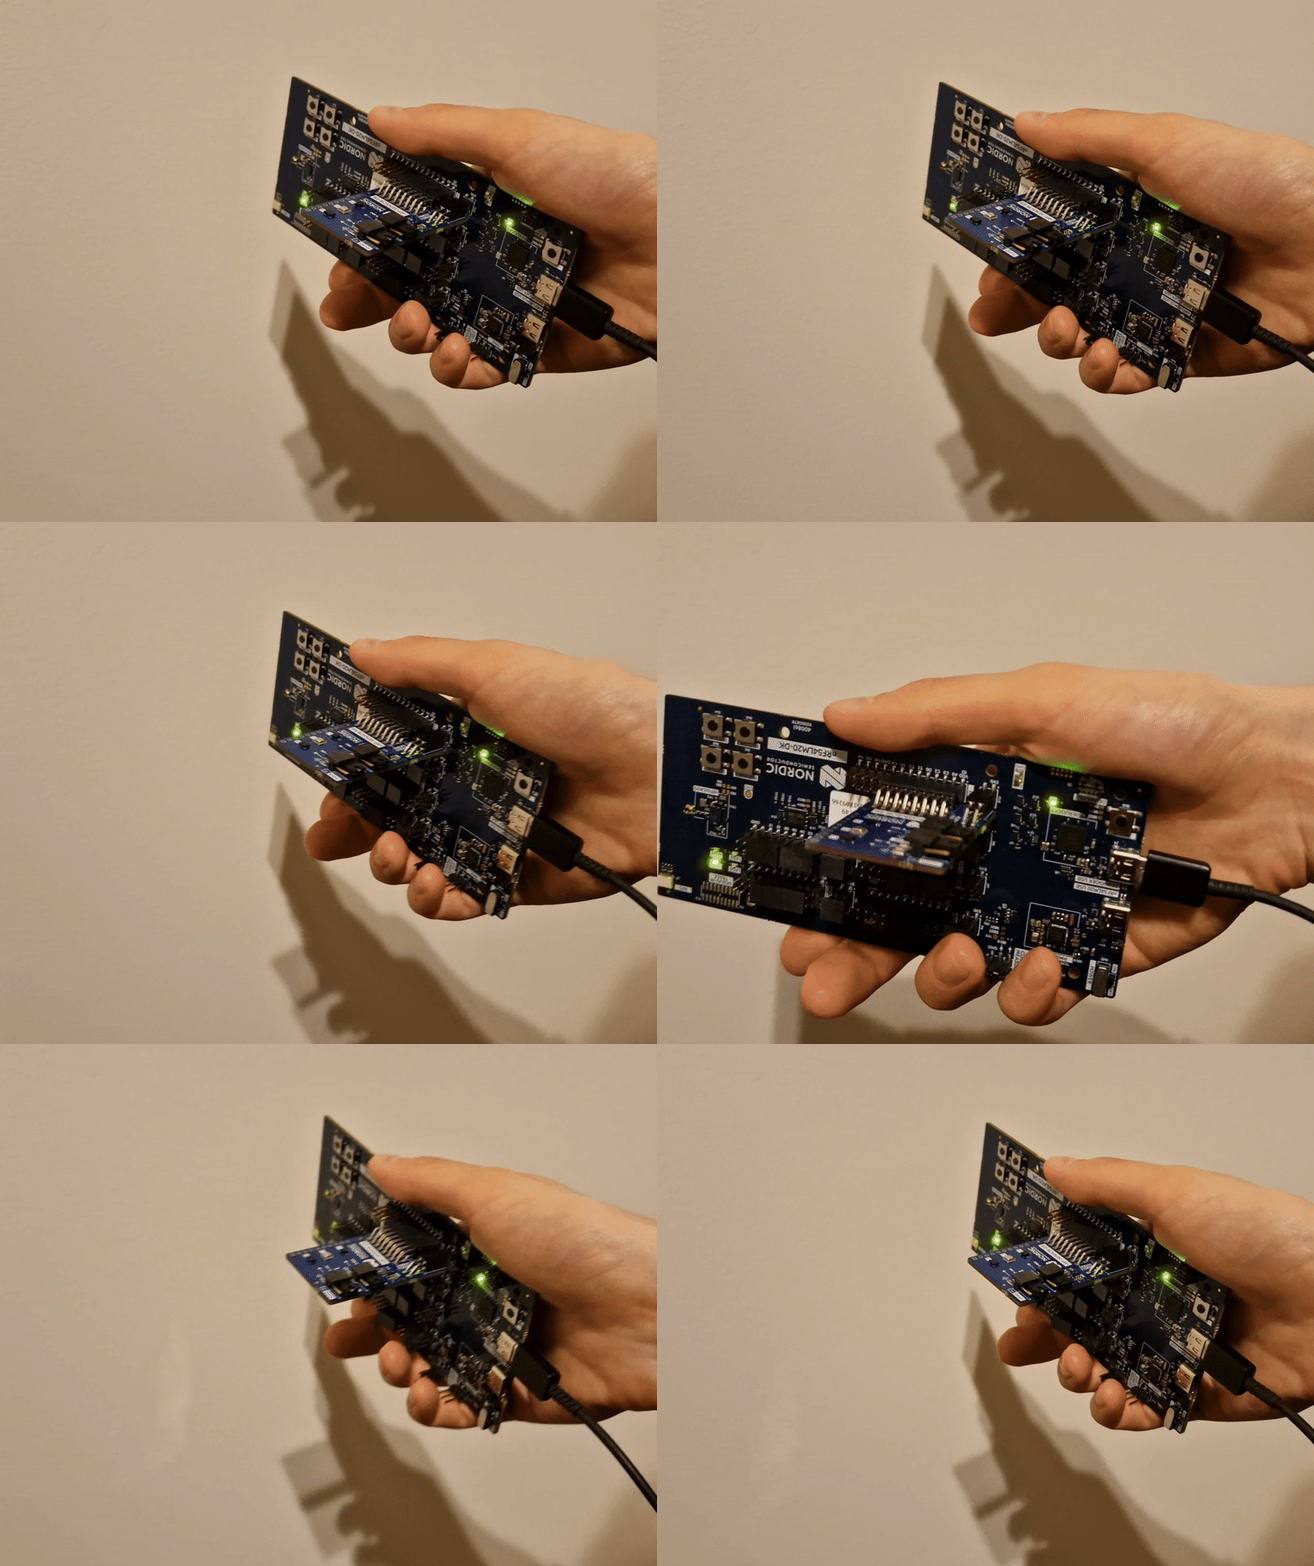
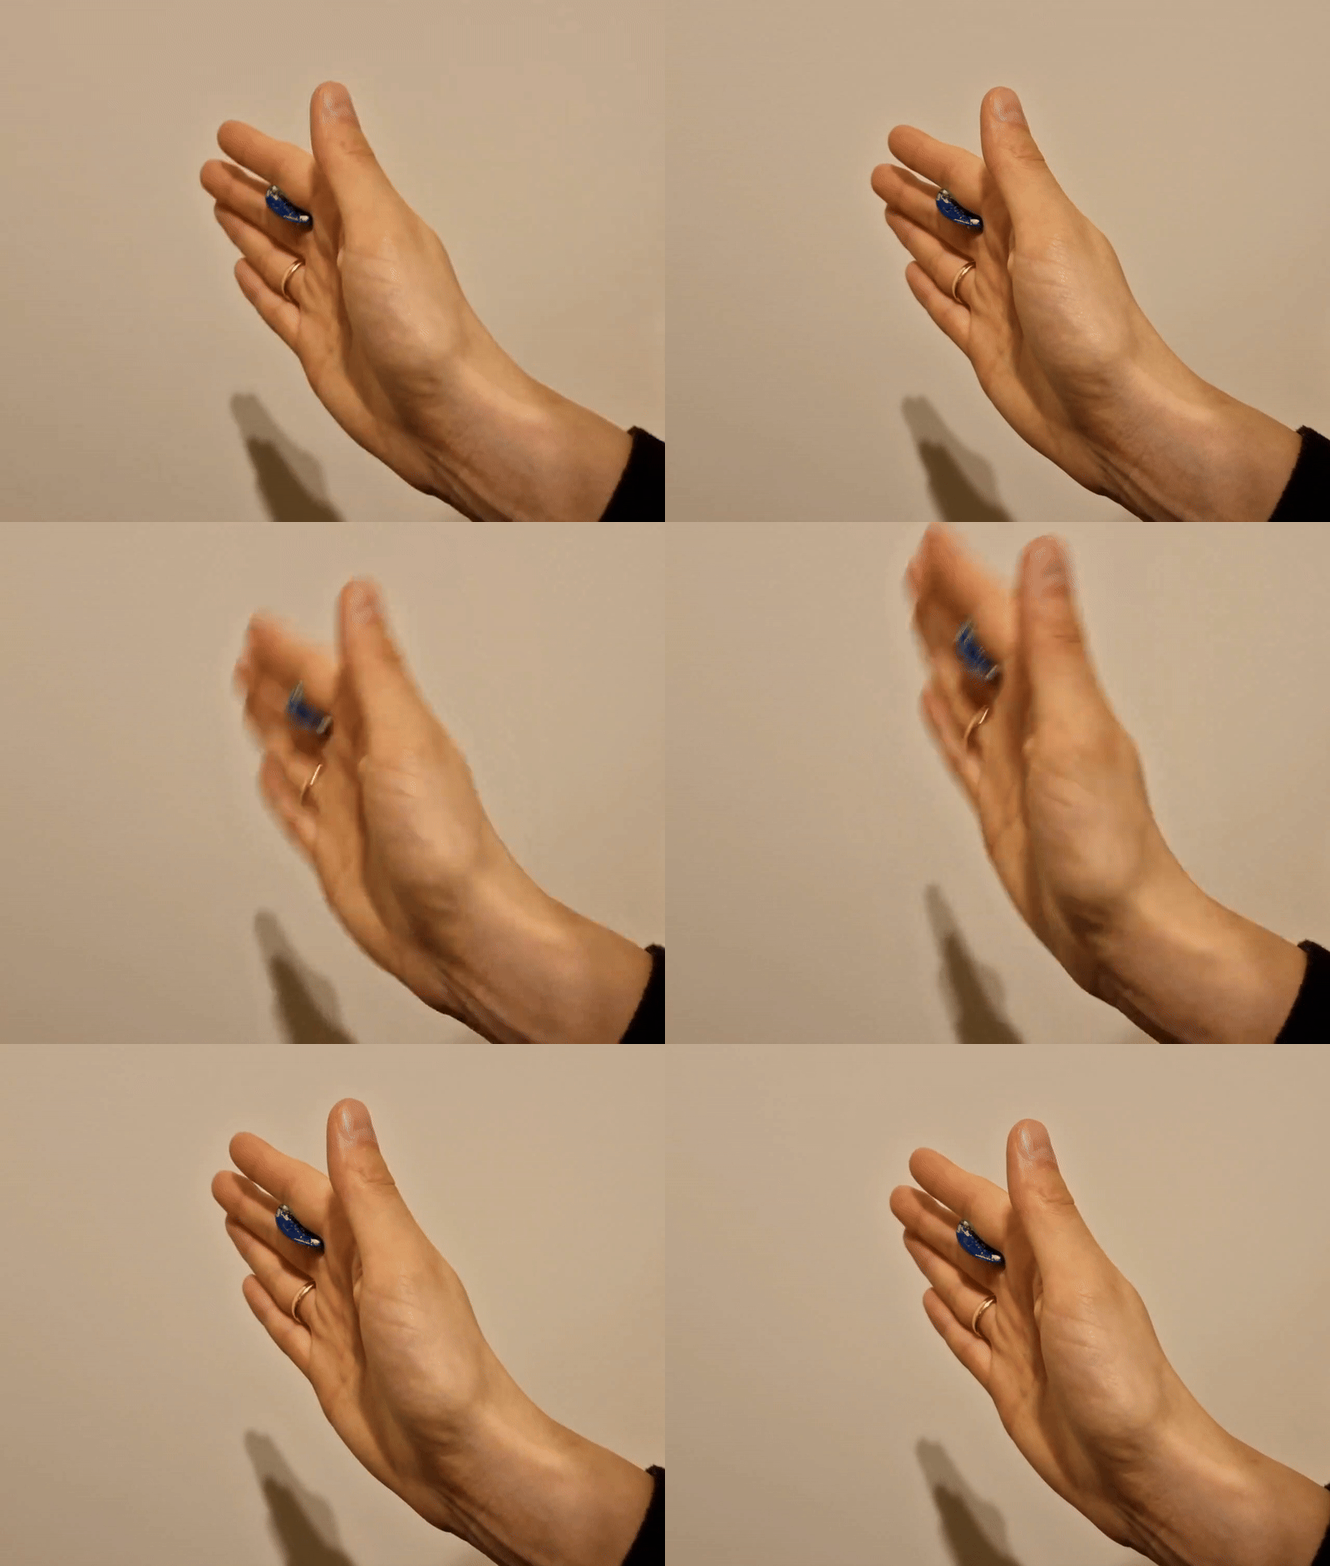
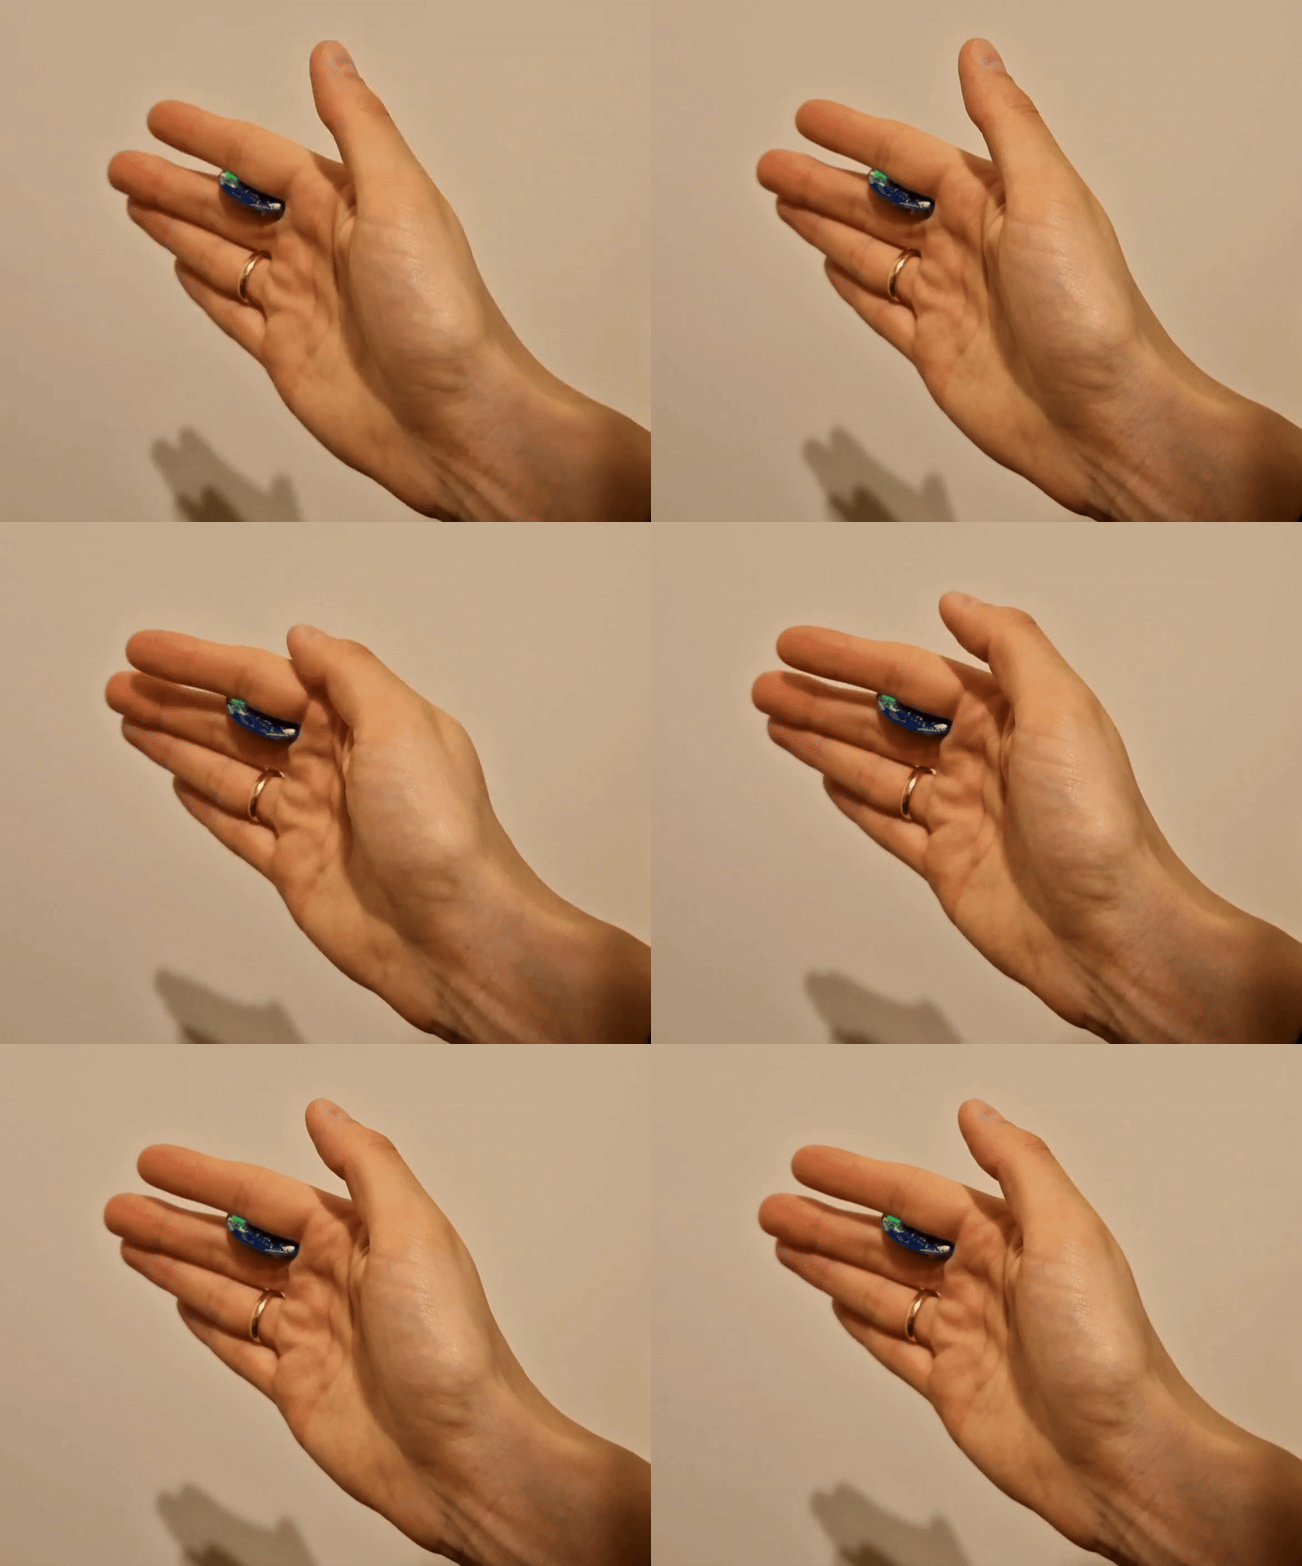
This section shows the correct device orientation and motion for performing supported gestures. The model was trained with a limited dataset. For optimal gesture recognition across different users, follow the instructions carefully and train a new model with a larger dataset.
Make sure the default (initial) position of the device matches the following:
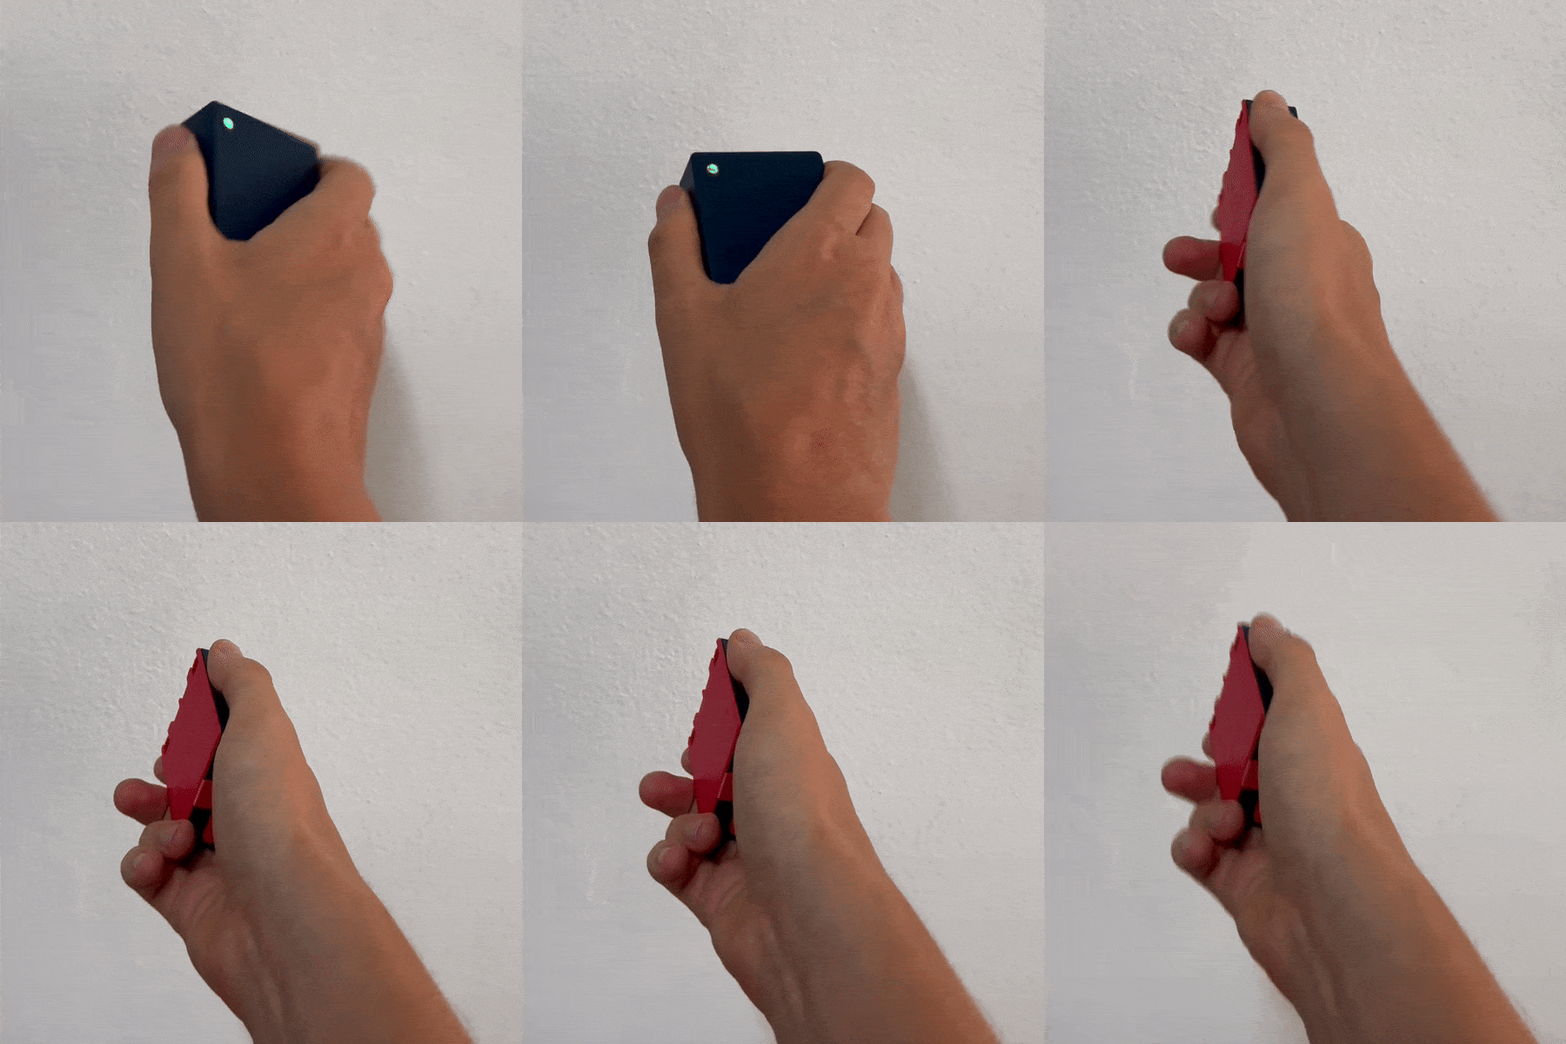
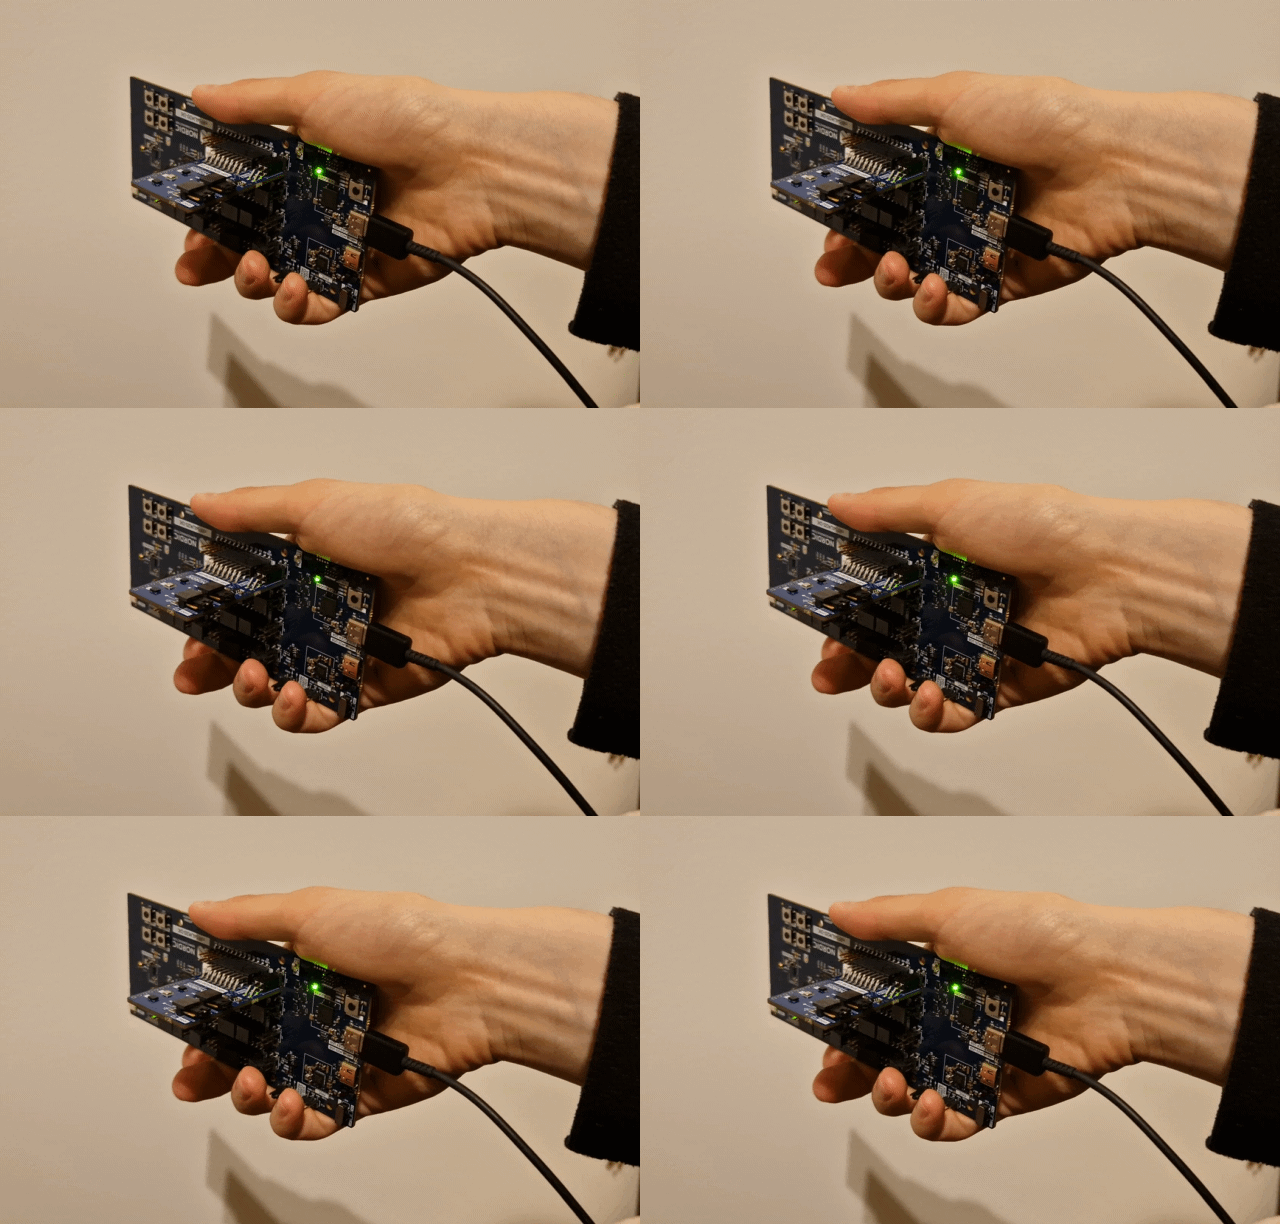
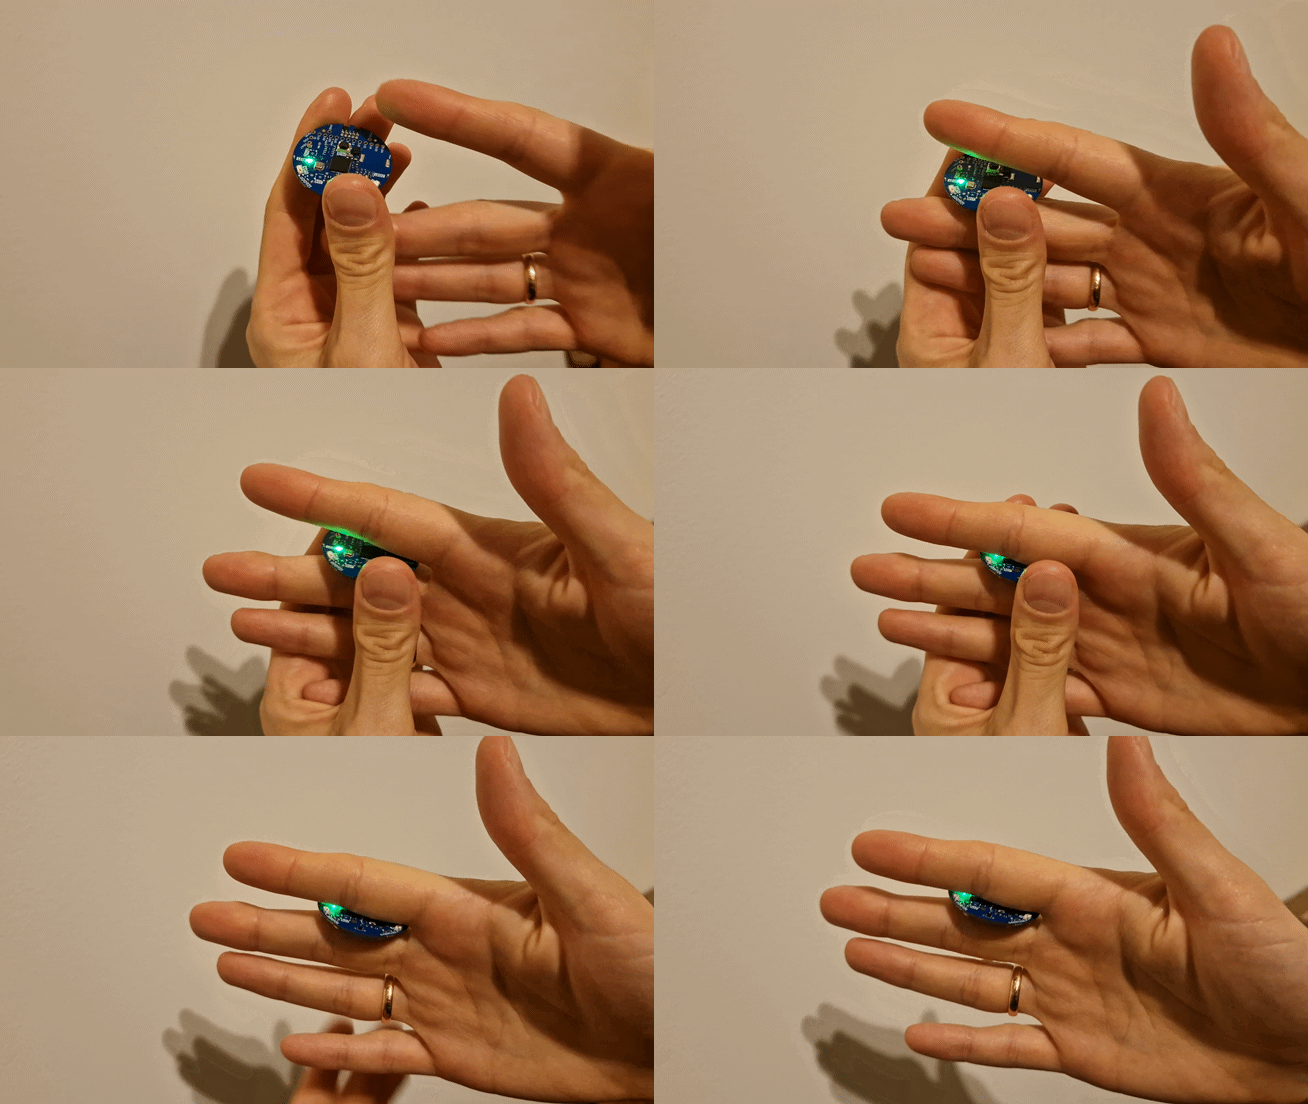
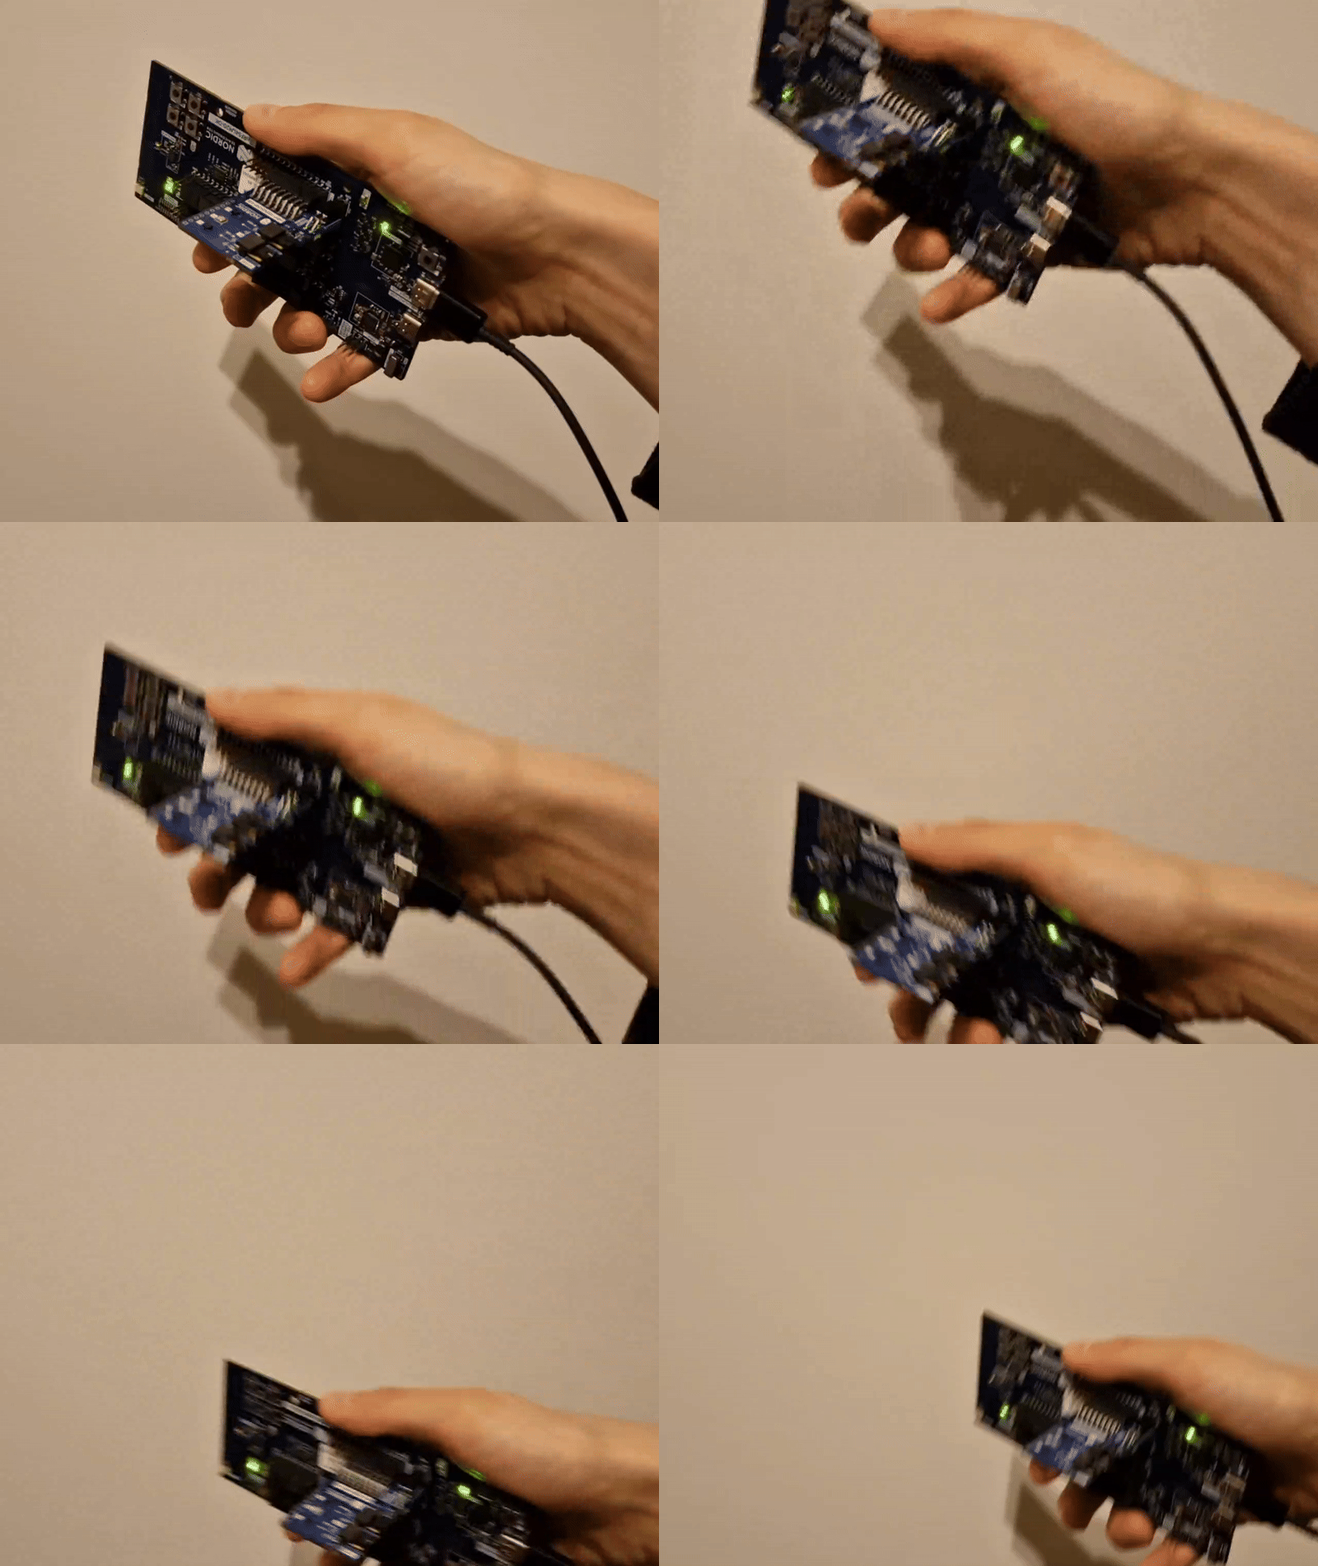
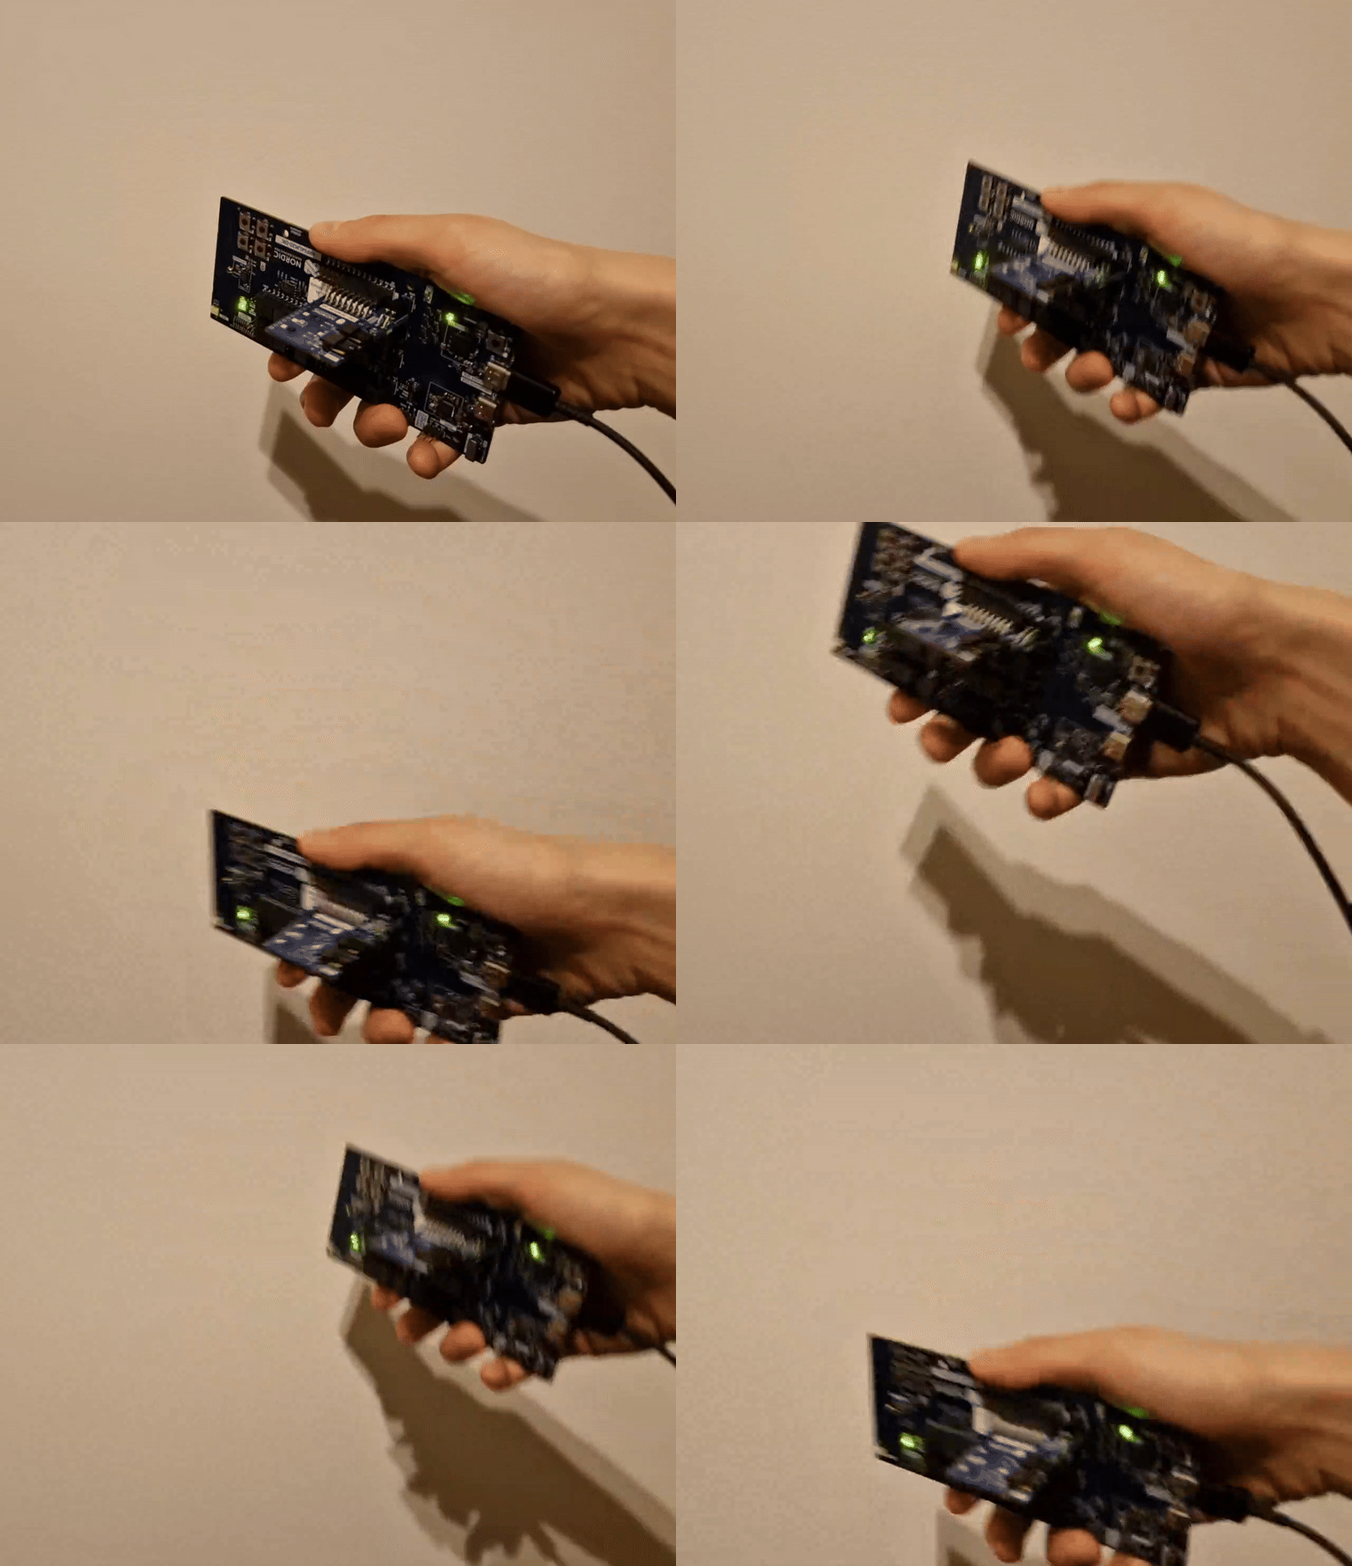
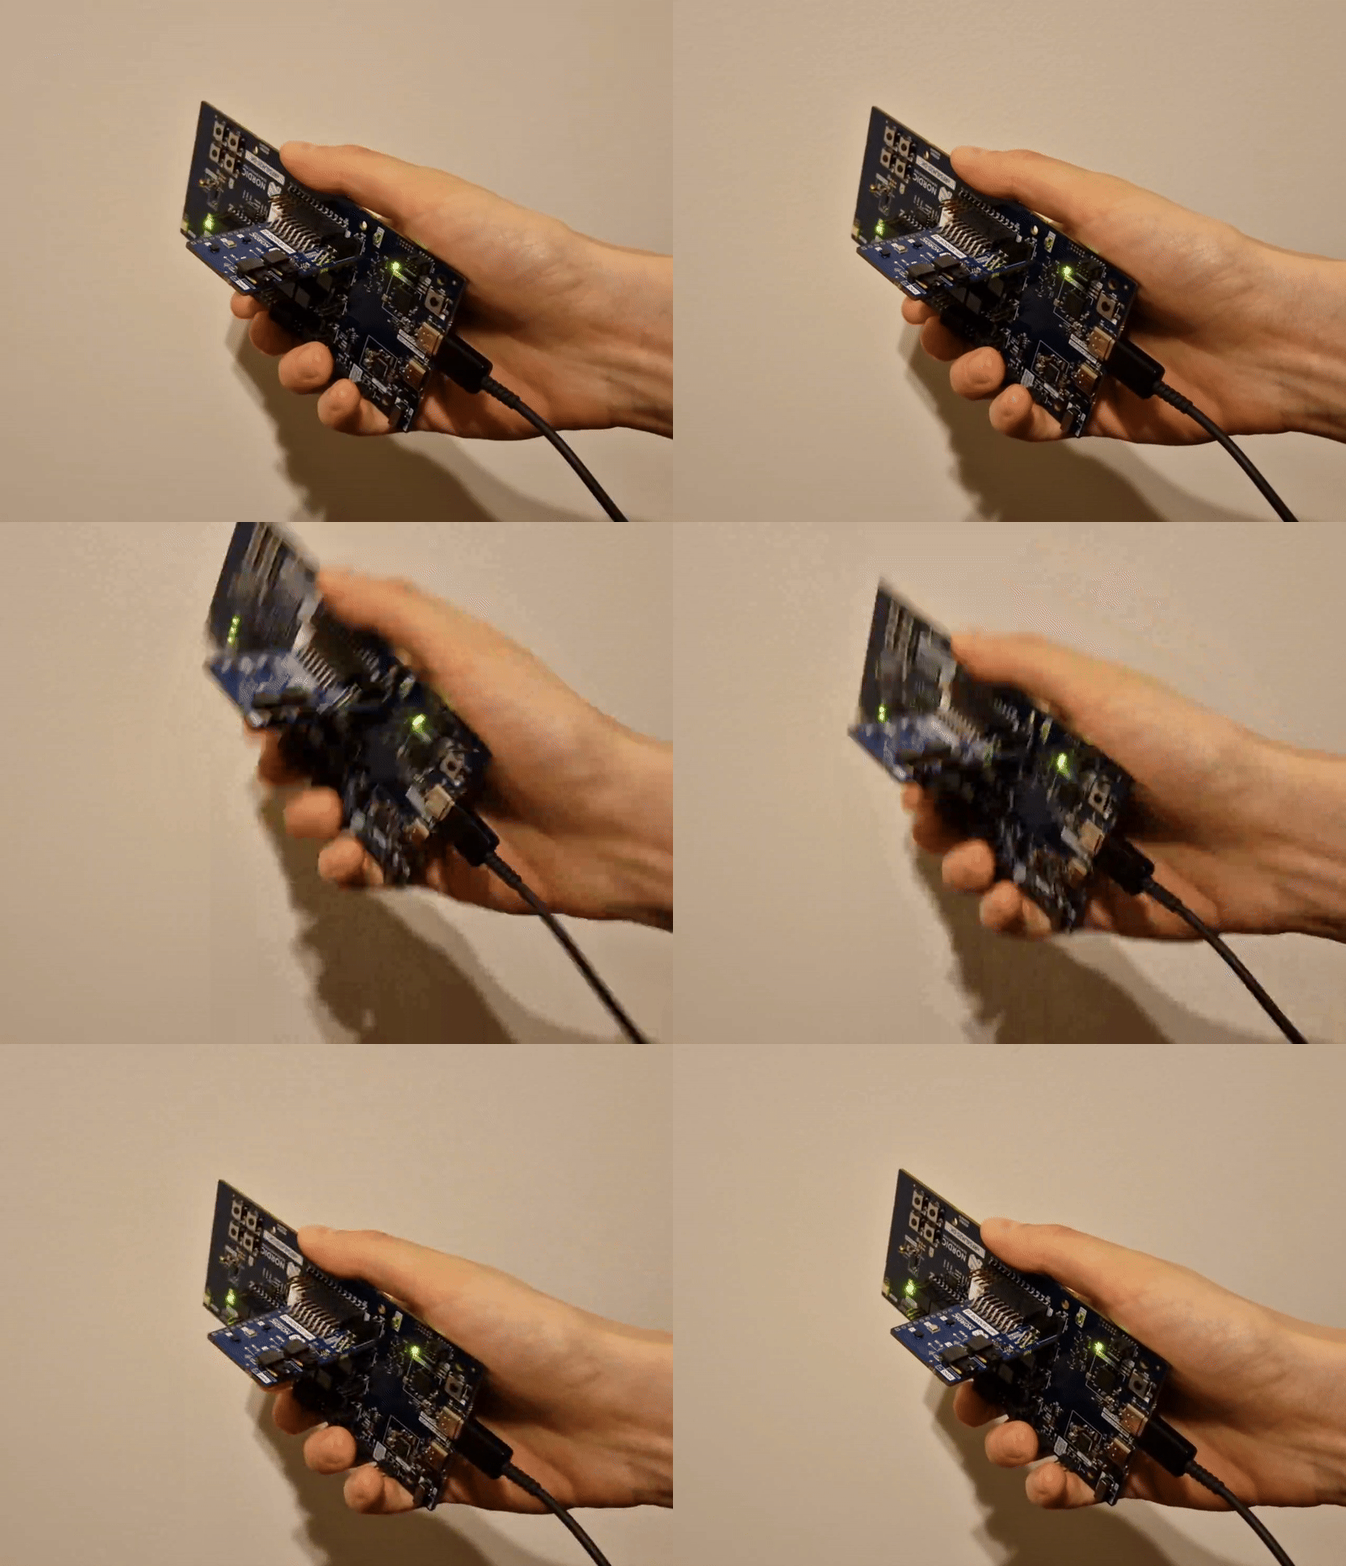
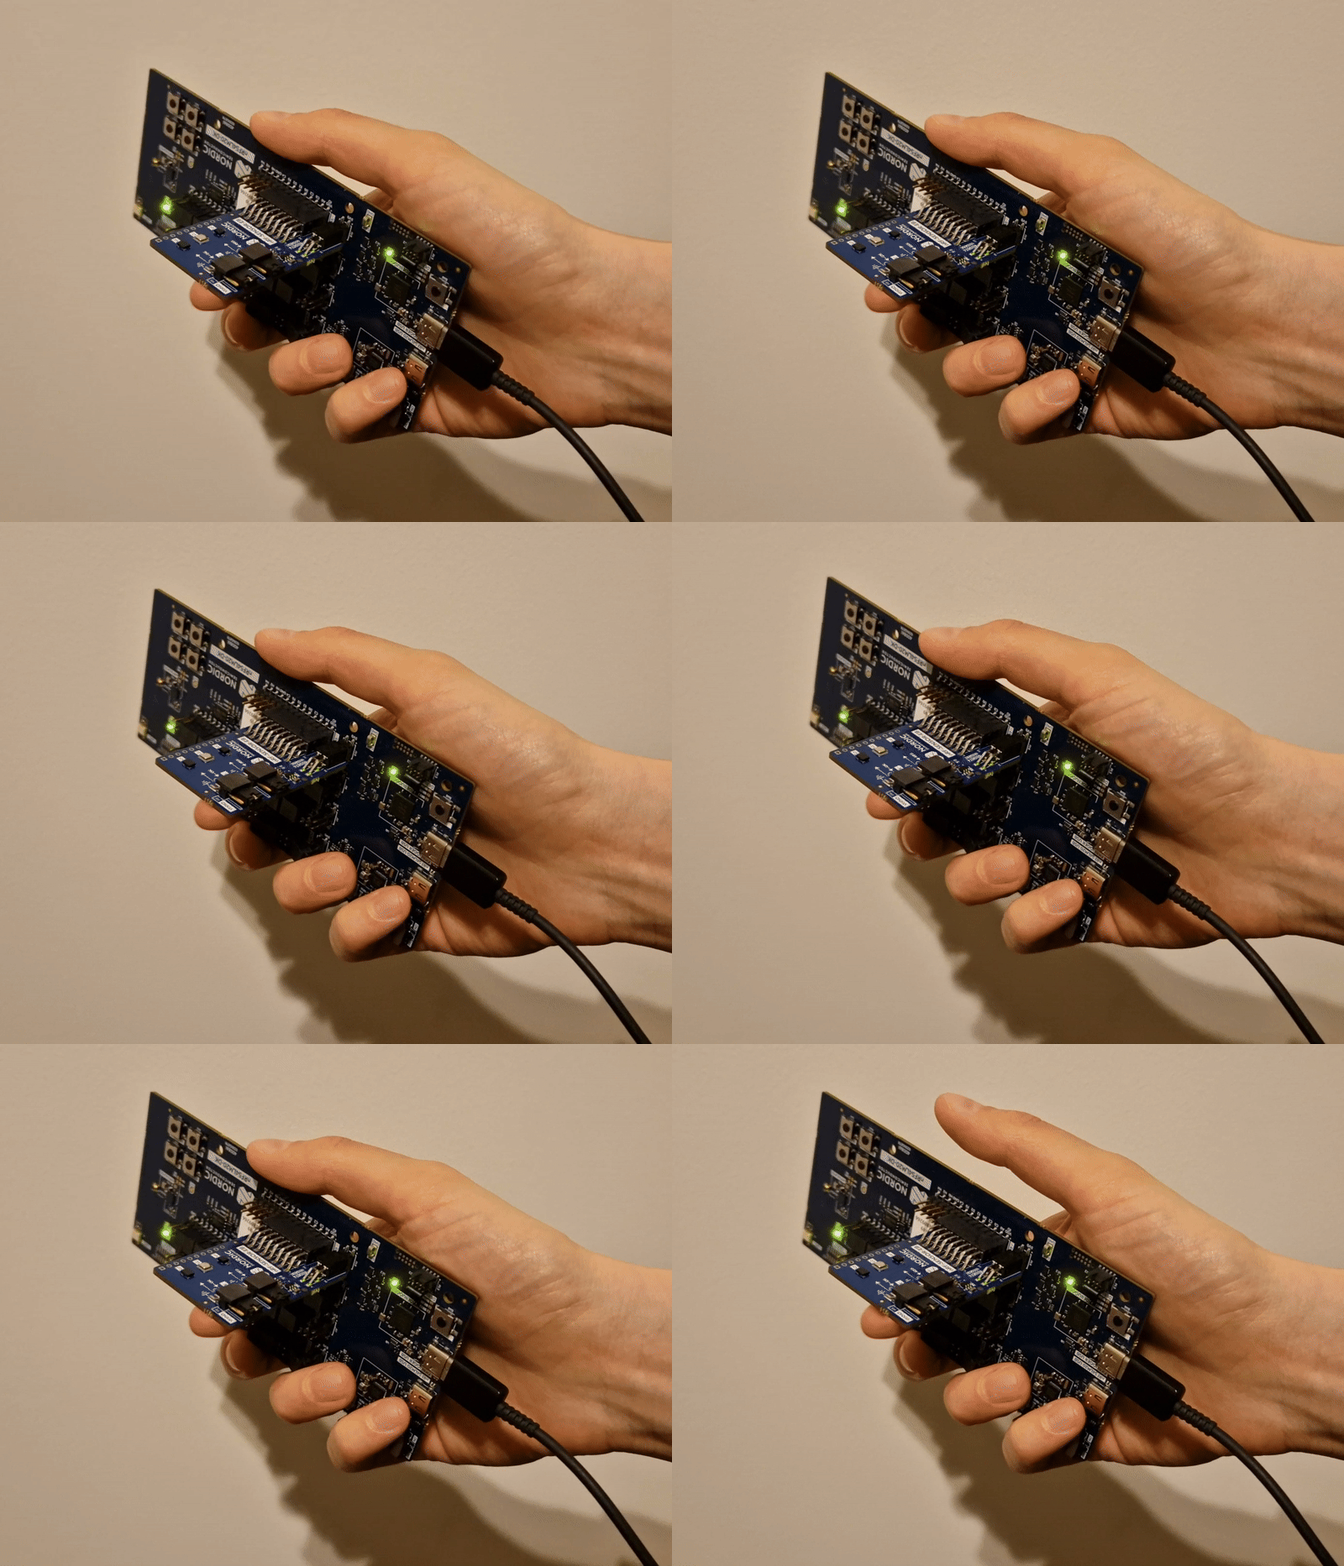
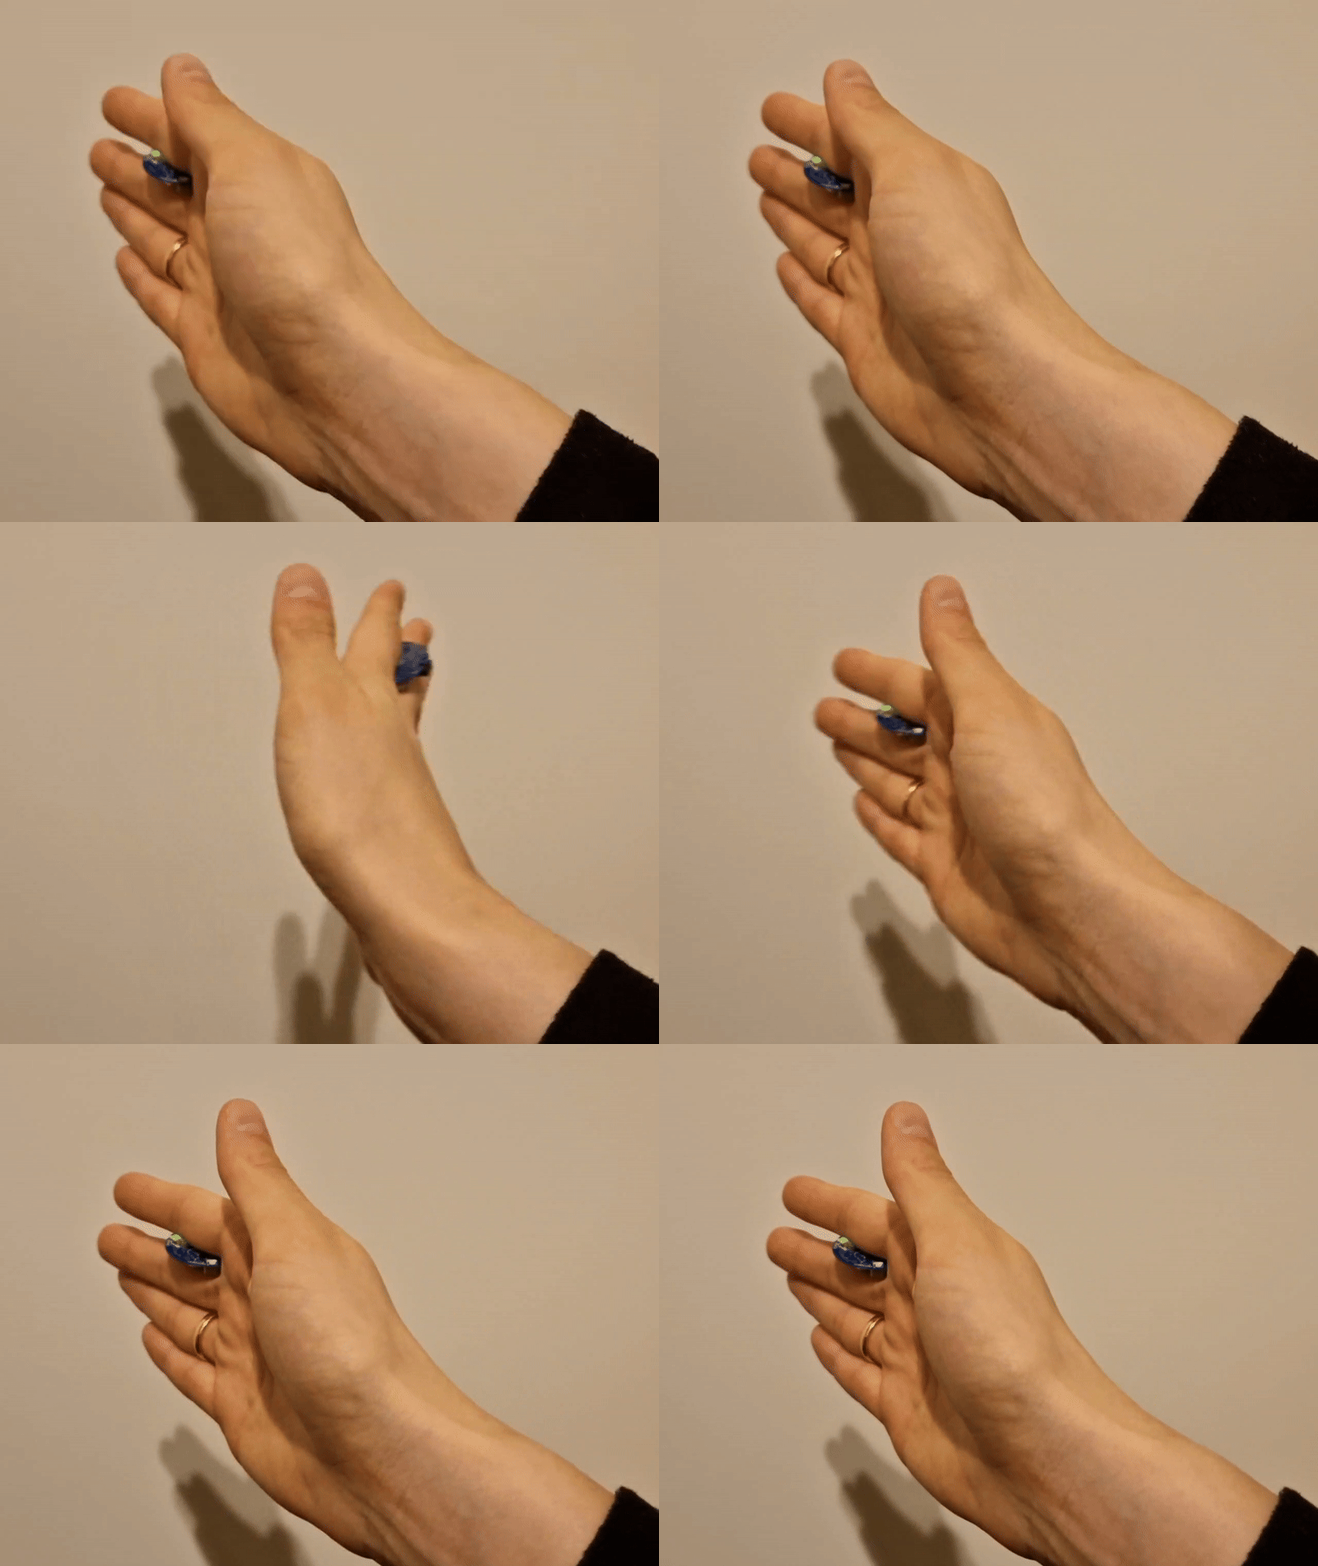
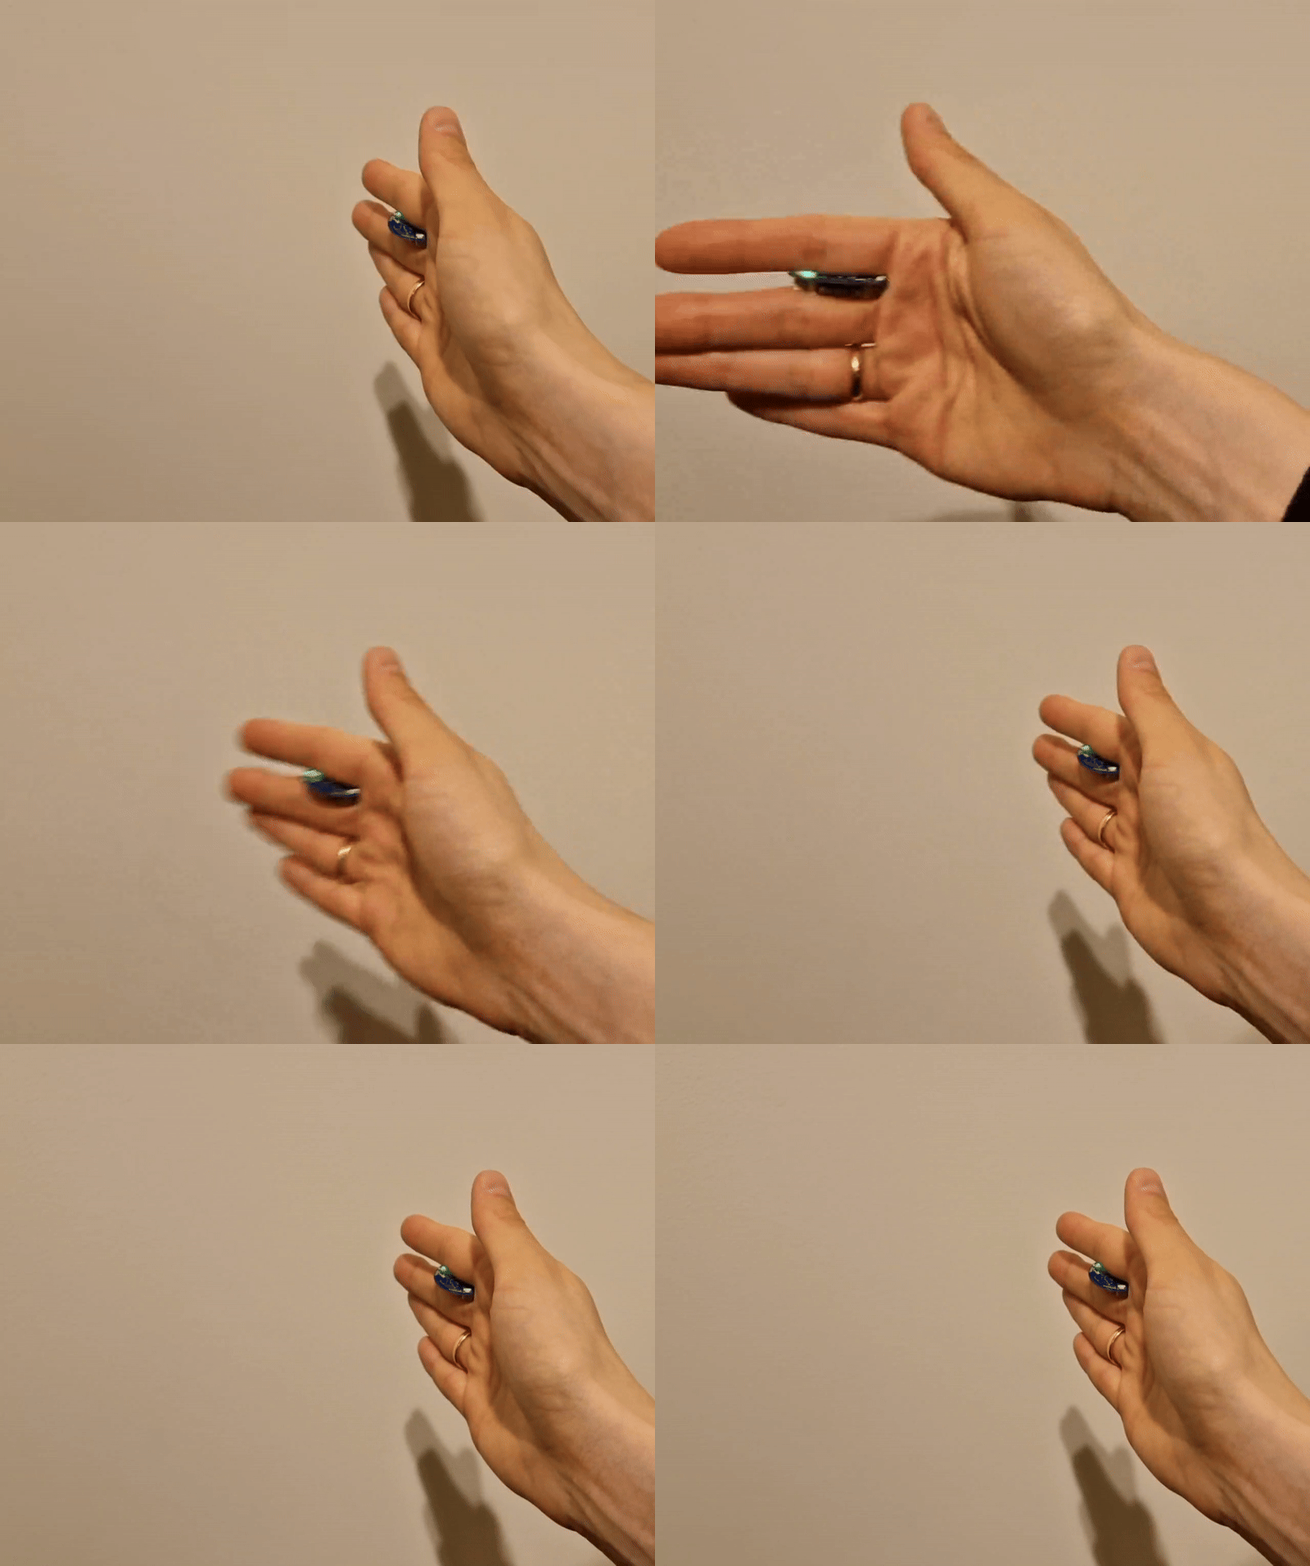
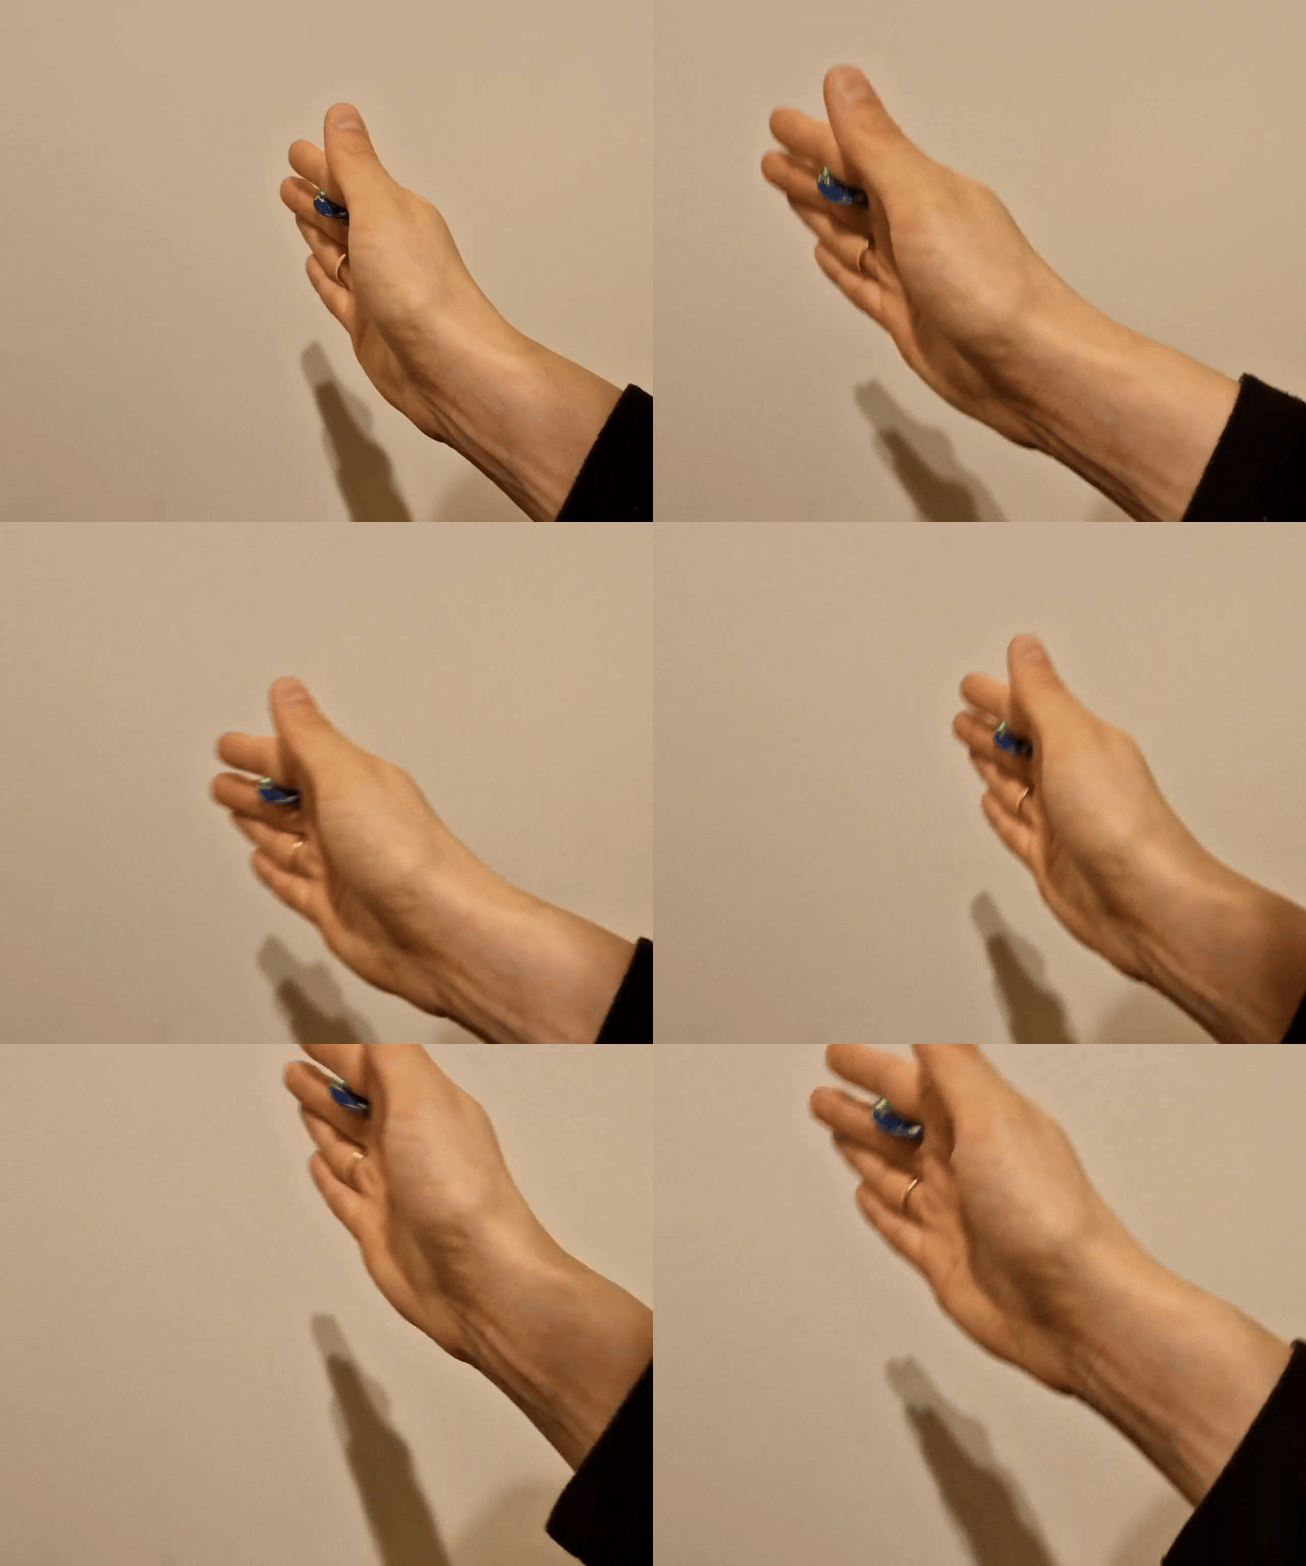
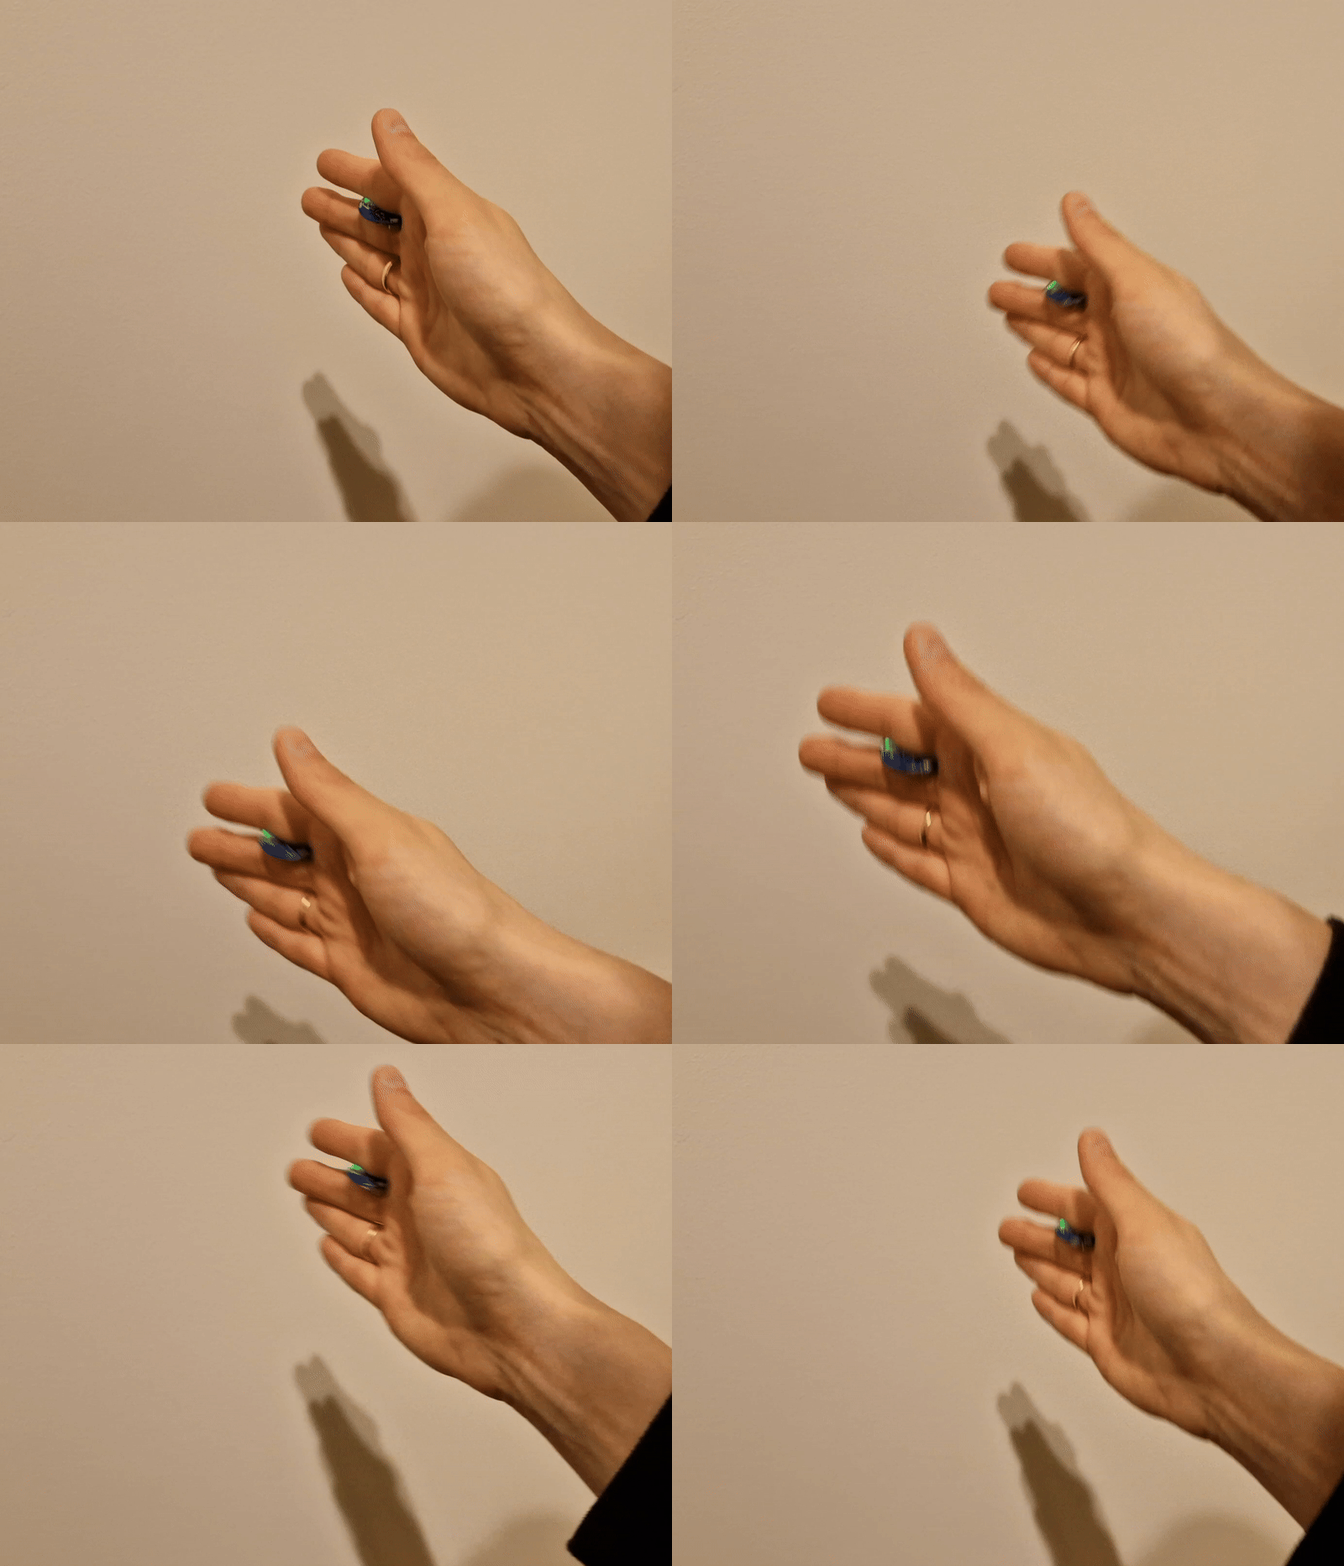
Follow the images below to make gestures. For better recognition, use your wrists more than your whole hand. The gestures are performed with the device in the initial position. Keep in mind the device orientation, as it is important for the recognition to work correctly.
Swipe right |
Swipe left |
|---|---|
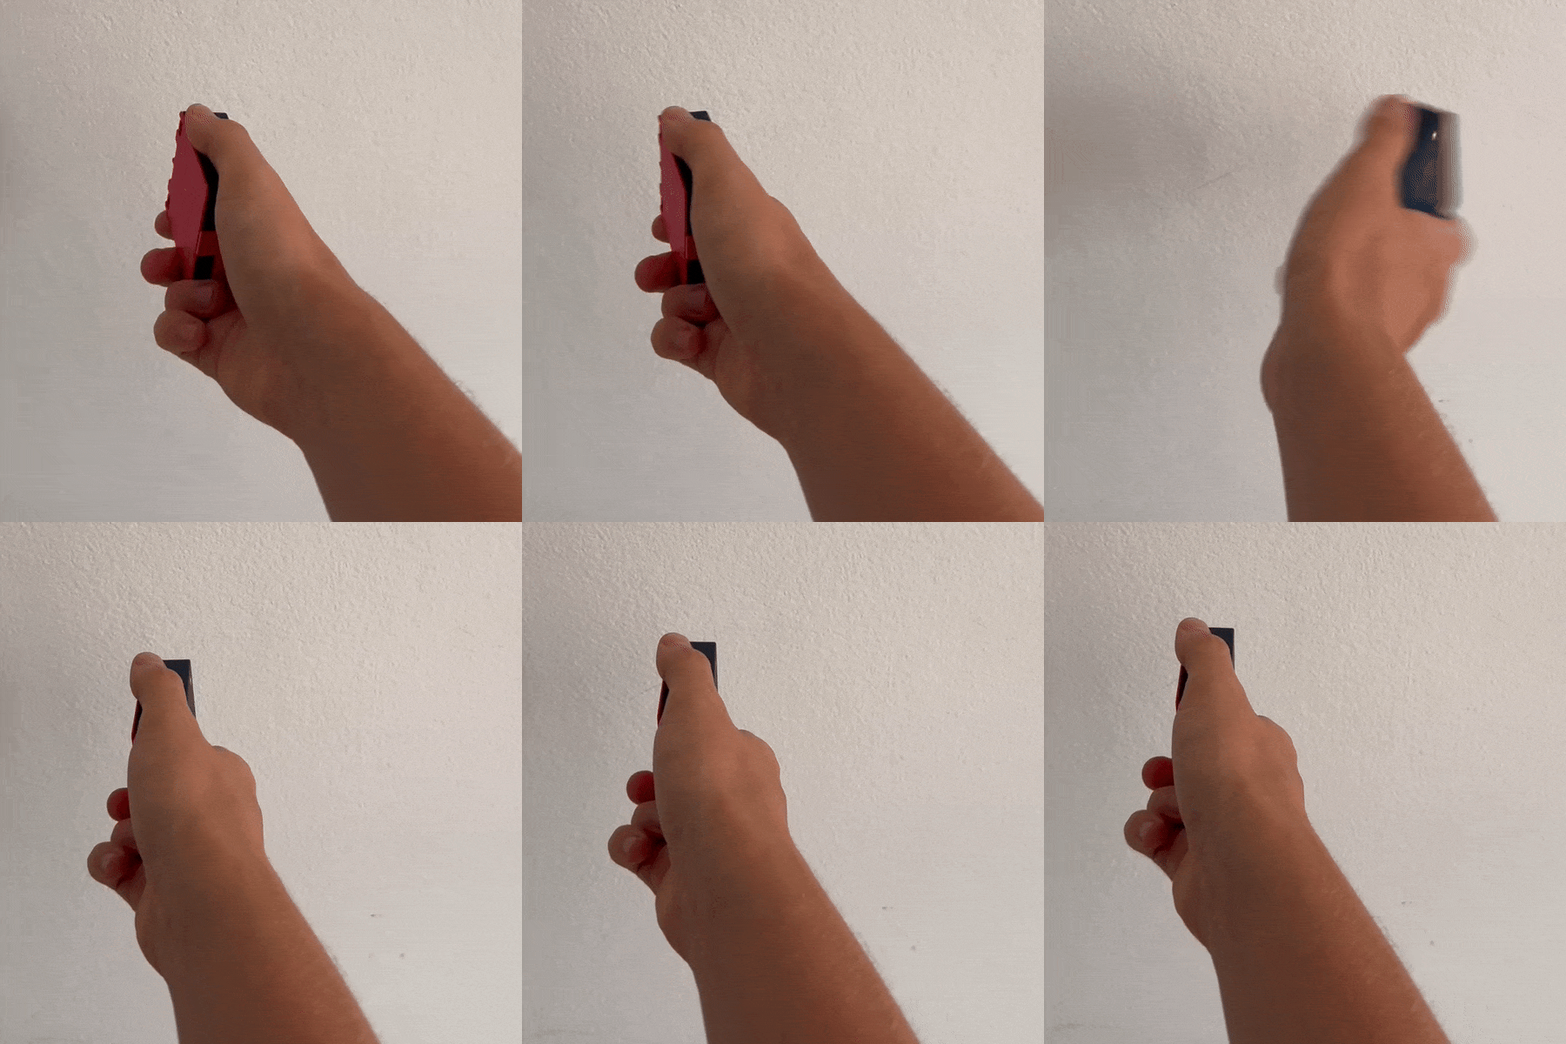
|
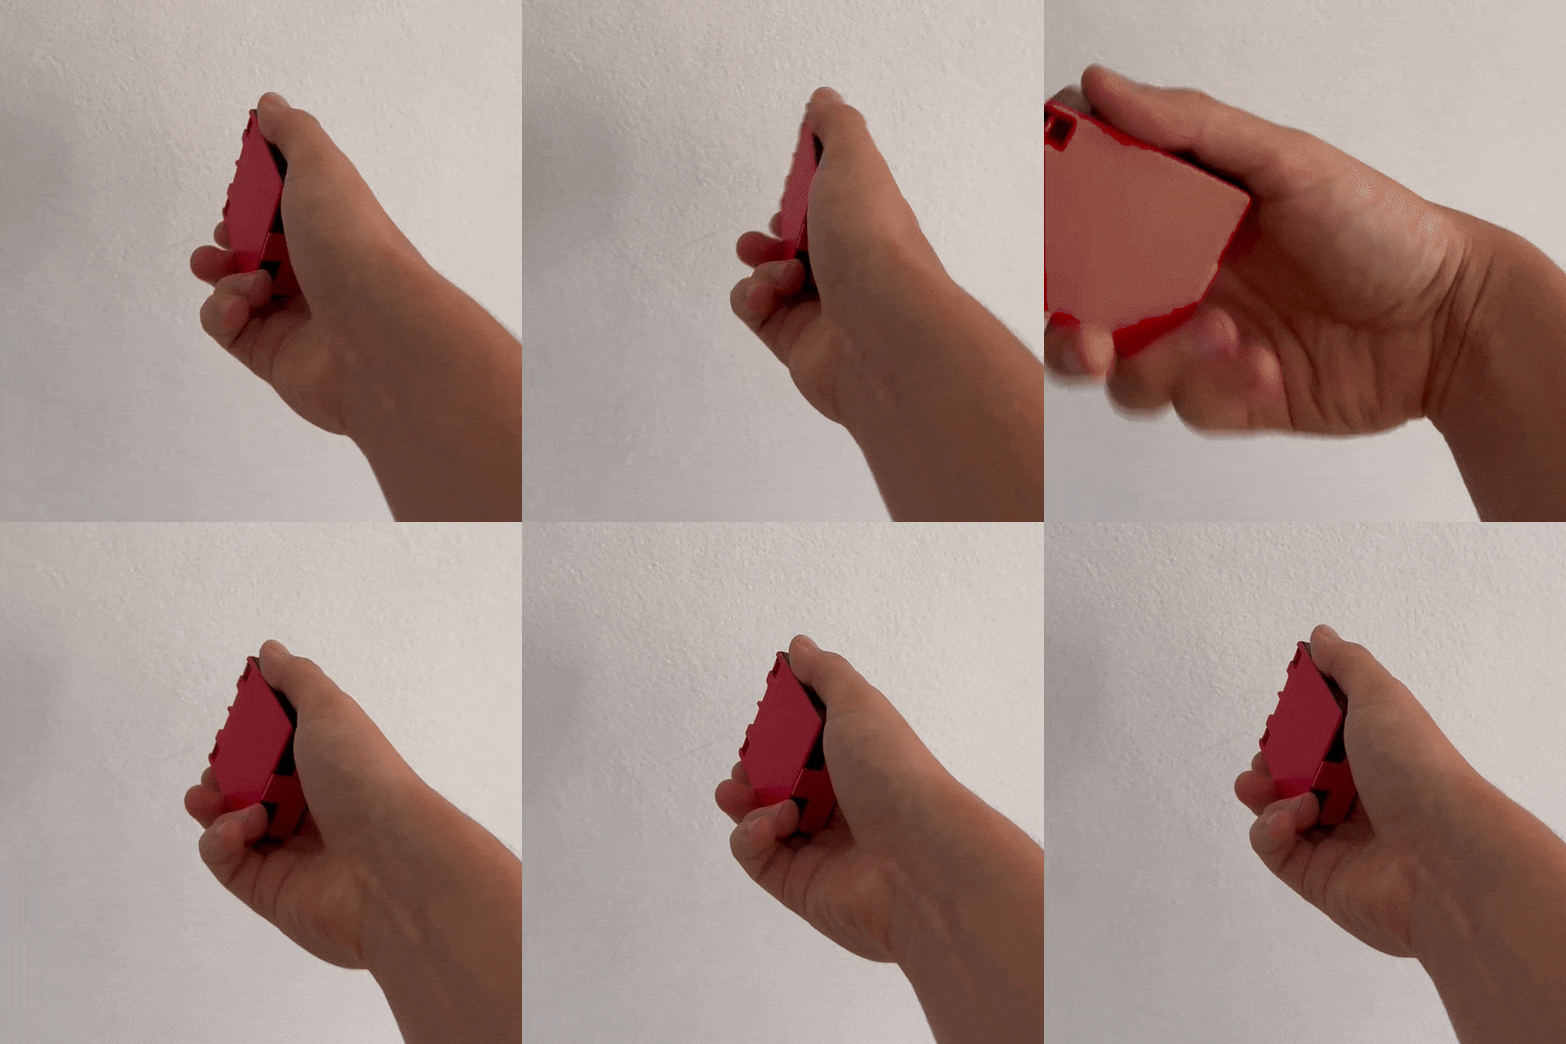
|
Rotation clockwise |
Rotation counter-clockwise |
|---|---|
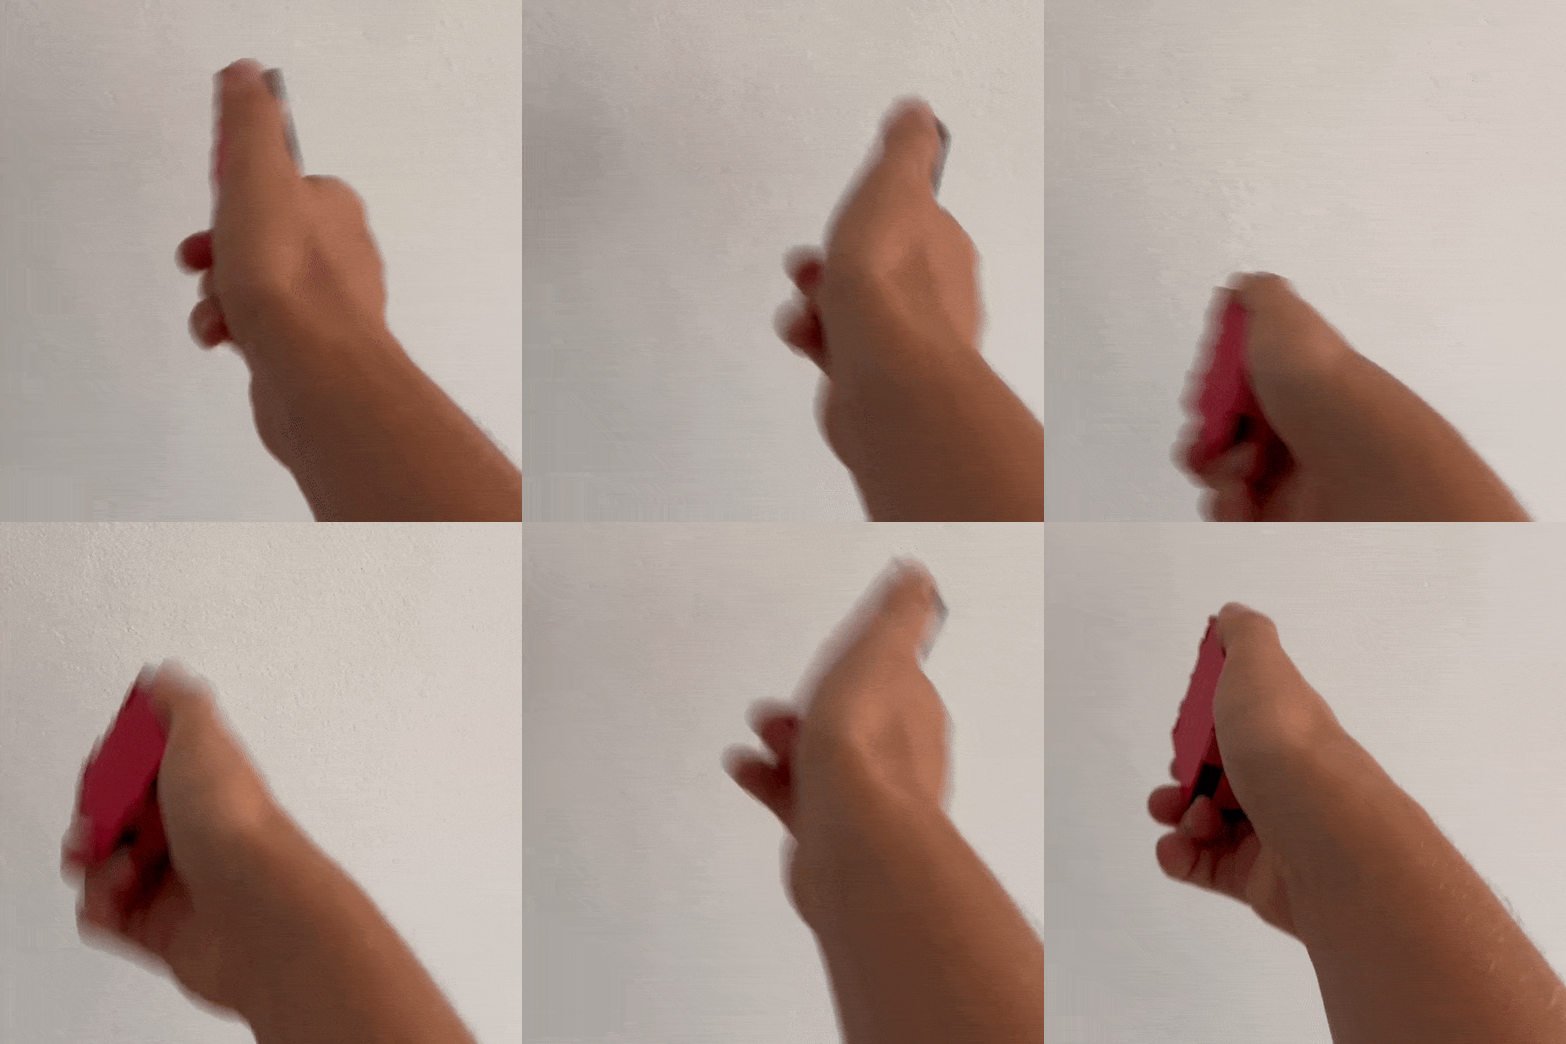
|
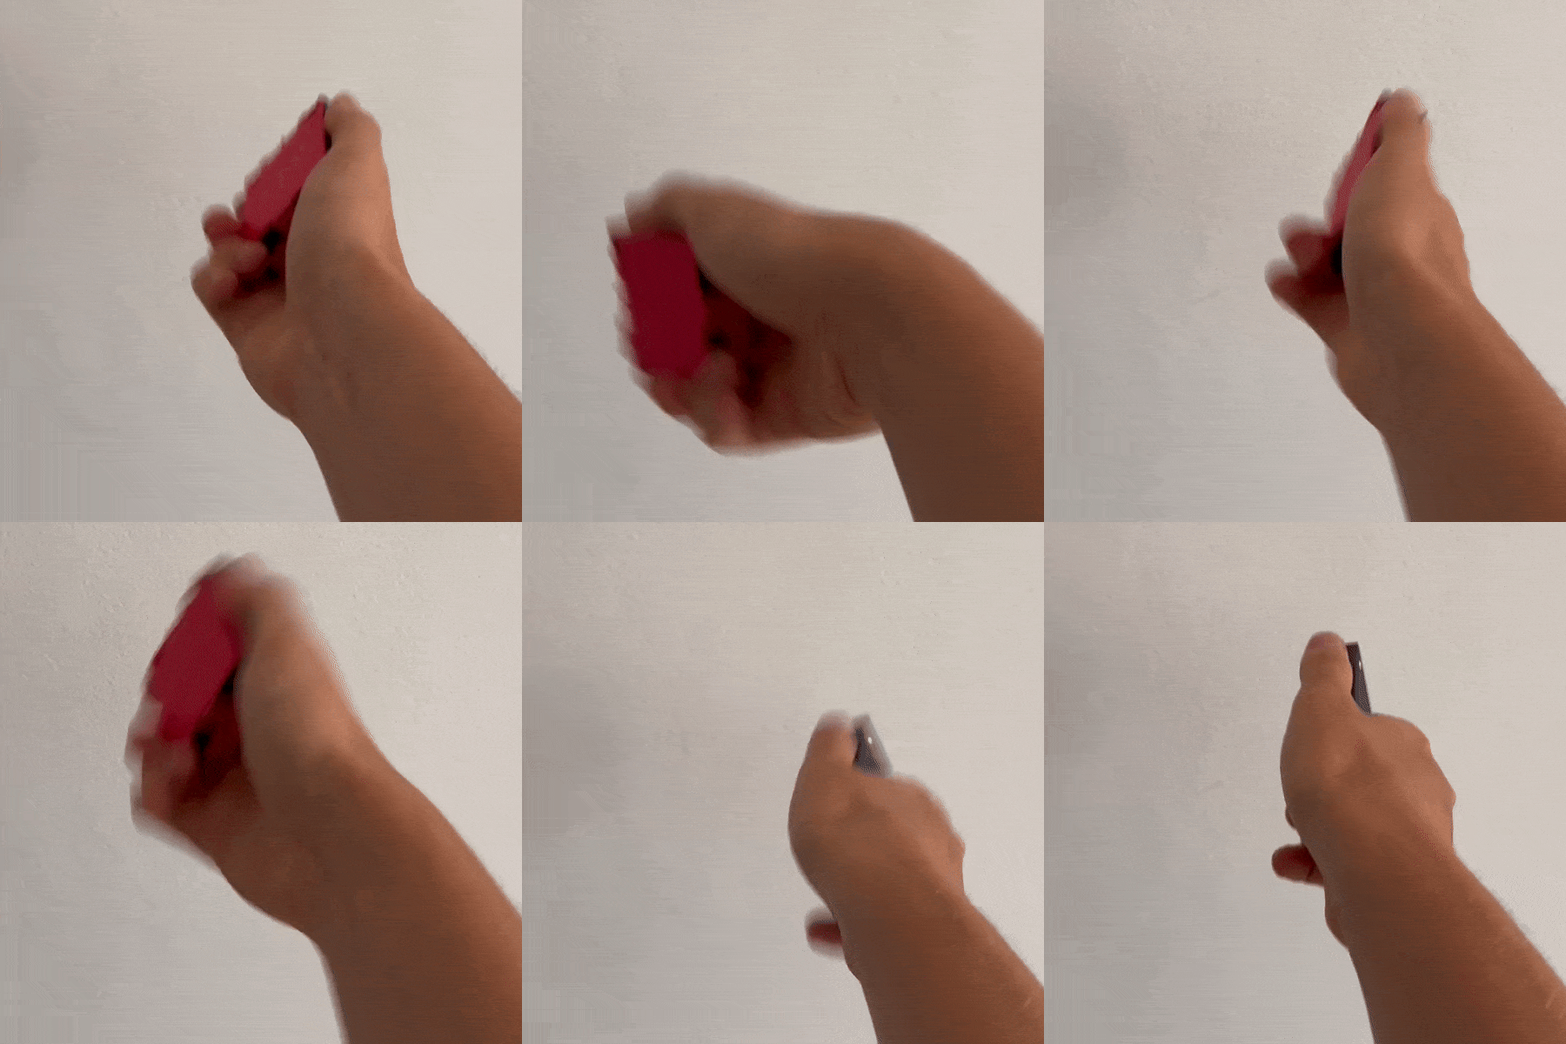
|
Double shake |
Double tap |
|---|---|
|
|
Dependencies
This sample uses the following nRF Connect SDK services:
This sample uses the following Zephyr libraries: