

Edge Impulse: Data forwarder
Note
Starting from the Edge AI Add-on release v2.2.0, this sample is deprecated and will be removed in a future Edge AI Add-on release. It is recommended to base your application on the Data forwarder, which also supports the format accepted by Edge Impulse’s data forwarder.
The Edge Impulse data forwarder sample demonstrates the usage of Edge Impulse’s data forwarder to provide sensor data to Edge Impulse studio when Integrating Edge Impulse with the nRF Connect SDK. The sample forwards simulated accelerometer data generated by Simulated sensor driver.
Requirements
The sample supports the following development kits:
Hardware platforms |
PCA |
Board name |
Board target |
|---|---|---|---|
PCA10184 |
|
||
PCA10156 |
|
Overview
The sample periodically performs the following operations:
Reads data from sensor. The sample reads simulated acceleration measurements for X, Y, and Z axes.
Forwards the data through UART using the protocol specified by Edge Impulse’s data forwarder.
Note
The sample uses 2 separate UARTs to forward the sensor data and to provide console output (logs) at the same time.
See Edge Impulse website for more information about the Edge Impulse platform.
Configuration
See Configuring and building for information about how to permanently or temporarily change the configuration.
Setup
Before running the sample, you must complete the following steps:
Prepare your own project using Edge Impulse studio external web tool. See Edge Impulse integration for more information about starting using the tool.
Building and running
Testing
After programming the sample to your development kit, complete the following steps to test it:
Connect the kit to the computer using a USB cable. The kit is assigned a serial port. Serial ports are referred to as COM ports on Windows, /dev/ttyACM devices on Linux, and /dev/tty devices on macOS. To list Nordic Semiconductor devices connected to your computer together with their serial ports, open a terminal and run the
nrfutil device listcommand. Alternatively, check your operating system’s device manager or its equivalent.Connect to the kit with a terminal emulator (for example, the Serial Terminal app). See Testing and optimization for the required settings and steps. Connect to the serial device printing console output. It can be identified by output similar to the following:
*** Booting nRF Connect SDK v3.2.0-5dcc6bd39b0f ***
*** Using Zephyr OS v4.2.99-a57ad913cf4e ***
The other UART port is used to forward the sensor data. Do not leave it open in a terminal application, as it will interfere with
edge-impulse-data-forwarder. This UART device can be identified by output similar to the following:1.28,1.28,1.28 2.53,2.53,2.53 3.77,3.77,3.77 5.00,5.00,5.00 6.20,6.20,6.20 7.39,7.39,7.39 8.54,8.54,8.54 9.66,9.66,9.66 10.74,10.74,10.74 11.78,11.78,11.78 12.77,12.77,12.77 13.71,13.71,13.71
Run the
edge-impulse-data-forwardercommand line tool. The tool connects the device to your Edge Impulse project. When prompted about UART port, provide the port on which the sensor data is forwarded, not the one containing console logs. See Edge Impulse’s data forwarder documentation for a guide.Trigger sampling data from the device using Edge Impulse studio:
Go to the Data acquisition tab.
In the Collect data panel, set the desired values and click Start sampling.
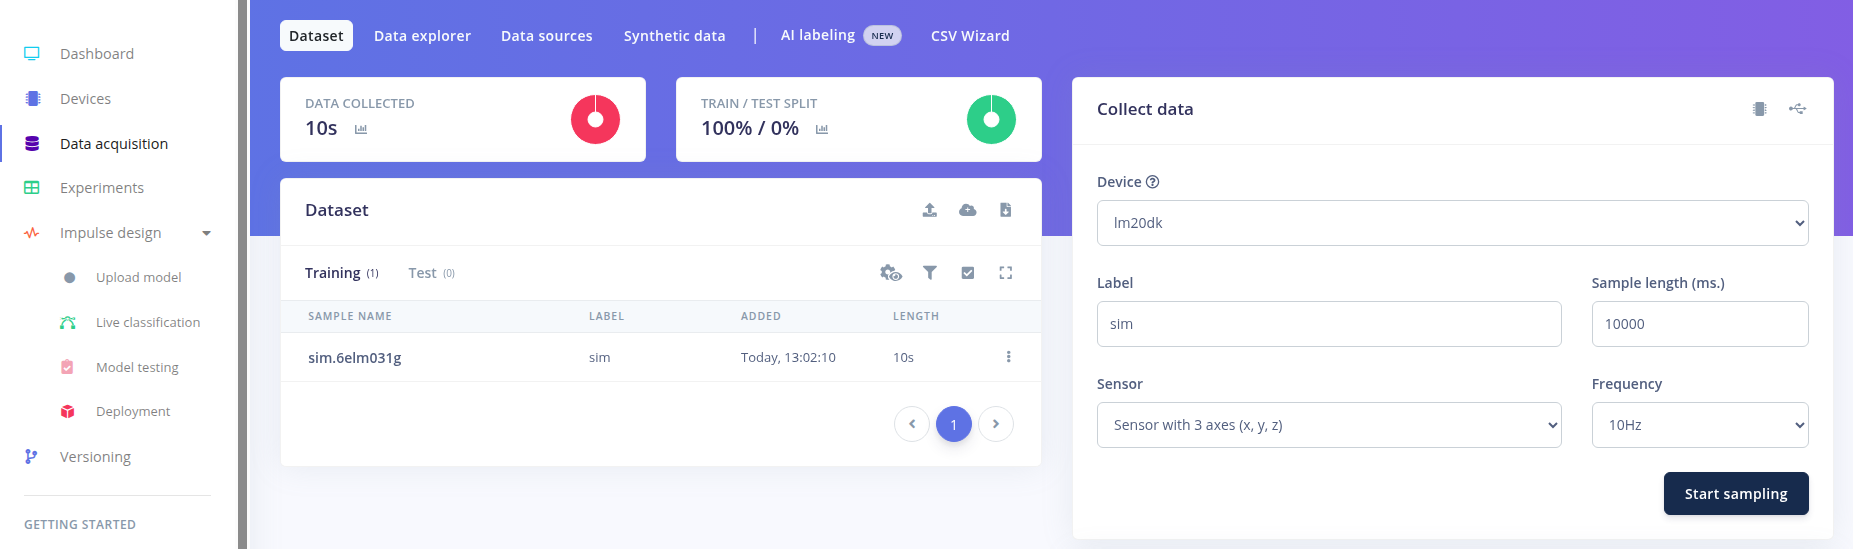
Sampling under Data acquisition in Edge Impulse studio
Observe the received sample data on the raw data graph under the panel. For the default sample configuration, you should observe sine waves.
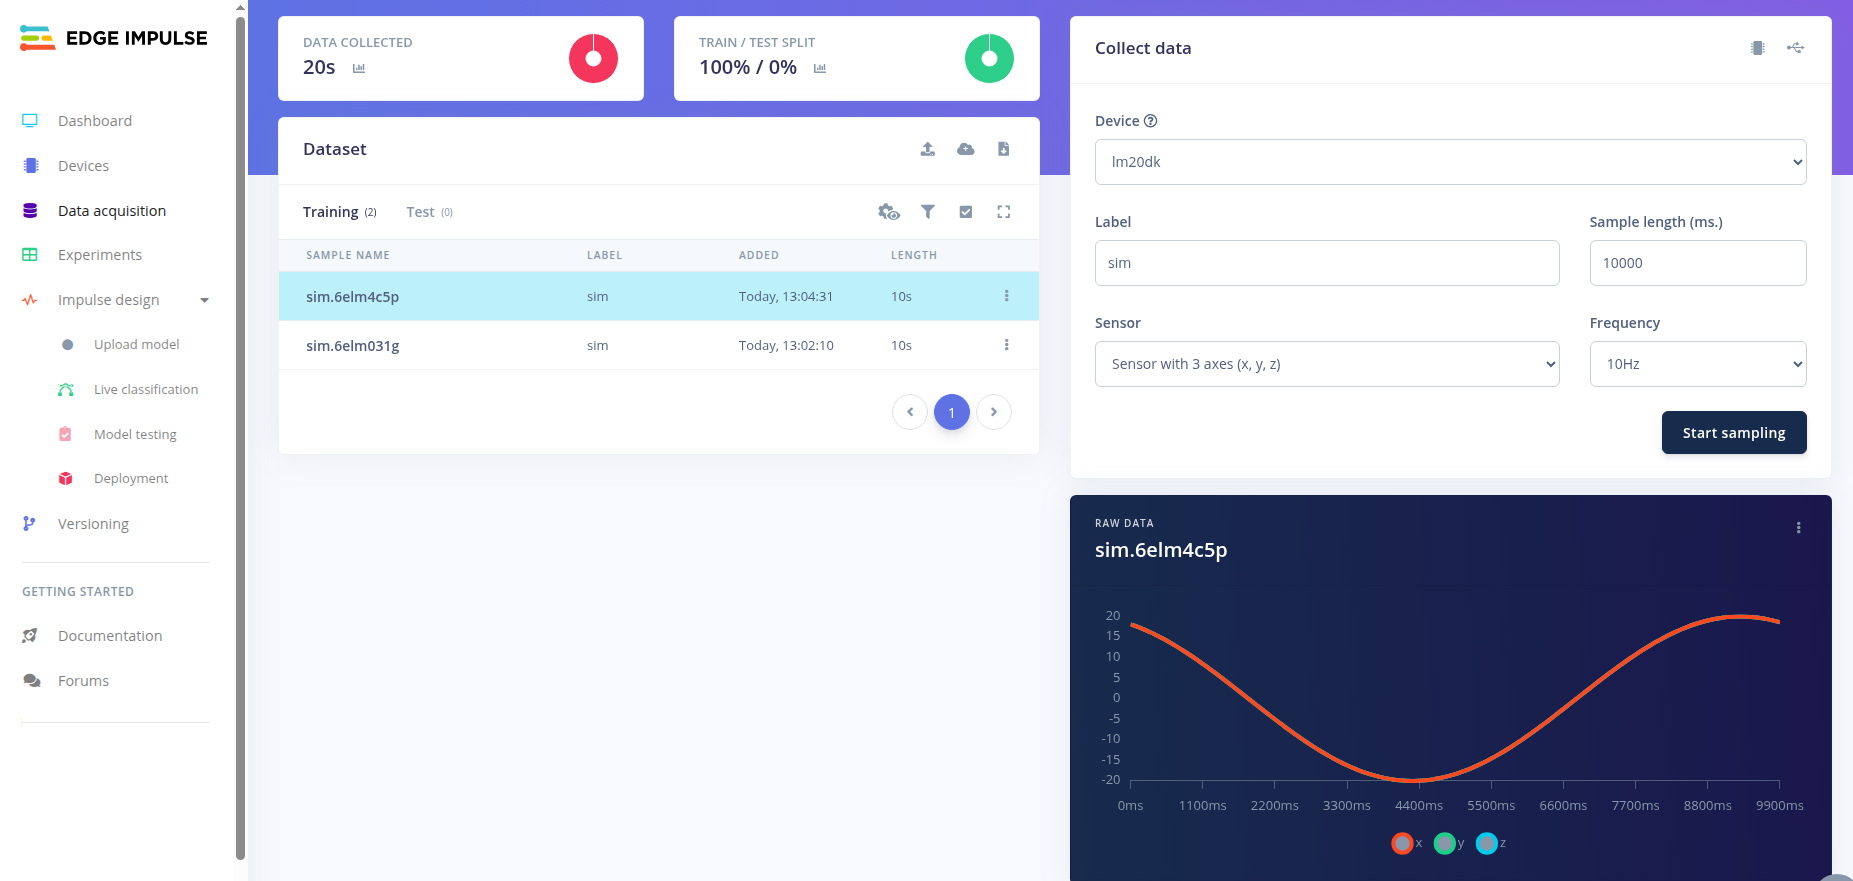
Sampling example
Dependencies
This sample uses the following nRF Connect SDK drivers:
In addition, it uses the following Zephyr drivers:
UART driver