Configuring and building a sample
Follow these steps to create your first build configuration for a sample:
Verify the configuration of the selected sample.
You will need the following information:
The nRF Connect SDK version and toolchain version that the current Bare Metal release is based on: v3.3.0
The board target onto which you want to program the firmware (see the Requirements section of each sample description).
This information will be used in the steps that follow.
Note
The following screenshots show the Hello SoftDevice sample as reference.
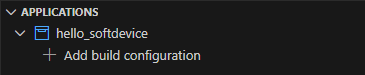
In the Applications View, click Add build configuration.
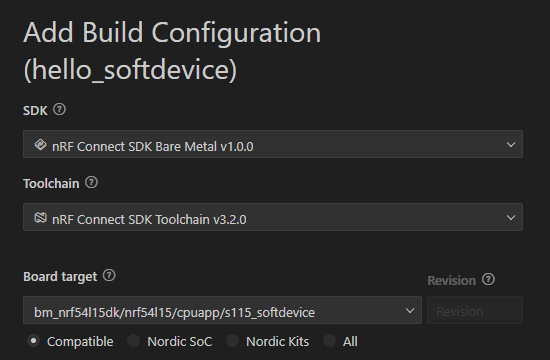
Add Build Configuration
This opens the Add Build Configuration page.
Add Build Configuration page - fragment
For your very first build configuration, double-check that the values in the nRF Connect SDK and toolchain menus match the expected versions.
Select the board target onto which you want to program the firmware.
For your very first build configuration, select a compatible board target from the drop-down menu.
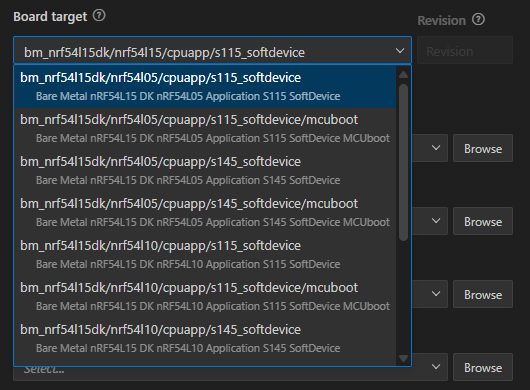
Board target drop-down menu
If the sample supports Kconfig fragments, you can configure a fragment by selecting
prj.conffrom the Base configuration files (Kconfig fragments) drop-down menu.Then, from the Extra Kconfig fragments drop-down menu, select the target fragment.
Leave all the other options as default.
For more details on how to configure builds, see How to build an application in Visual Studio Code extension documentation.
Click Generate and Build.
The Visual Studio Code extension generates the configuration file and triggers the build process, which can take some time. You can monitor its progress in the notification that appears.
When the process is complete, the Actions View appears. In this View, you can trigger the build process again, flash the built application, start a debug session (if debug options were set when building), or generate a memory report. The build files appear in the build’s Details View, which is named after your application.
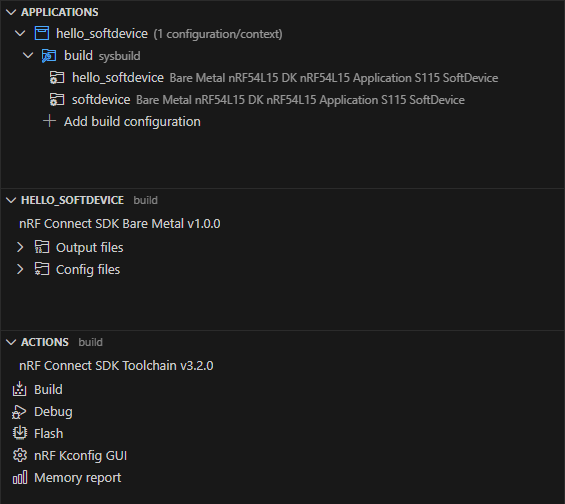
Build configuration files
When selecting simple board variants, the SoftDevice hex file is automatically included. When the build process is completed, the Applications View lists the SoftDevice in addition to the main application.
Note
This is also the case for the peripheral samples where the SoftDevice is not needed. This is because the SDK does not include board targets without the SoftDevice, in order to reduce complexity.
When the process is complete, the Actions View appears. In this View, you can trigger the build process again, flash the built application, start a debug session (if debug options were set when building), or generate a memory report. The build files appear in the build’s Details View, which is named after your application.
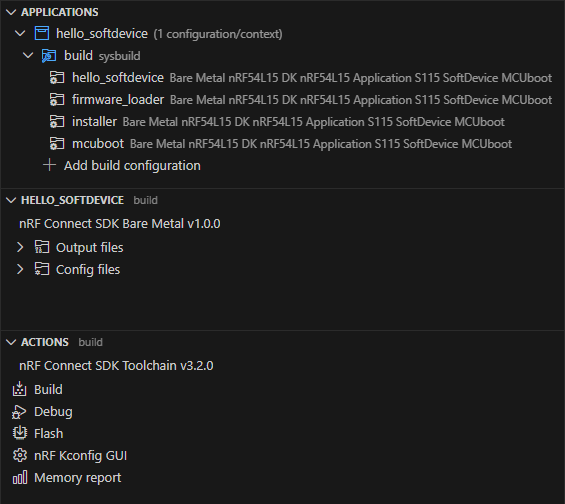
Build configuration files with MCUboot board variant
When selecting an MCUboot board variant, the configuration of the memory includes both MCUboot and single-bank DFU. This will automatically include and compile the extra images needed for the partitions. When the build process is completed, the Application view will list all images.
For details on how the memory partitions are organized when including MCUboot and DFU, see Memory Partitioning for DFU.
For how to program your board and run the images, see Running the DFU process.