
Connecting the nRF93M1 DK to nRF Cloud
The nRF Cloud client runs in the module firmware. You can provision a device and use cloud services with AT commands, without building a host application that includes a cloud library.
Transport is CoAP over DTLS 1.2, which keeps message overhead small and works with cellular power saving.
Each cloud transaction emits a %COAP: unsolicited result code carrying the transport-layer status for that request.
Requirements
An nRF93M1 DK, with the supplied LTE antenna attached and the supplied SIM inserted.
An nRF Cloud account.
nRF Util and the Serial Terminal app from nRF Connect for Desktop.
A working network connection. See Verifying registration.
Connect USB1 on the DK to your computer, then identify the AT command port:
nrfutil device list
Open the vcom1 port at 115200 bps.
This is the port that communicates with the module.
Device identity
Each device presents two stable identities and two short-lived credentials.
Command |
What it returns |
|---|---|
|
A 36-character device UUID, generated once and stored in non-volatile memory |
|
A P-256 ECC public key in Base64-DER form. The private key is generated on-chip and never leaves the device. |
|
A signed registration JWT, used during onboarding |
|
A short-lived authentication JWT, valid for approximately one hour |
Important
Device system time must be valid for a JWT to be accepted by the cloud. If authentication fails immediately after a cold boot, check time before investigating anything else.
Provisioning a device
Onboarding needs your nRF Cloud Team ID, then a UUID and registration JWT read from the device.
Register for an nRF Cloud account.
Find your Team ID.
Open the Legacy App from the bottom-left panel.
Open the top-right menu.
Select Team and note the Team ID displayed at the top of the screen.
Return to the new nRF Cloud experience by clicking NEW EXPERIENCE in the bottom-left panel.
Read the device credentials (
AT%DEVICEUUIDandAT%REGJWT="<team-id>") over the serial terminal, substituting your Team ID. The following output is displayed:AT%DEVICEUUID %DEVICEUUID: xxxxxxxx-xxxx-xxxx-xxxx-xxxxxxxxxxxx OK AT%REGJWT="<team-id>" %REGJWT: xxxxx.xxxxx.xxxxx OK
In nRF Cloud:
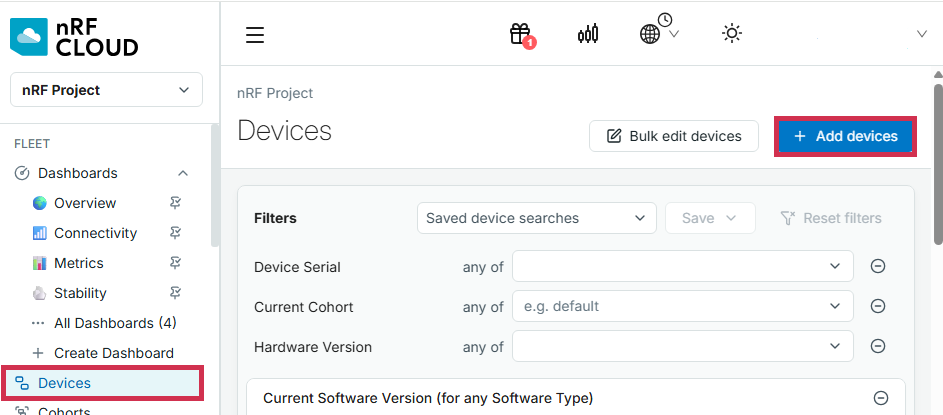
Navigate to Fleet.
Select Devices.
Click on Add Devices:
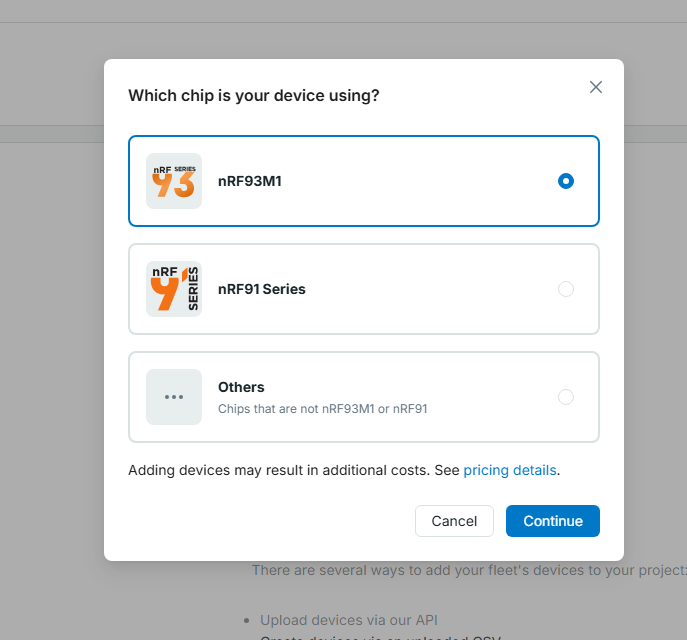
Choose the nRF93M1 from the device chooser:
Enter the UUID and the registration JWT from step 3, then review and confirm.
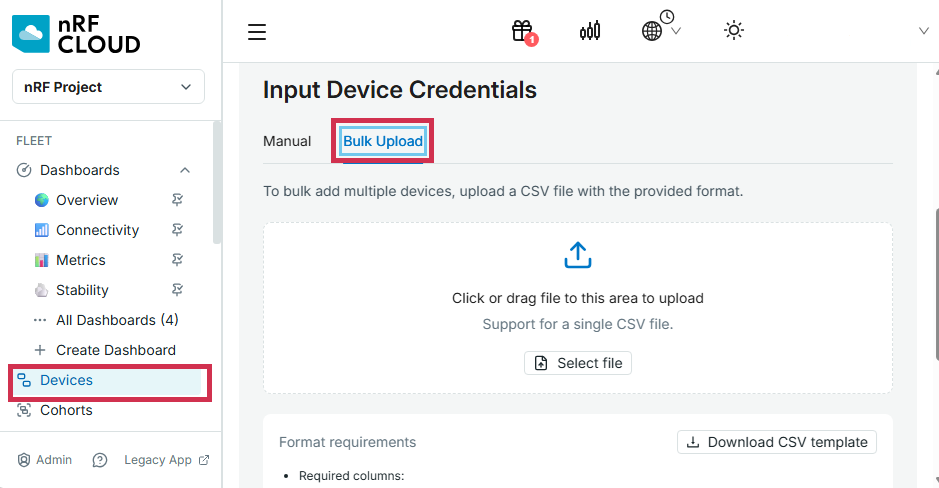
You can upload up to 1000 nRF93M1 devices by using the Bulk Upload feature with a CSV file. Each line in the CSV must contain comma-separated fields in the format: deviceId, onboardingToken.
Confirm the device appears in the device list.
This might take a few seconds.
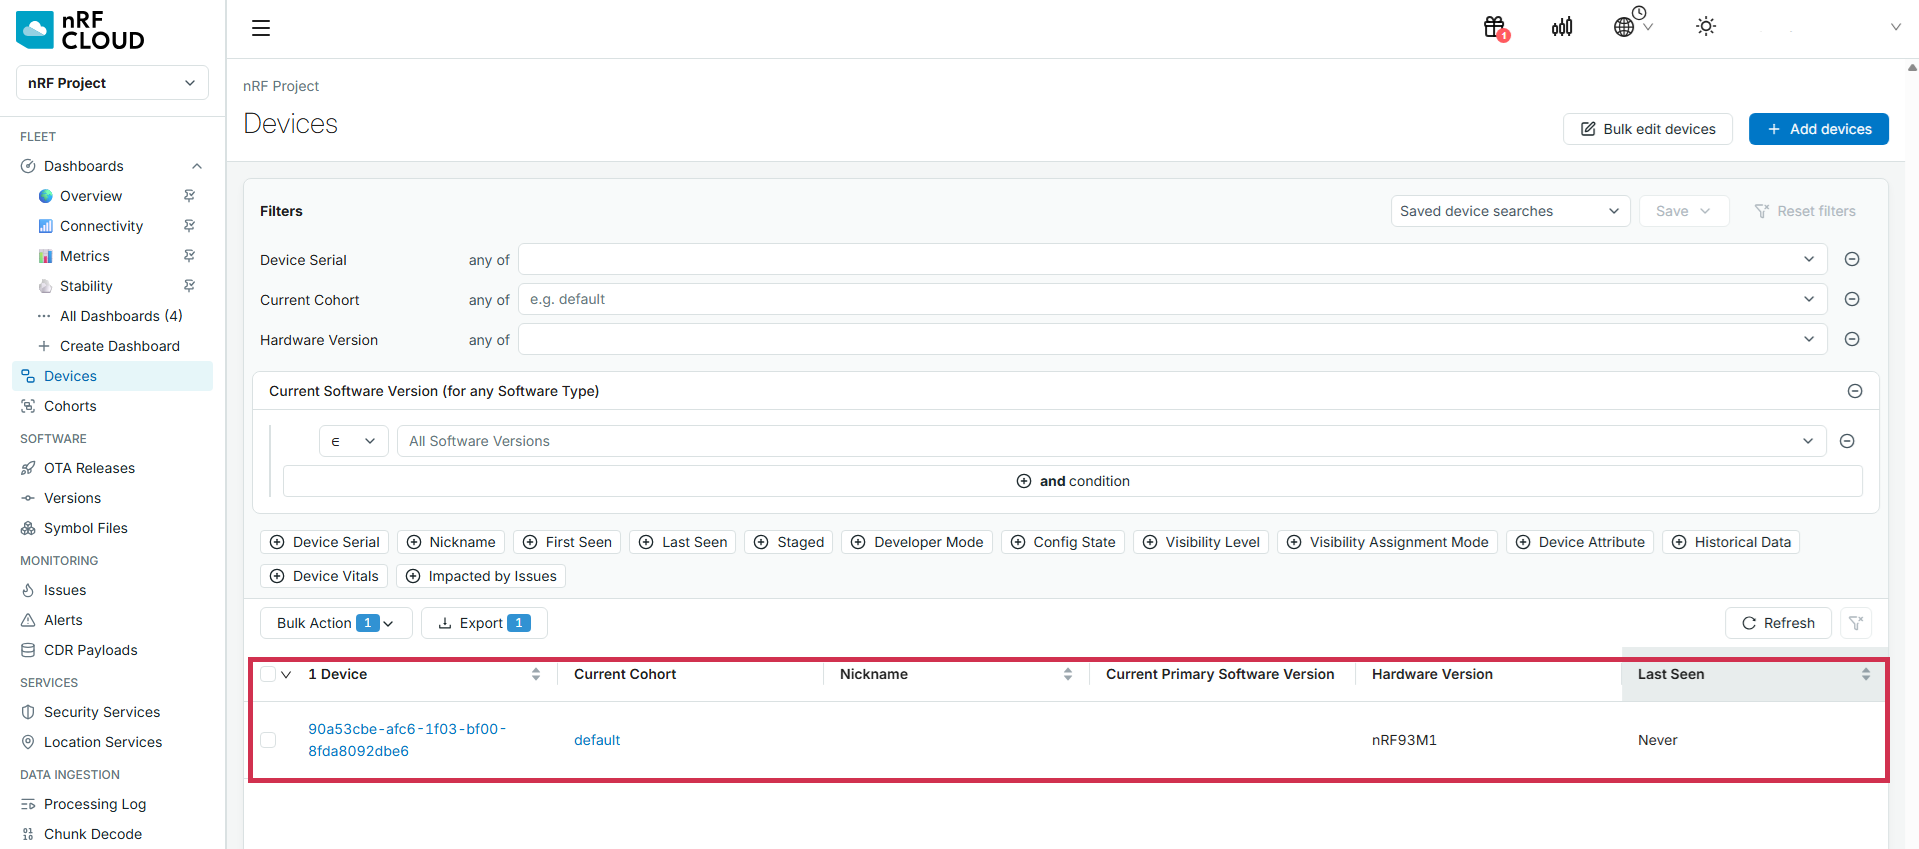
You can also verify that the device was added successfully by going to Legacy nRF Cloud Experience:
Open the bottom-left panel and click Legacy App.
In the left-hand panel, select Device Management.
Click Devices.
Check the device list to confirm that your newly added devices are displayed.
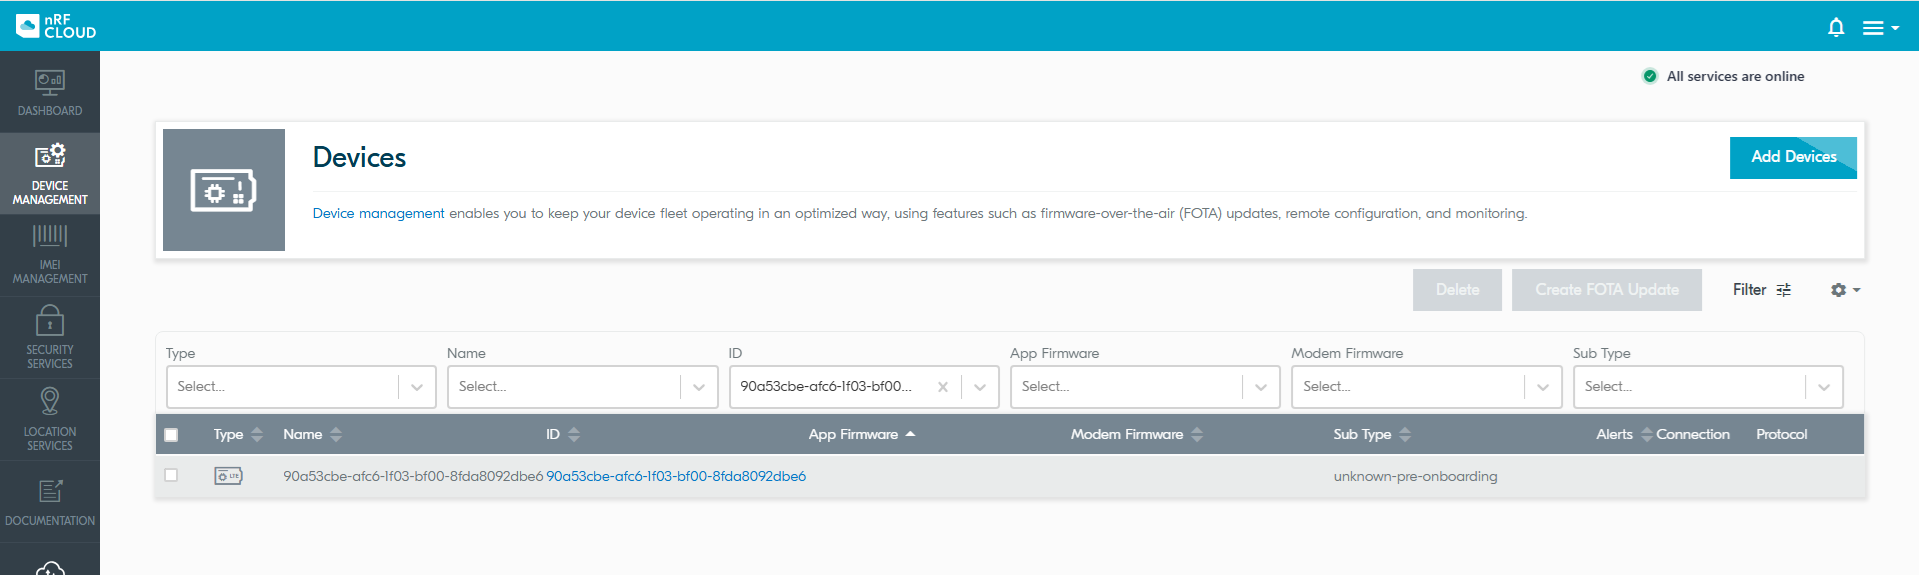
The device is now provisioned and authenticated.
Note
For more than a handful of devices, use the bulk upload option instead of entering credentials by hand.
It accepts a CSV of up to 1000 devices, one device per line, with comma-separated deviceId, onboardingToken fields.
Location
Location requires no GNSS receiver. The module collects Wi-Fi® or cellular measurements and nRF Cloud resolves them to a position.
Collect measurement data:
Command |
Data collected |
|---|---|
|
Serving cell as |
|
Per access point: encryption, SSID, RSSI, MAC, channel. Scan time, rounds, and BSSID count are configurable. |
Request a location with AT%NRFCLOUDLOCATION:
AT%NRFCLOUDLOCATION=<method>,<fetch_result>
|
Sources used |
|---|---|
1 |
Single-cell |
2 |
Multicell |
3 |
Single-cell and multicell |
4 |
Wi-Fi only |
5 |
Single-cell and Wi-Fi |
6 |
Multicell and Wi-Fi |
7 |
All |
<fetch_result> set to 1 returns the position to the host.
Set to 0, the module sends the collected data to nRF Cloud and reports only an acknowledgment:
%NRFCLOUDLOCATION: ACK RECEIVED
Use 0 when the position is only needed server side, since it avoids transferring the result back over the air.
For the full syntax, see the nRF93M1 AT Commands Reference Guide.
With <fetch_result> set to 1, the result arrives as:
%NRFCLOUDLOCATION: <lat>,<lon>,<unc>,<fulfilled_method>
<unc>is the uncertainty in meters.<fulfilled_method>is the method the cloud actually used, reported as1for single-cell,2for multicell, or4for Wi-Fi. It can differ from the method you requested whenever you allow multiple data sources.
Prefer a combined method such as 7 in a deployed device, and log <fulfilled_method> alongside <unc>.
A device that silently falls back from Wi-Fi to single-cell reports a much larger uncertainty, and without the fulfilled method there is nothing to explain why.
Caution
Multicell and Wi-Fi positioning do not work while the module is in RRC Connected mode. Request a location when the connection is idle, not immediately after a data transfer.
Note
Unsolicited %COAP result codes can be emitted during any cloud transaction.
Messaging and shadow
Command |
Purpose |
|---|---|
|
Publish a JSON payload over CoAP, for example |
|
Read a dotted path from the desired shadow, and write a dotted path into the reported shadow |
Firmware observability
The module integrates Memfault firmware observability. Coredumps and periodic metrics heartbeats are captured on the device, stored in the secure file system, and uploaded over the existing cellular connection.
Command |
Purpose |
|---|---|
|
Upload observability data. The optional project key overrides automatic routing. |
|
Trigger a heartbeat. Debug use. |
|
Forward observability chunks from the host MCU |
Observability is the practical way to diagnose intermittent field faults, where the failure does not reproduce on a bench.
Note
Forwarding host MCU chunks means your host application can report its own diagnostics through the module’s existing connection, without opening a second channel.
Firmware updates
Both modem firmware and host application firmware updates are delivered through nRF Cloud with AT%NRFCLOUDFOTA.
See Updating the modem firmware.
Moving to production
The flow in this guide provisions one device by hand. A production flow differs in the following ways:
Credentials are collected and registered in bulk at manufacture, using the CSV upload path, rather than typed into a terminal.
Your host application issues the AT sequence, rather than a person.
SIM provisioning uses SGP.32 remote provisioning or SoftSIM rather than the physical trial SIM supplied with the DK. See SIM support.
Disable power saving during provisioning. Peripheral and general-purpose I/O functionality must stay available. See Configuring power saving.