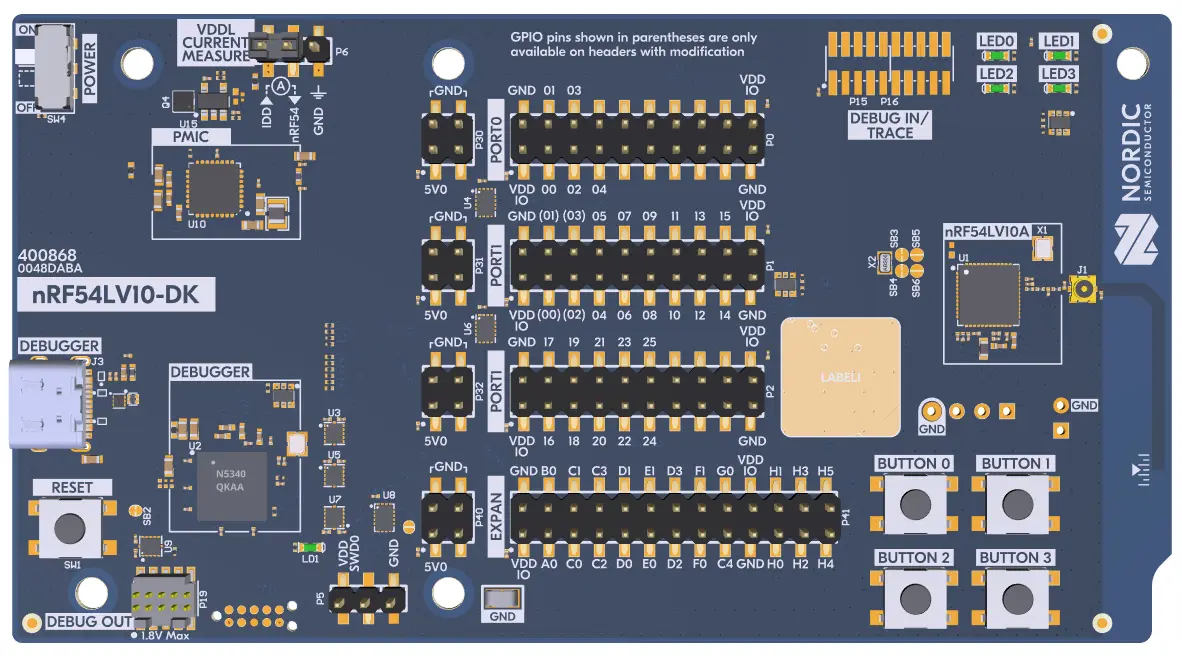
nRF54LV10 DK
Note
You can find more information about the nRF54LV10A SoC on the nRF54LV10A System-on-Chip product page. For the nRF54LV10A technical documentation and other resources (such as the SoC Datasheet), see Developing with nRF54L Series.
nRF54LV10 DK
The nRF54LV10 Development Kit hardware provides support for the Nordic Semiconductor nRF54LV10A Arm Cortex-M33 CPU and the following devices:
SAADC
CLOCK
RRAM
GPIO
TWIM
MEMCONF
MPU
NVIC
GRTC
Segger RTT (RTT Console)
SPI
UARTE
WDT
Hardware
nRF54LV10 DK has two crystal oscillators:
High-frequency 32 MHz crystal oscillator (HFXO)
Low-frequency 32.768 kHz crystal oscillator (LFXO)
You can configure the crystal oscillators to use either internal or external capacitors.
Programming and Debugging
You can build, flash, and debug applications for the nrf54lv10dk/nrf54lv10a/cpuapp in the usual way.
See Building an Application and Run an Application for more details on building and running.
Applications for the nrf54lv10dk/nrf54lv10a/cpuflpr board target must be built using sysbuild to include the vpr_launcher image for the application core.
Enter the following command to compile hello_world for the FLPR core:
west build -p -b nrf54lv10dk/nrf54lv10a/cpuflpr --sysbuild
Flashing
As an example, the following section shows how to build and flash the Hello World application.
Warning
When programming the device, you might get an error similar to the following message:
ERROR: The operation attempted is unavailable due to readback protection in
ERROR: your device. Please use --recover to unlock the device.
This error occurs when readback protection is enabled. To disable the readback protection, you must recover your device.
Enter the following command to recover the core:
west flash --recover
The --recover command erases the flash memory and then writes a small binary into the recovered flash memory.
This binary prevents the readback protection from enabling itself again after a pin reset or power cycle.
Follow the instructions in the Nordic nRF5x Segger J-Link page to install and configure all the necessary software. Refer to further information about Flashing.
To build and program the sample to the nRF54LV10 DK, complete the following steps:
Connect the nRF54LV10 DK to your computer using the IMCU USB port on the DK.
Build the sample by running the following command:
# From the root of the zephyr repository
west build -b nrf54lv10dk/nrf54lv10a/cpuapp samples/hello_world
west flash